
Tomato growth tips are the secret weapon every home gardener needs to unlock a bountiful harvest of juicy, sun-ripened tomatoes! Imagine biting into a perfectly ripe tomato, bursting with flavor, knowing you nurtured it from a tiny seed to a culinary masterpiece. That’s the magic we’re chasing, and this article is your roadmap to achieving it.
For centuries, tomatoes have held a special place in cultures worldwide. Originating in South America, they were initially viewed with suspicion in Europe, but eventually, their vibrant color and delicious taste won everyone over. Now, they’re a staple in cuisines across the globe, from Italian pasta sauces to Mexican salsas.
But let’s be honest, growing tomatoes can sometimes feel like a frustrating endeavor. We’ve all been there – tiny seedlings that wither, plants plagued by pests, or fruits that just refuse to ripen. That’s where these DIY tricks and hacks come in. I’m going to share simple, effective techniques that will transform your tomato-growing game, regardless of your experience level. Whether you’re a seasoned gardener or just starting out, these tomato growth tips will help you overcome common challenges and maximize your yield. Get ready to enjoy the satisfaction of harvesting your own delicious, homegrown tomatoes!
Tomatenanbau leicht gemacht: Dein DIY-Guide für eine reiche Ernte
Hallo liebe Gartenfreunde! Ich liebe es, frische Tomaten direkt aus dem Garten zu ernten. Nichts schmeckt besser als eine sonnengereifte Tomate, die man selbst gezogen hat. Und das Beste daran? Es ist gar nicht so schwer, wie man vielleicht denkt! In diesem Artikel zeige ich dir meine besten DIY-Tricks und Tipps, mit denen auch du eine reiche Tomatenernte erzielen kannst. Los geht’s!
Die Vorbereitung: Der Grundstein für deinen Tomatenerfolg
Bevor wir mit dem eigentlichen Anbau beginnen, ist eine gute Vorbereitung das A und O. Hier sind die wichtigsten Punkte, die du beachten solltest:
* Die richtige Sorte wählen: Es gibt unzählige Tomatensorten, von kleinen Cherrytomaten bis hin zu riesigen Fleischtomaten. Überlege dir, welche Sorte dir am besten schmeckt und welche am besten zu deinem Garten passt. Informiere dich über die Eigenschaften der verschiedenen Sorten, wie z.B. ihre Größe, Reifezeit und Krankheitsresistenz.
* Der perfekte Standort: Tomaten lieben die Sonne! Wähle einen sonnigen Standort in deinem Garten, an dem die Pflanzen mindestens 6-8 Stunden Sonne pro Tag bekommen. Achte auch darauf, dass der Standort windgeschützt ist, da starke Winde die Pflanzen beschädigen können.
* Der ideale Boden: Tomaten bevorzugen einen lockeren, humusreichen und gut durchlässigen Boden. Wenn dein Boden sehr lehmig ist, kannst du ihn mit Kompost oder Sand verbessern. Ein leicht saurer pH-Wert (zwischen 6,0 und 6,8) ist ideal.
* Die Anzucht: Du kannst Tomaten entweder direkt ins Freiland säen oder sie vorziehen. Ich empfehle die Voranzucht, da die Pflanzen so einen Wachstumsvorsprung haben und früher Früchte tragen.
Schritt-für-Schritt-Anleitung zur Tomatenanzucht
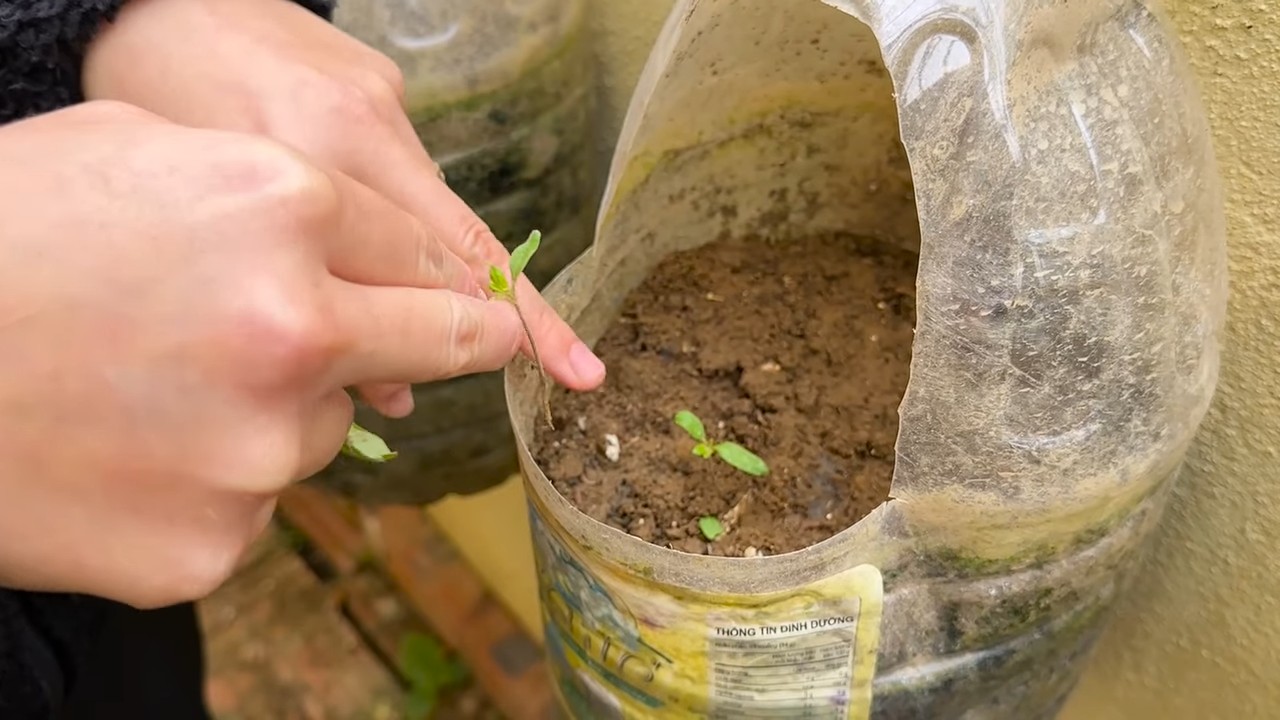
1. Aussaat: Beginne mit der Aussaat etwa 6-8 Wochen vor dem letzten erwarteten Frost. Fülle kleine Anzuchttöpfe oder eine Anzuchtschale mit Anzuchterde. Lege 2-3 Tomatensamen pro Topf oder Zelle aus und bedecke sie leicht mit Erde. Befeuchte die Erde vorsichtig mit einer Sprühflasche.
2. Keimung: Stelle die Anzuchttöpfe an einen warmen und hellen Ort. Eine Temperatur von 20-25°C ist ideal für die Keimung. Halte die Erde feucht, aber nicht nass. Nach etwa 7-14 Tagen sollten die ersten Keimlinge erscheinen.
3. Pikieren: Sobald die Keimlinge ihre ersten richtigen Blätter (nach den Keimblättern) entwickelt haben, ist es Zeit zum Pikieren. Das bedeutet, dass du die kleinen Pflänzchen in größere Töpfe umpflanzt, damit sie mehr Platz zum Wachsen haben. Fülle die größeren Töpfe mit Tomatenerde. Hebe die Keimlinge vorsichtig aus den Anzuchttöpfen und setze sie einzeln in die neuen Töpfe. Achte darauf, dass die Wurzeln nicht beschädigt werden. Gieße die Pflanzen nach dem Pikieren gut an.
4. Pflege: Stelle die pikierten Tomatenpflanzen an einen hellen und kühlen Ort (ca. 15-20°C). Gieße sie regelmäßig, aber vermeide Staunässe. Dünge die Pflanzen alle 2-3 Wochen mit einem flüssigen Tomatendünger.
5. Abhärten: Bevor du die Tomatenpflanzen ins Freiland pflanzt, musst du sie abhärten. Das bedeutet, dass du sie langsam an die Bedingungen im Freien gewöhnst. Stelle die Pflanzen tagsüber für einige Stunden ins Freie und hole sie abends wieder herein. Verlängere die Zeit im Freien jeden Tag, bis die Pflanzen schließlich den ganzen Tag draußen bleiben können.
Die Pflanzung im Freiland: Endlich raus in die Sonne!
Nachdem du deine Tomatenpflanzen erfolgreich vorgezogen hast, ist es endlich Zeit, sie ins Freiland zu pflanzen. Hier sind die wichtigsten Punkte, die du beachten solltest:
* Der richtige Zeitpunkt: Warte mit der Pflanzung, bis keine Frostgefahr mehr besteht. In der Regel ist das Mitte Mai der Fall.
* Die Pflanzabstände: Achte auf ausreichend Platz zwischen den Pflanzen. Je nach Sorte solltest du einen Abstand von 50-80 cm zwischen den Pflanzen und 80-100 cm zwischen den Reihen einhalten.
* Das Pflanzloch: Grabe ein ausreichend großes Pflanzloch. Es sollte so tief sein, dass der Wurzelballen der Tomatenpflanze vollständig darin Platz findet.
* Die Pflanzung: Setze die Tomatenpflanze vorsichtig in das Pflanzloch. Fülle das Loch mit Erde und drücke sie leicht an. Gieße die Pflanze nach der Pflanzung gut an.
* Stütze: Tomatenpflanzen brauchen eine Stütze, damit sie nicht umknicken, wenn sie Früchte tragen. Du kannst entweder Tomatenstäbe, Spiralstäbe oder ein Tomatenhaus verwenden.
Die Pflege während der Wachstumsphase: Damit deine Tomaten prächtig gedeihen
Nach der Pflanzung ist es wichtig, die Tomatenpflanzen regelmäßig zu pflegen, damit sie gesund wachsen und viele Früchte tragen. Hier sind die wichtigsten Pflegemaßnahmen:
* Gießen: Tomaten brauchen viel Wasser, besonders während der Fruchtbildung. Gieße die Pflanzen regelmäßig, aber vermeide Staunässe. Am besten gießt du morgens, damit die Blätter über den Tag abtrocknen können.
* Düngen: Tomaten sind Starkzehrer und brauchen regelmäßig Dünger. Dünge die Pflanzen alle 2-3 Wochen mit einem flüssigen Tomatendünger oder einem organischen Dünger.
* Ausgeizen: Das Ausgeizen ist eine wichtige Maßnahme, um die Ernte zu verbessern. Dabei werden die Seitentriebe (Geiztriebe) entfernt, die sich in den Blattachseln bilden. Dadurch konzentriert sich die Pflanze auf die Bildung von Früchten und wird nicht zu buschig.
* Mulchen: Das Mulchen mit Stroh, Heu oder Rasenschnitt hilft, den Boden feucht zu halten und Unkraut zu unterdrücken.
* Krankheits- und Schädlingsbekämpfung: Achte auf Anzeichen von Krankheiten oder Schädlingen und bekämpfe sie frühzeitig. Es gibt viele biologische Mittel, die du verwenden kannst, um deine Tomatenpflanzen zu schützen.
Spezielle Tipps und Tricks für eine reiche Ernte
* Tomaten düngen mit Kaffeesatz: Kaffeesatz ist ein natürlicher Dünger, der reich an Stickstoff, Phosphor und Kalium ist. Verteile den Kaffeesatz einfach um die Tomatenpflanzen herum und arbeite ihn leicht in den Boden ein.
* Tomaten gießen mit Brennnesseljauche: Brennnesseljauche ist ein hervorragender Dünger und stärkt die Pflanzen gegen Krankheiten und Schädlinge. Setze die Jauche am besten verdünnt ein (1:10).
* Tomaten vor Regen schützen: Regen kann zu Pilzkrankheiten führen. Schütze deine Tomatenpflanzen vor Regen, indem du sie unter ein Dach stellst oder ein Tomatenhaus verwendest.
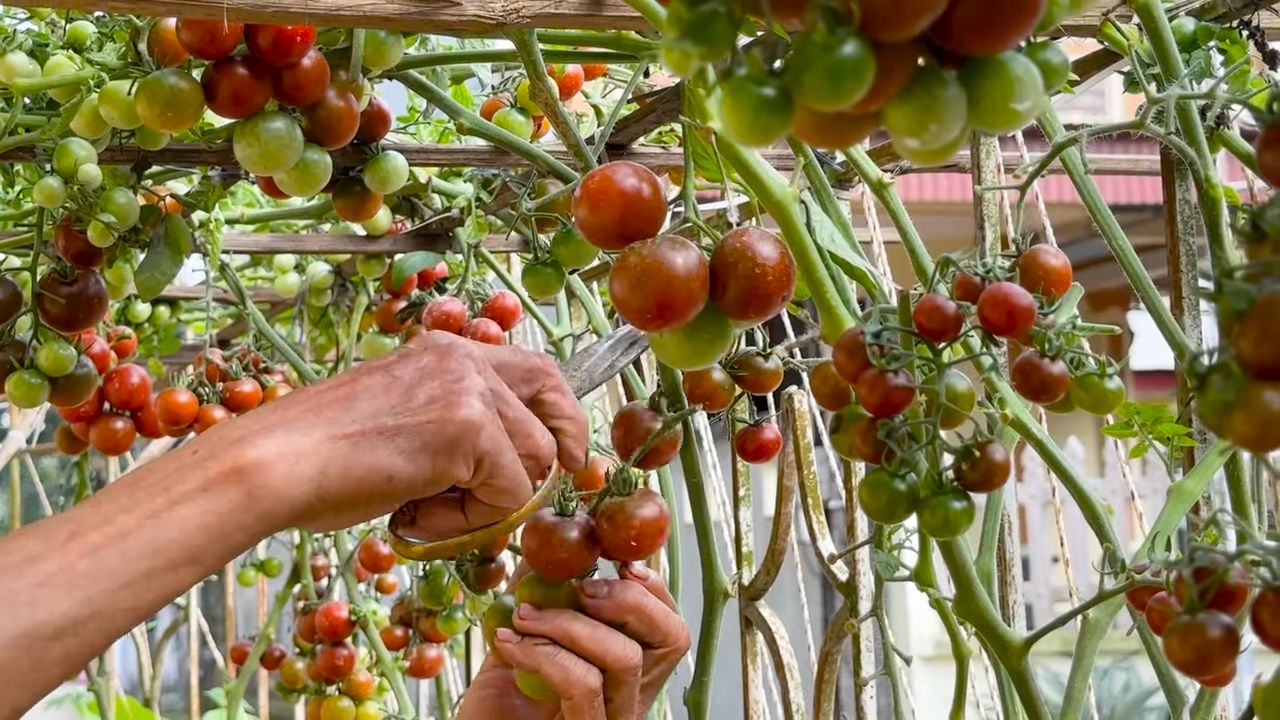
* Tomaten regelmäßig ernten: Ernte die Tomaten regelmäßig, sobald sie reif sind. Dadurch förderst du die Bildung neuer Früchte.
Häufige Probleme und Lösungen
* Blütenendfäule: Braune Flecken an der Spitze der Tomaten. Ursache ist meist ein Calciummangel. Lösung: Calciummangel beheben, z.B. mit Eierschalen oder einem speziellen Calciumdünger.
* Braunfäule: Braune Flecken auf den Blättern und Früchten. Ursache ist ein Pilz. Lösung: Befallene Blätter und Früchte entfernen, Pflanzen mit einem Fungizid behandeln und für gute Belüftung sorgen.
* Blattläuse: Kleine, saugende Insekten, die die Pflanzen schwächen. Lösung: Blattläuse mit einem Wasserstrahl abspritzen oder mit einem biologischen Insektizid bekämpfen.
Ich hoffe, diese Tipps und Tricks helfen dir dabei, eine reiche Tomatenernte zu erzielen. Viel Spaß beim Gärtnern! Und denk daran: Geduld und Pflege sind der Schlüssel zum Erfolg!
Conclusion
So, there you have it! This simple yet incredibly effective DIY trick for boosting your tomato growth is a game-changer for any gardener, regardless of experience level. We’ve walked you through the process, highlighting the benefits of using this method to achieve healthier, more productive tomato plants. From stronger root systems to increased fruit yield, the advantages are undeniable.
Why is this a must-try? Because it’s a cost-effective, environmentally friendly alternative to expensive commercial fertilizers and growth enhancers. You’re utilizing readily available resources and minimizing your environmental impact while maximizing your tomato harvest. Plus, there’s a certain satisfaction that comes from nurturing your plants with your own homemade solutions.
But the beauty of this DIY trick lies in its adaptability. Feel free to experiment with variations to suit your specific needs and preferences. For example, if you’re dealing with particularly acidic soil, you might consider adding a small amount of lime to your mixture to balance the pH. Or, if you’re looking to further enrich the nutrient content, you could incorporate other organic materials like compost tea or worm castings. The possibilities are endless!
Consider adding crushed eggshells to your planting hole for an extra boost of calcium, which helps prevent blossom-end rot, a common problem in tomatoes. You can also try companion planting with basil, marigolds, or other herbs known to deter pests and attract beneficial insects. These additions can further enhance the health and productivity of your tomato plants.
Ultimately, the success of any gardening technique depends on your specific environment and growing conditions. That’s why we encourage you to try this DIY trick and observe the results for yourself. Keep a journal to track your progress, noting any improvements in plant growth, fruit production, or overall health. This will help you fine-tune your approach and optimize your results over time.
We’re confident that you’ll be amazed by the difference this simple trick can make. Imagine biting into a juicy, sun-ripened tomato that you grew yourself, knowing that you nurtured it with your own homemade solution. It’s a truly rewarding experience!
Don’t just take our word for it – give it a try and see for yourself! We’re eager to hear about your experiences and see the amazing tomatoes you grow. Share your photos, tips, and success stories in the comments section below. Let’s create a community of gardeners who are passionate about growing healthy, delicious tomatoes using sustainable and effective DIY methods. Let us know how this DIY trick for **tomato growth** worked for you. Happy gardening!
Frequently Asked Questions (FAQ)
What exactly does this DIY trick do for my tomato plants?
This DIY trick primarily focuses on improving the soil conditions around your tomato plants, providing them with essential nutrients and promoting healthy root development. By using readily available materials, you’re essentially creating a nutrient-rich environment that encourages vigorous growth, increased fruit production, and overall plant health. It helps to improve soil structure, water retention, and drainage, all of which are crucial for successful tomato cultivation. The specific ingredients used in the trick contribute different benefits, such as nitrogen for leafy growth, phosphorus for root development and flowering, and potassium for fruit production and disease resistance.
How often should I apply this DIY trick to my tomato plants?
The frequency of application depends on several factors, including the age of your plants, the quality of your soil, and the specific ingredients you’re using. As a general guideline, you can apply this trick every 2-3 weeks during the active growing season. For young seedlings, start with a diluted version of the mixture to avoid overwhelming them. As the plants mature, you can gradually increase the concentration. Monitor your plants closely for any signs of nutrient deficiencies or excesses, and adjust the frequency accordingly. If you notice yellowing leaves, stunted growth, or other symptoms, it may be a sign that you need to adjust your feeding schedule.
Can I use this DIY trick for other types of plants besides tomatoes?
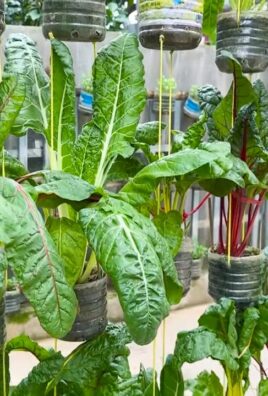
While this trick is specifically formulated for tomatoes, it can also be beneficial for other fruiting vegetables and plants that require similar nutrients. Peppers, eggplants, and cucumbers, for example, can also benefit from the nutrient boost provided by this DIY solution. However, it’s important to note that different plants have different nutrient requirements, so you may need to adjust the recipe accordingly. For example, leafy greens may require a higher nitrogen content, while root vegetables may benefit from more phosphorus and potassium. Research the specific needs of your plants before applying this trick to ensure optimal results.
What if I don’t have all the ingredients listed in the recipe? Can I substitute them?
Yes, you can often substitute ingredients based on what you have available. The key is to understand the purpose of each ingredient and find a suitable alternative that provides similar benefits. For example, if you don’t have access to a specific type of fertilizer, you can use another organic source of nutrients, such as compost tea or worm castings. If you’re missing a particular mineral supplement, you can try using a different source that contains the same nutrients. Just be sure to research the potential effects of any substitutions and adjust the quantities accordingly.
Is this DIY trick safe for organic gardening?
Yes, this DIY trick can be a great addition to your organic gardening practices, provided you use organic ingredients. Ensure that any fertilizers, supplements, or other materials you use are certified organic and free from synthetic chemicals. This will help you maintain the integrity of your organic garden and ensure that your tomatoes are grown in a healthy and sustainable manner. Avoid using any ingredients that contain pesticides, herbicides, or other harmful chemicals.
What are some common mistakes to avoid when using this DIY trick?
One common mistake is over-fertilizing your plants. Too much of a good thing can actually harm your tomatoes, leading to nutrient burn, stunted growth, or even death. Always start with a diluted version of the mixture and gradually increase the concentration as needed. Another mistake is applying the mixture directly to the leaves, which can cause leaf burn. Instead, focus on applying it to the soil around the base of the plant. Finally, be sure to monitor your plants closely for any signs of nutrient deficiencies or excesses, and adjust your feeding schedule accordingly.
How do I know if my tomato plants are responding well to this DIY trick?
There are several signs that indicate your tomato plants are responding well to this DIY trick. You may notice increased growth, darker green leaves, more abundant flowering, and larger, more flavorful fruits. The plants may also appear healthier and more resistant to diseases and pests. Keep a journal to track your progress and compare the results to previous years or to plants that haven’t received the treatment. This will help you determine the effectiveness of the trick and fine-tune your approach for optimal results.
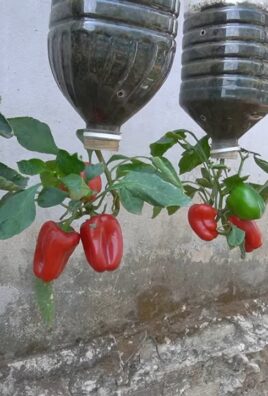
Can I use this DIY trick in container gardens?
Absolutely! This DIY trick is perfectly suitable for container gardens. In fact, it can be especially beneficial for container-grown tomatoes, as they often have limited access to nutrients compared to plants grown in the ground. Just be sure to adjust the quantities of the ingredients based on the size of your containers. Smaller containers will require less of the mixture, while larger containers may need more. Monitor the moisture levels in your containers closely, as container-grown plants tend to dry out more quickly than those in the ground.
What if I live in an area with poor soil quality? Will this DIY trick still be effective?
Yes, this DIY trick can be particularly helpful if you live in an area with poor soil quality. By providing your tomato plants with essential nutrients and improving the soil structure, you can overcome the limitations of poor soil and create a more favorable growing environment. Consider amending your soil with compost, aged manure, or other organic materials to further improve its quality. You may also need to adjust the frequency of application of the DIY trick based on the severity of the soil problems.
How long will it take to see results from using this DIY trick?
The time it takes to see results can vary depending on several factors, including the age of your plants, the quality of your soil, and the specific ingredients you’re using. In general, you should start to see noticeable improvements within a few weeks of starting the treatment. However, it may take longer to see significant changes in fruit production or overall plant health. Be patient and consistent with your applications, and monitor your plants closely for any signs of improvement. Remember that gardening is a long-term process, and it takes time to nurture healthy, productive plants.
Leave a Comment