
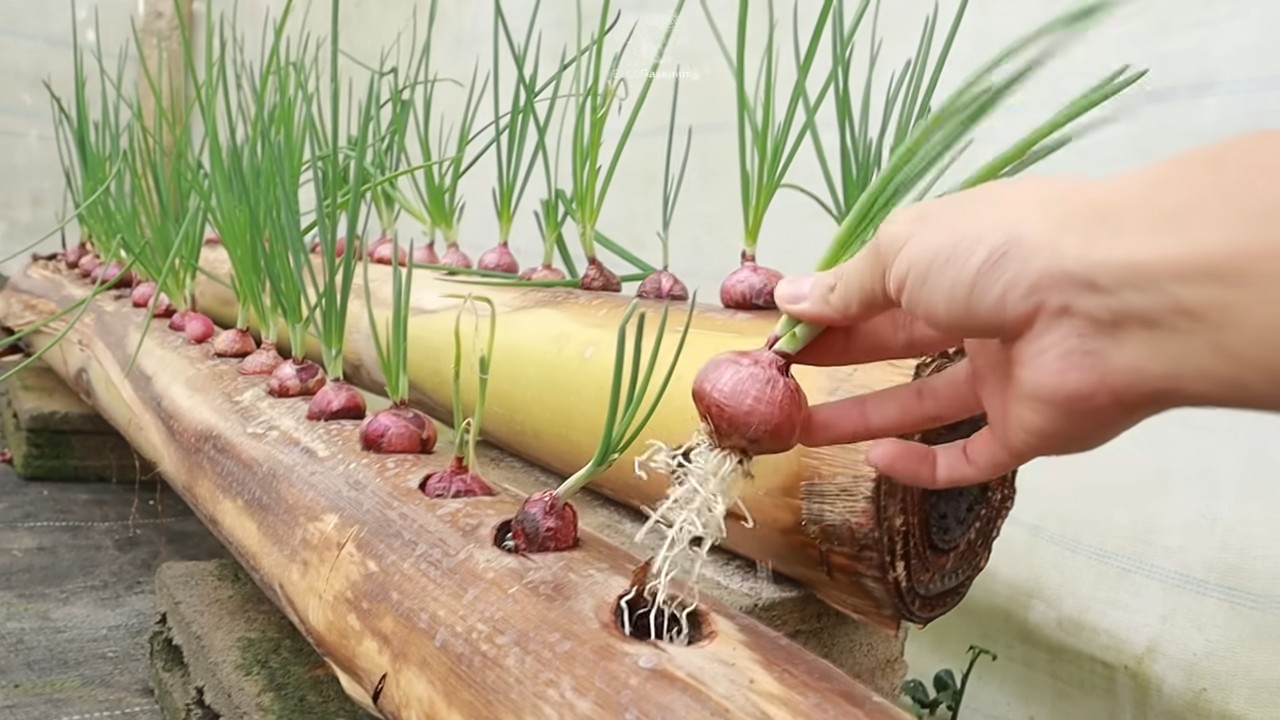
Unusual Onion Growing Method: Ready to ditch the same old gardening routine and unlock a secret to bigger, bolder onions? I’m so excited to share a game-changing trick that will have your neighbors green with envy! For centuries, onions have been a staple in cuisines worldwide, from the humble French onion soup to the vibrant curries of India. But what if I told you there’s a way to boost your onion harvest using a method that’s a little… unconventional?
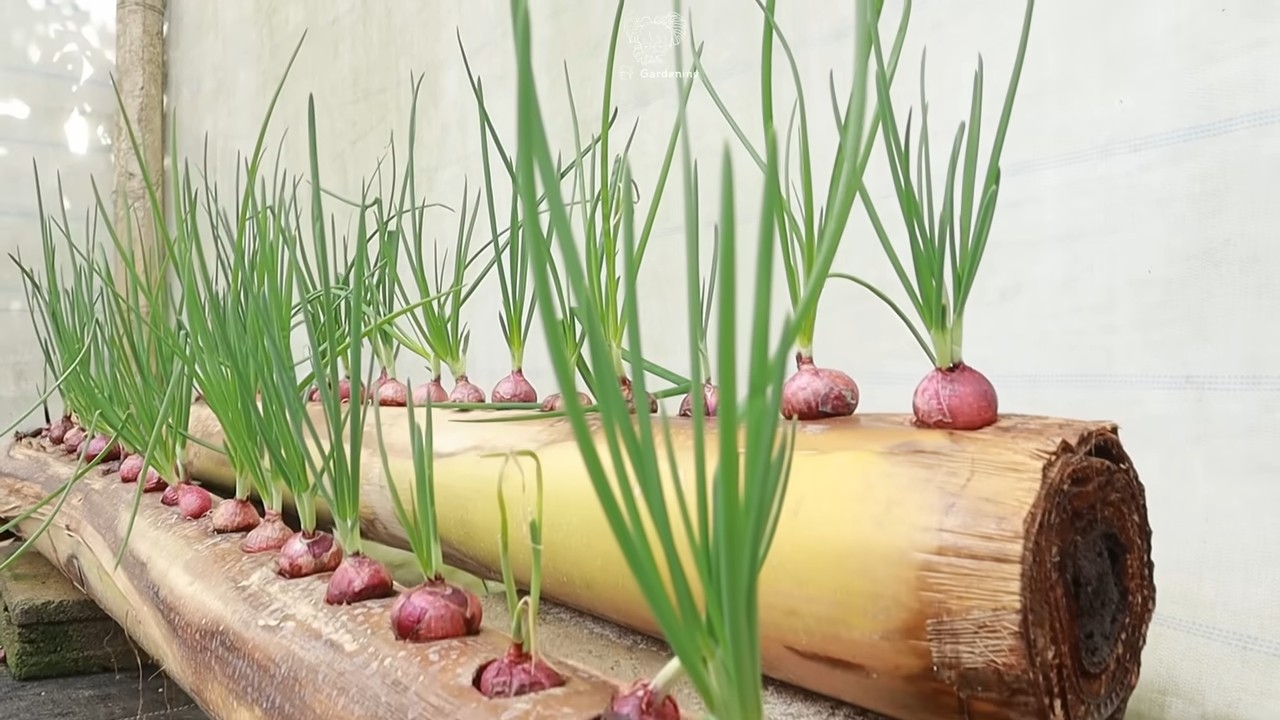
Forget everything you thought you knew about planting onions. This DIY guide dives deep into an unusual onion growing method that maximizes space, minimizes waste, and ultimately, delivers a more abundant yield. We’re talking about transforming those tiny onion sets into giants!
Why do you need this hack? Because let’s face it, gardening can be tough! Space is often limited, and traditional methods can be inefficient. This trick is perfect for urban gardeners, beginners, or anyone looking to get the most out of their garden. Plus, it’s incredibly satisfying to see the results of a little ingenuity. So, grab your gardening gloves, and let’s get ready to revolutionize your onion patch!
Unlocking Onion Abundance: The Vertical Tower Growing Method
Hey there, fellow gardening enthusiasts! Are you tired of limited garden space but dream of a bountiful onion harvest? Well, I’ve got a game-changer for you: vertical onion towers! This method is not only space-saving but also incredibly efficient, allowing you to grow a surprising number of onions in a small footprint. I’m going to walk you through, step-by-step, how to build and maintain your own onion tower. Get ready to impress your neighbors with your gardening ingenuity!
What You’ll Need: Gathering Your Supplies
Before we dive in, let’s make sure you have everything you need. This project is relatively inexpensive and uses readily available materials.
* **A Large Container:** This will be the base of your tower. Think a large plastic storage bin (the kind with drainage holes drilled in the bottom), a sturdy bucket, or even a repurposed trash can (cleaned thoroughly, of course!). The bigger the container, the more onions you can grow. Aim for something at least 18 inches in diameter and 18 inches deep.
* **PVC Pipe (4-inch diameter):** This will be the central support and watering system for your tower. The length should be slightly shorter than the height of your container. For example, if your container is 24 inches tall, get a PVC pipe that’s around 22 inches long.
* **Drill with Various Drill Bits:** You’ll need a standard drill bit for creating drainage holes in the container and a larger hole saw bit (around 2-3 inches in diameter) for creating planting holes in the PVC pipe.
* **Landscape Fabric or Burlap:** This will line the inside of the PVC pipe to prevent soil from washing out.
* **Zip Ties or Twine:** To secure the landscape fabric inside the PVC pipe.
* **Potting Mix:** A high-quality, well-draining potting mix is crucial for healthy onion growth. Avoid using garden soil, as it can compact and hinder drainage.
* **Onion Sets or Seedlings:** Choose your favorite onion variety! Sets are easier for beginners, but seedlings offer more variety.
* **Slow-Release Fertilizer:** Onions are heavy feeders, so a slow-release fertilizer will provide them with the nutrients they need throughout the growing season.
* **Gravel or Small Rocks:** For drainage at the bottom of the container.
* **Measuring Tape or Ruler:** For accurate hole placement.
* **Marker or Pen:** For marking the PVC pipe.
* **Gloves:** To protect your hands.
* **Safety Glasses:** Always a good idea when drilling!
Building Your Onion Tower: Step-by-Step Instructions
Alright, let’s get our hands dirty! Follow these steps carefully to construct your vertical onion tower.
1. **Prepare the Container:** If your chosen container doesn’t already have drainage holes, drill several evenly spaced holes in the bottom. This is essential for preventing waterlogging, which can lead to root rot. I usually go for about 6-8 holes, each about half an inch in diameter.
2. **Add Drainage Layer:** Pour a layer of gravel or small rocks (about 2-3 inches deep) into the bottom of the container. This will further improve drainage and prevent the potting mix from becoming waterlogged.
3. **Prepare the PVC Pipe:** This is where the magic happens! We’ll be creating planting holes in the PVC pipe to house our onions.
* **Mark the Holes:** Using your measuring tape and marker, mark the locations for your planting holes. Space them evenly around the pipe, staggering them vertically. I recommend starting about 4 inches from the bottom of the pipe and leaving about 4 inches at the top. Aim for a spacing of about 6-8 inches between holes, both horizontally and vertically. The number of holes will depend on the size of your pipe and the spacing you choose.
* **Drill the Holes:** Using your hole saw bit, carefully drill out the marked holes. Take your time and apply even pressure to avoid cracking the PVC pipe. Remember to wear your safety glasses!
* **Line the PVC Pipe:** Cut a piece of landscape fabric or burlap that’s slightly longer than the PVC pipe and wide enough to wrap around the inside. Secure it to the inside of the pipe using zip ties or twine. This will prevent soil from washing out through the planting holes when you water. Make sure the fabric covers all the holes from the inside.
4. **Position the PVC Pipe:** Place the prepared PVC pipe in the center of the container, standing it upright on the drainage layer.
5. **Add Potting Mix:** Slowly add potting mix to the container, filling it around the PVC pipe. As you add the potting mix, gently pack it down to eliminate air pockets. Fill the container to within a few inches of the top.
6. **Plant Your Onions:** Now for the fun part! Carefully plant your onion sets or seedlings into the holes in the PVC pipe. Gently tease apart the roots of the seedlings before planting. Make sure the roots are well covered with potting mix.
7. **Plant Onions on Top:** Once the PVC pipe holes are filled, plant additional onions on the top surface of the potting mix in the container. Space them evenly, giving them enough room to grow.
8. **Water Thoroughly:** After planting, water the entire tower thoroughly. Water slowly and deeply, allowing the water to soak into the potting mix. You may need to water several times to ensure the entire tower is saturated.
9. **Fertilize:** Apply a slow-release fertilizer according to the package instructions. This will provide your onions with the nutrients they need to thrive.
Maintaining Your Onion Tower: Ensuring a Bountiful Harvest
Building the tower is just the beginning! Here’s how to keep your onions happy and healthy throughout the growing season.
* **Watering:** Onions need consistent moisture, especially during bulb formation. Water your tower regularly, especially during hot, dry weather. Check the soil moisture by sticking your finger into the potting mix. If it feels dry an inch or two below the surface, it’s time to water. The PVC pipe acts as a central watering system, distributing water evenly throughout the tower.
* **Fertilizing:** Onions are heavy feeders, so regular fertilization is essential. In addition to the slow-release fertilizer you added at planting, you can supplement with a liquid fertilizer every few weeks. Choose a fertilizer that’s high in phosphorus and potassium, which are important for bulb development.
* **Sunlight:** Onions need at least 6-8 hours of sunlight per day. Place your tower in a sunny location where it will receive plenty of direct sunlight.
* **Weeding:** Keep the area around your tower free of weeds. Weeds can compete with your onions for nutrients and water.
* **Pest and Disease Control:** Keep an eye out for common onion pests and diseases, such as onion thrips and downy mildew. If you notice any problems, take action immediately. There are many organic pest control and disease control options available.
* **Rotation:** If you plan to reuse your container for future onion crops, be sure to rotate the location of your tower each year. This will help prevent the buildup of soilborne diseases.
Troubleshooting: Addressing Common Issues
Even with the best care, you might encounter some challenges along the way. Here are a few common issues and how to address them:
* **Yellowing Leaves:** This could be a sign of overwatering, underwatering, or nutrient deficiency. Check the soil moisture and adjust your watering schedule accordingly. If the soil is consistently moist, reduce watering. If it’s dry, water more frequently. If you suspect a nutrient deficiency, fertilize with a balanced fertilizer.
* **Slow Growth:** This could be due to insufficient sunlight, poor soil, or lack of nutrients. Make sure your tower is in a sunny location and that you’re using a high-quality potting mix. Fertilize regularly to provide your onions with the nutrients they need.
* **Small Bulbs:** This could be caused by overcrowding, insufficient watering, or lack of nutrients. Thin out your onions if they’re too close together. Water regularly and fertilize with a fertilizer that’s high in phosphorus and potassium.
* **Pest Infestations:** Regularly inspect your onions for pests. If you find any, take action immediately. There are many organic pest control options available, such as insecticidal soap and neem oil.
Harvesting Your Onions: The Sweet Reward
After all your hard work, it’s time to reap the rewards! Onions are typically ready to harvest when the tops start to fall over and turn brown.
1. **Check for Readiness:** Gently push the tops of a few onions over. If they easily bend and start to turn brown, it’s a good sign that they’re ready to harvest.
2. **Harvest Carefully:** Gently pull the onions from the soil, being careful not to damage the bulbs.
3. **Cure the Onions:** After harvesting, cure the onions by laying them out in a single layer in a well-ventilated area for about 2-3 weeks. This will allow the outer layers to dry and
Conclusion
So, there you have it! This unusual onion growing method, while seemingly unconventional, offers a surprisingly effective way to cultivate a bountiful harvest of delicious onions, even in limited spaces or challenging soil conditions. We’ve explored how utilizing recycled plastic bottles and a strategic planting technique can significantly improve your onion yield and overall gardening experience.
But why is this DIY trick a must-try? Firstly, it’s incredibly resource-efficient. By repurposing plastic bottles, you’re actively contributing to waste reduction and promoting sustainable gardening practices. Secondly, the method provides a controlled environment for your onion seedlings, protecting them from harsh weather conditions and pests, especially during their vulnerable early stages. This leads to stronger, healthier plants and ultimately, larger, more flavorful onions. Thirdly, the concentrated planting allows you to maximize your garden space, making it ideal for urban gardeners or those with limited land. Finally, and perhaps most importantly, it’s a fun and engaging project that connects you more deeply with the process of growing your own food.
Looking for variations? Absolutely! Consider experimenting with different types of onions. Red onions, yellow onions, white onions – each variety will respond slightly differently to this method, offering a unique flavor profile to your culinary creations. You can also adjust the size of the plastic bottles to accommodate larger or smaller onion varieties. For example, shallots, with their smaller bulbs, might thrive in smaller bottles. Another variation involves enriching the soil mixture with compost or other organic matter to provide an extra boost of nutrients to your growing onions. You can also try adding companion plants like marigolds or basil around the base of the bottles to deter pests naturally.
Don’t be afraid to get creative and adapt this method to suit your specific needs and preferences. The key is to provide your onions with adequate sunlight, water, and nutrients. Observe your plants closely and adjust your care routine as needed.
We wholeheartedly encourage you to try this unusual onion growing method. It’s a rewarding experience that will not only provide you with a delicious supply of homegrown onions but also deepen your understanding of the natural world. We are confident that you will be amazed by the results.
Once you’ve given it a try, we’d love to hear about your experience! Share your photos, tips, and insights in the comments section below. Let’s build a community of innovative gardeners and learn from each other’s successes and challenges. Your feedback will help us refine this method and make it even more accessible to aspiring gardeners everywhere. Happy growing!
Frequently Asked Questions
What type of plastic bottles are best for this method?
Ideally, you should use clear or translucent plastic bottles that are food-grade. This ensures that no harmful chemicals leach into the soil and affect your onions. Avoid using bottles that have contained harsh chemicals or pesticides. The size of the bottle will depend on the variety of onion you are growing, but generally, bottles that are 1-2 liters in size work well. Make sure to thoroughly clean the bottles before using them to remove any residue.
How often should I water my onions grown in plastic bottles?
Watering frequency will depend on the climate, soil type, and the size of the plastic bottle. Generally, you should water your onions when the top inch of soil feels dry to the touch. Avoid overwatering, as this can lead to root rot. Ensure that the bottles have adequate drainage holes to prevent water from accumulating at the bottom. During hot and dry periods, you may need to water more frequently. A good rule of thumb is to check the soil moisture daily and water as needed.
What kind of soil should I use for growing onions in plastic bottles?
A well-draining, nutrient-rich soil is essential for successful onion growth. A mixture of potting soil, compost, and perlite or vermiculite works well. The potting soil provides a good base, the compost adds essential nutrients, and the perlite or vermiculite improves drainage and aeration. Avoid using heavy clay soil, as it can become waterlogged and hinder root development. You can also add a slow-release fertilizer to the soil mix to provide a steady supply of nutrients to your onions.
How much sunlight do onions need when grown in this method?
Onions require at least 6-8 hours of direct sunlight per day to thrive. Choose a location in your garden that receives ample sunlight throughout the day. If you are growing your onions indoors, you may need to supplement with grow lights to ensure they receive enough light. Rotate the bottles regularly to ensure that all sides of the plants receive equal exposure to sunlight. Insufficient sunlight can lead to weak, leggy growth and reduced bulb size.
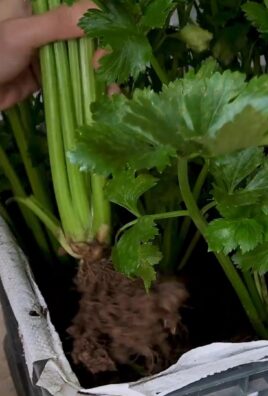
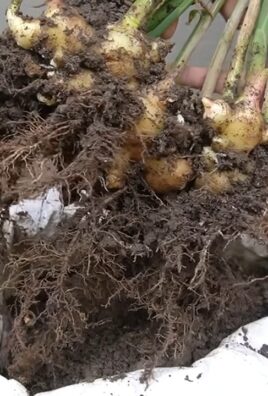
Can I use this method for other vegetables besides onions?
While this method is particularly well-suited for onions, it can also be adapted for other vegetables with similar growing requirements, such as garlic, shallots, and even some herbs. The key is to choose vegetables that have relatively shallow root systems and can tolerate being grown in close proximity to each other. Experiment with different vegetables and see what works best in your specific climate and growing conditions. Remember to adjust the size of the plastic bottles and the spacing between plants accordingly.
What are some common pests and diseases that affect onions, and how can I prevent them?
Onions are susceptible to several pests and diseases, including onion maggots, thrips, and fungal diseases like downy mildew and onion rot. To prevent these problems, practice good sanitation in your garden, such as removing any dead or decaying plant material. Use insect netting to protect your onions from pests. Ensure good air circulation around the plants to prevent fungal diseases. You can also use organic pesticides or fungicides if necessary. Crop rotation can also help to prevent the buildup of pests and diseases in the soil.
How do I know when my onions are ready to harvest?
Onions are typically ready to harvest when the tops start to turn yellow and fall over. This indicates that the bulb has reached its mature size. You can also gently dig around the base of the plant to check the size of the bulb. If the bulb is the desired size and the tops are starting to fall over, it’s time to harvest. Gently pull the onions from the soil and allow them to dry in a well-ventilated area for a few days before storing them.
How should I store my harvested onions?
Proper storage is essential to prolong the shelf life of your harvested onions. After drying the onions, trim the roots and the tops, leaving about an inch of the stem. Store the onions in a cool, dry, and well-ventilated place, such as a basement or pantry. Avoid storing them in the refrigerator, as this can cause them to become soft and mushy. You can also braid the onion tops together and hang them in a cool, dry place. Properly stored onions can last for several months.
Can I reuse the plastic bottles for multiple growing seasons?
Yes, you can reuse the plastic bottles for multiple growing seasons, provided that they are still in good condition. Thoroughly clean the bottles after each use to remove any soil or debris. Inspect the bottles for any cracks or damage and replace them if necessary. Proper cleaning and maintenance will help to extend the lifespan of the plastic bottles and reduce waste.
What if I don’t have access to plastic bottles? Are there alternative containers I can use?
If you don’t have access to plastic bottles, you can use other types of containers, such as buckets, pots, or even repurposed food containers. The key is to choose containers that are large enough to accommodate the root system of the onions and have adequate drainage holes. Ensure that the containers are made of food-grade materials and are free from any harmful chemicals. You can also use raised beds or garden boxes if you have more space available.
Leave a Comment