
Vertical Spinach Tower DIY: Ready to ditch the grocery store spinach and grow your own fresh, vibrant greens right at home? I’m so excited to share this incredibly rewarding and space-saving project with you! Forget sprawling garden beds – we’re going vertical! For centuries, humans have cultivated spinach, valuing it for its nutritional power and versatility. From ancient Persia to modern-day salads, this leafy green has nourished generations. But let’s be honest, buying spinach can be a gamble – sometimes it’s wilted, sometimes it’s pricey, and sometimes it just doesn’t taste as good as it should.
That’s where this Vertical Spinach Tower DIY comes in! Imagine stepping outside your door and harvesting crisp, delicious spinach whenever you need it. No more sad, bagged greens! This DIY project is perfect for anyone with limited space, whether you have a small balcony, a tiny patio, or just a sunny corner in your yard. Plus, it’s a fantastic way to reduce your carbon footprint and connect with nature. I’ll guide you through each step, making it easy and fun to create your own thriving spinach oasis. Let’s get growing!
Spinat-Turm selber bauen: Dein DIY-Projekt für frischen Spinat auf kleinstem Raum
Hallo liebe Gartenfreunde! Habt ihr auch das Problem, dass euer Garten nicht der größte ist, ihr aber trotzdem gerne frischen Spinat anbauen möchtet? Dann habe ich die perfekte Lösung für euch: einen vertikalen Spinat-Turm! Dieses DIY-Projekt ist nicht nur platzsparend, sondern auch ein echter Hingucker und super einfach umzusetzen. Ich zeige euch Schritt für Schritt, wie ihr euren eigenen Spinat-Turm bauen könnt, damit ihr bald eure erste Spinat-Ernte einfahren könnt. Los geht’s!
Was du für deinen Spinat-Turm brauchst
Bevor wir loslegen, hier eine Liste aller Materialien und Werkzeuge, die du benötigst. Keine Sorge, das meiste davon hast du wahrscheinlich schon zu Hause oder kannst es günstig im Baumarkt besorgen.
* Pflanzrohr: Ein PVC-Rohr mit einem Durchmesser von ca. 15-20 cm und einer Länge von ca. 1,50-2 Meter. Das ist die Basis unseres Turms.
* Innenrohr: Ein kleineres PVC-Rohr (ca. 5-7 cm Durchmesser), das in das größere Rohr passt. Dieses dient zur Bewässerung.
* Bohrmaschine mit Lochsäge oder Bohraufsatz: Zum Bohren der Löcher für die Spinatpflanzen.
* Bohrmaschine mit kleinem Bohrer: Zum Bohren von Löchern für die Bewässerung im Innenrohr.
* Pflanzerde: Am besten eine hochwertige Gemüseerde, die reich an Nährstoffen ist.
* Kies oder Blähton: Für eine gute Drainage am Boden des Turms.
* Spinatsamen oder Jungpflanzen: Je nachdem, ob du deinen Spinat selbst ziehen möchtest oder lieber gleich loslegen willst.
* Gartenvlies oder Jute: Um das Innenrohr zu umwickeln und zu verhindern, dass Erde in die Bewässerungslöcher gelangt.
* Klebeband: Zum Fixieren des Gartenvlieses.
* Messer oder Schere: Zum Zuschneiden des Vlieses.
* Handschuhe: Um deine Hände sauber zu halten.
* Messbecher oder Gießkanne: Zum Bewässern.
* Optional: Eine Säge, falls du das Pflanzrohr kürzen möchtest.
Schritt-für-Schritt-Anleitung: So baust du deinen Spinat-Turm
Jetzt geht es ans Eingemachte! Folge diesen Schritten, um deinen eigenen Spinat-Turm zu bauen. Ich verspreche dir, es ist einfacher als es aussieht!
1. Vorbereitung des Pflanzrohrs
1. Löcher bohren: Nimm dein großes PVC-Rohr und markiere die Stellen, an denen du die Löcher für die Spinatpflanzen bohren möchtest. Ich empfehle, die Löcher versetzt anzuordnen, damit die Pflanzen genügend Platz haben. Der Abstand zwischen den Löchern sollte etwa 15-20 cm betragen. Die Größe der Löcher hängt von der Größe deiner Spinatpflanzen ab. Für Jungpflanzen reichen Löcher mit einem Durchmesser von 5-7 cm, für Samen etwas kleinere.
2. Löcher sägen/bohren: Mit der Lochsäge oder dem Bohraufsatz bohrst du nun die markierten Löcher in das Pflanzrohr. Achte darauf, dass die Löcher sauber und glatt sind, damit die Pflanzen später gut hineinpassen.
3. Rohr reinigen: Entferne alle Späne und Rückstände vom Bohren aus dem Rohr. Du kannst es einfach mit Wasser ausspülen.
2. Vorbereitung des Innenrohrs
1. Löcher bohren: Nimm dein kleineres PVC-Rohr und bohre viele kleine Löcher (ca. 5 mm Durchmesser) hinein. Diese Löcher dienen dazu, das Wasser gleichmäßig im Turm zu verteilen. Bohre die Löcher über die gesamte Länge des Rohrs und in verschiedenen Richtungen.
2. Rohr umwickeln: Wickle das Innenrohr mit Gartenvlies oder Jute ein. Das Vlies verhindert, dass Erde in die Bewässerungslöcher gelangt und diese verstopft. Fixiere das Vlies mit Klebeband, damit es nicht verrutscht.
3. Zusammenbau des Spinat-Turms
1. Drainage vorbereiten: Stelle das große Pflanzrohr an den Ort, an dem dein Spinat-Turm stehen soll. Fülle den Boden des Rohrs mit einer Schicht Kies oder Blähton (ca. 10-15 cm). Das sorgt für eine gute Drainage und verhindert Staunässe.
2. Innenrohr einsetzen: Stelle das umwickelte Innenrohr mittig in das große Pflanzrohr.
3. Erde einfüllen: Fülle nun das große Pflanzrohr mit Pflanzerde. Achte darauf, dass die Erde gut verteilt ist und keine Hohlräume entstehen. Lass oben einen Rand von ca. 5-10 cm frei.
4. Erde andrücken: Drücke die Erde leicht an, damit sie sich setzt.
4. Bepflanzung des Spinat-Turms
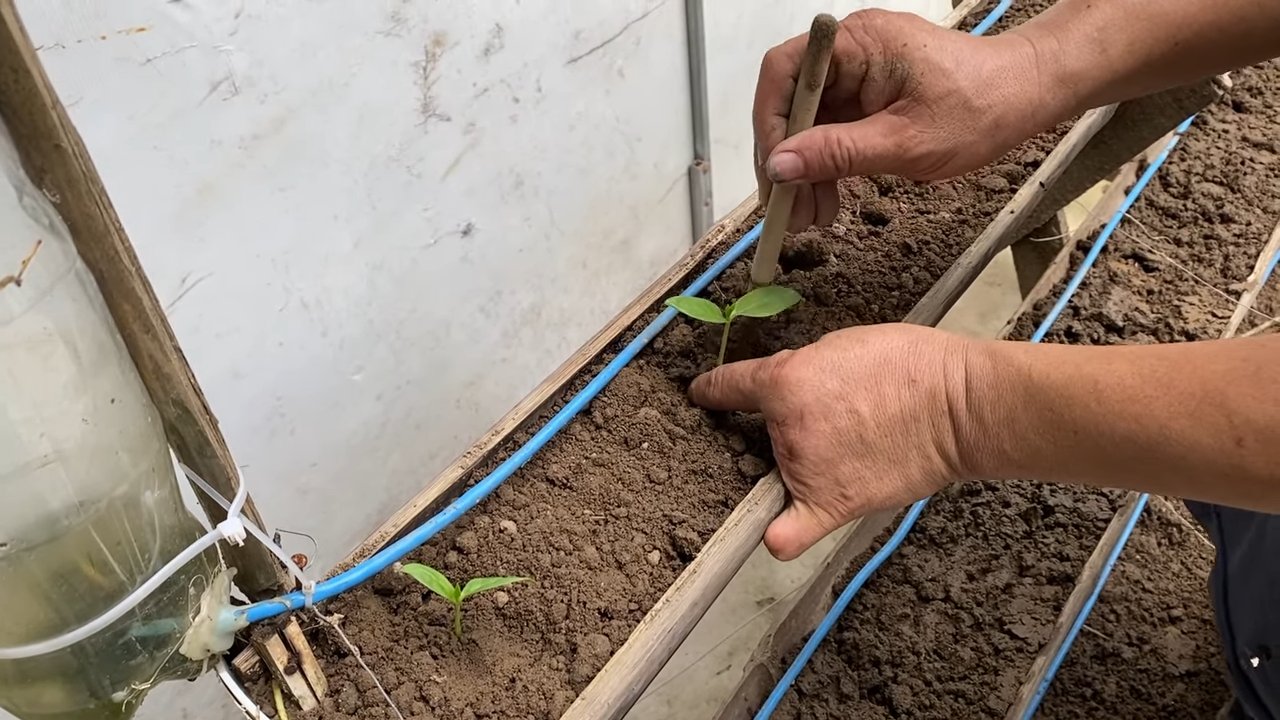
1. Spinat pflanzen: Nun ist es Zeit, den Spinat zu pflanzen! Wenn du Jungpflanzen verwendest, nimm sie vorsichtig aus ihren Töpfen und setze sie in die vorgebohrten Löcher. Fülle die Löcher mit Erde auf und drücke sie leicht an. Wenn du Samen verwendest, säe sie gemäß den Anweisungen auf der Samenpackung in die Löcher.
2. Oberseite bepflanzen: Bepflanze auch die Oberseite des Turms mit Spinat. Hier kannst du etwas mehr Spinat pflanzen, da hier mehr Platz ist.
3. Angießen: Gieße den Spinat-Turm gründlich an. Gieße das Wasser direkt in das Innenrohr, damit es sich gleichmäßig im Turm verteilen kann.
Pflege deines Spinat-Turms
Damit dein Spinat gut wächst und du eine reiche Ernte einfahren kannst, ist die richtige Pflege wichtig. Hier ein paar Tipps:
* Bewässerung: Gieße deinen Spinat-Turm regelmäßig, besonders bei warmem Wetter. Achte darauf, dass die Erde immer leicht feucht ist, aber nicht zu nass. Gieße das Wasser am besten direkt in das Innenrohr, damit es sich gleichmäßig verteilt.
* Düngung: Spinat ist ein Starkzehrer und benötigt ausreichend Nährstoffe. Dünge deinen Spinat-Turm regelmäßig mit einem organischen Gemüsedünger. Beachte dabei die Anweisungen auf der Düngerpackung.
* Standort: Stelle deinen Spinat-Turm an einen sonnigen bis halbschattigen Standort. Spinat mag es nicht zu heiß, daher ist ein halbschattiger Standort besonders im Sommer ideal.
* Schutz vor Schädlingen: Kontrolliere deinen Spinat regelmäßig auf Schädlinge wie Blattläuse oder Schnecken. Bei Bedarf kannst du natürliche Schädlingsbekämpfungsmittel einsetzen.
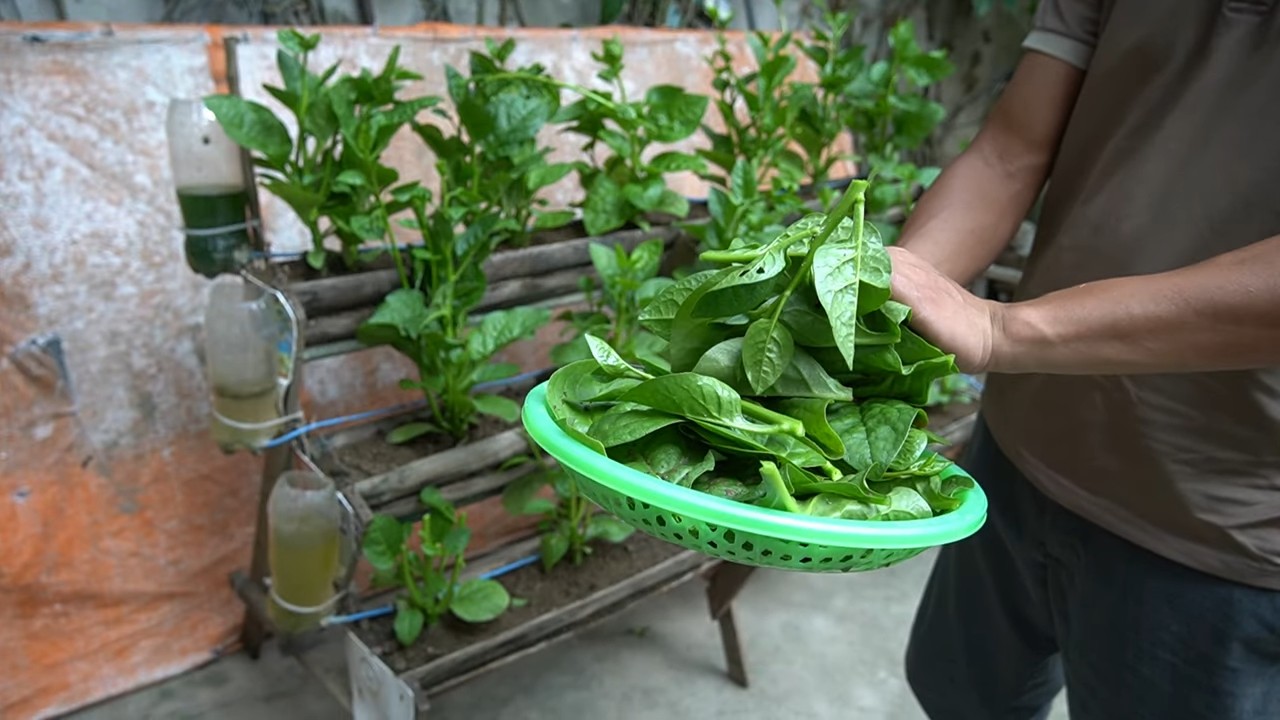
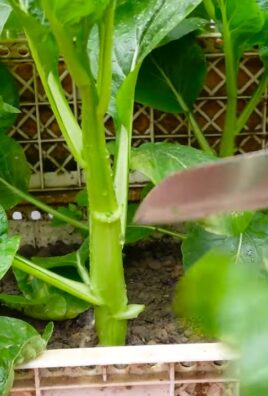
* Ernte: Du kannst deinen Spinat ernten, sobald die Blätter groß genug sind. Schneide die äußeren Blätter ab, damit die inneren Blätter weiterwachsen können.
Zusätzliche Tipps und Tricks
* Materialauswahl: Achte bei der Auswahl der PVC-Rohre auf eine gute Qualität. Sie sollten UV-beständig sein, damit sie nicht spröde werden.
* Farbe des Rohrs: Dunkle Rohre heizen sich in der Sonne stärker auf als helle Rohre. Wenn du in einer sehr sonnigen Gegend wohnst, solltest du ein helles Rohr wählen oder es mit einer hellen Farbe streichen.
* Alternative Materialien: Anstelle von PVC-Rohren kannst du auch andere Materialien verwenden, z.B. alte Regenrinnen oder Pflanzkübel.
* Kräuter-Turm: Du kannst deinen Turm auch mit anderen Kräutern oder Salaten bepflanzen. Achte dabei auf die unterschiedlichen Bedürfnisse der Pflanzen.
* Winterfest machen: Wenn du deinen Spinat-Turm über den Winter bringen möchtest, solltest du ihn an einen geschützten Ort stellen und mit Vlies abdecken.
Ich hoffe, diese Anleitung hat dir geholfen, deinen eigenen Spinat-Turm zu bauen. Viel Spaß beim Gärtnern und eine reiche Ernte! Lass es dir schmecken!
Conclusion
So, there you have it! Creating your own vertical spinach tower is not just a fun weekend project; it’s a game-changer for anyone looking to maximize their gardening space and enjoy a constant supply of fresh, delicious spinach. We’ve walked you through the process, highlighting the ease and affordability of this DIY endeavor. But why is this a must-try?
First and foremost, the vertical design is incredibly space-efficient. Whether you have a sprawling backyard or a tiny balcony, you can cultivate a surprising amount of spinach in a small footprint. This is particularly beneficial for urban gardeners or those with limited outdoor space. Imagine the satisfaction of harvesting a bowlful of vibrant green spinach leaves just steps from your kitchen!
Beyond space efficiency, a vertical spinach tower offers improved growing conditions. The elevated structure allows for better air circulation, reducing the risk of fungal diseases that can plague ground-level crops. It also makes it easier to control pests, as you can spot and address infestations more quickly. Plus, the consistent watering and drainage provided by the tower system ensure that your spinach plants receive the optimal amount of moisture.
But the benefits don’t stop there. Building your own vertical spinach tower is an incredibly rewarding experience. It’s a chance to get your hands dirty, unleash your creativity, and connect with nature. And the best part? You get to enjoy the fruits (or rather, vegetables) of your labor in the form of fresh, homegrown spinach.
Ready to take your spinach game to the next level?
Don’t be afraid to experiment with variations on the basic design. You could use different types of containers, such as repurposed plastic bottles or fabric grow bags. You could also incorporate a self-watering system to further simplify the maintenance process. Consider adding companion plants like marigolds or basil to deter pests and attract beneficial insects.
For those who want to take their vertical garden to the next level, consider adding a small trellis to the top of the tower. This will allow your spinach plants to climb and spread, creating an even more impressive display. You could also experiment with different types of spinach, such as baby spinach, savoy spinach, or flat-leaf spinach, to find your favorite variety.
The possibilities are endless! The key is to have fun and let your creativity guide you.
We are confident that you will find this DIY vertical spinach tower project to be both enjoyable and rewarding. It’s a simple, affordable, and effective way to grow your own fresh spinach, regardless of your gardening experience or available space.
So, what are you waiting for? Gather your materials, follow our instructions, and get ready to enjoy a bountiful harvest of homegrown spinach.
We encourage you to try this DIY trick and share your experience with us! Post photos of your vertical spinach tower on social media using #VerticalSpinachTowerDIY and tag us so we can see your amazing creations. We can’t wait to see what you come up with! Let’s spread the word about this fantastic way to grow fresh, healthy spinach at home. Happy gardening!
FAQ
What type of spinach grows best in a vertical tower?
Almost any type of spinach can thrive in a vertical tower, but some varieties are particularly well-suited. Baby spinach is a popular choice due to its compact size and quick growth. Savoy spinach, with its crinkled leaves, is also a good option, as it tends to be more resistant to bolting (going to seed). Flat-leaf spinach is another reliable choice, known for its smooth leaves and mild flavor. Experiment with different varieties to find your personal favorite! Consider the climate in your area when selecting your spinach variety. Some are more heat-tolerant than others.
How often should I water my vertical spinach tower?
Watering frequency depends on several factors, including the climate, the type of soil you’re using, and the size of your tower. As a general rule, you should water your spinach tower whenever the top inch of soil feels dry to the touch. During hot, dry weather, you may need to water daily, while in cooler, wetter conditions, you may only need to water every few days. Be sure to water thoroughly, ensuring that the water reaches all levels of the tower. Avoid overwatering, as this can lead to root rot. A well-draining soil mix is essential to prevent waterlogging.
What kind of soil should I use for my vertical spinach tower?
A well-draining and nutrient-rich soil mix is crucial for the success of your vertical spinach tower. A good option is a mix of equal parts potting soil, compost, and perlite or vermiculite. The potting soil provides a base for the plants to grow in, the compost adds essential nutrients, and the perlite or vermiculite improves drainage and aeration. Avoid using garden soil, as it can be too heavy and compact, hindering root growth. You can also add a slow-release fertilizer to the soil mix to provide a steady supply of nutrients to your spinach plants.
How much sunlight does my vertical spinach tower need?
Spinach thrives in full sun to partial shade. Ideally, your vertical spinach tower should receive at least 4-6 hours of direct sunlight per day. However, in hot climates, some afternoon shade can be beneficial to prevent the leaves from scorching. If you don’t have a sunny spot in your yard, you can supplement with grow lights. Position the grow lights about 12-18 inches above the plants and provide them with 14-16 hours of light per day.
How do I prevent pests and diseases in my vertical spinach tower?
Regularly inspect your spinach plants for signs of pests or diseases. Common pests that can affect spinach include aphids, spider mites, and slugs. You can control these pests with insecticidal soap, neem oil, or by handpicking them off the plants. To prevent fungal diseases, ensure good air circulation around the plants and avoid overwatering. You can also apply a fungicide if necessary. Companion planting with herbs like basil or marigolds can also help deter pests.
How do I harvest spinach from my vertical tower?
You can begin harvesting spinach leaves as soon as they are large enough to eat, typically when they are about 4-6 inches long. Simply snip off the outer leaves with scissors or a knife, leaving the inner leaves to continue growing. This cut-and-come-again harvesting method allows you to enjoy a continuous supply of fresh spinach throughout the growing season. Avoid harvesting more than one-third of the plant at a time to ensure that it can continue to produce new leaves.
Can I grow other plants in my vertical spinach tower?
Yes, you can definitely grow other plants in your vertical spinach tower alongside your spinach. Companion planting can be beneficial for both the spinach and the other plants. Good companion plants for spinach include lettuce, radishes, carrots, and herbs like basil and cilantro. Avoid planting spinach near plants that are heavy feeders, such as tomatoes or peppers, as they may compete for nutrients.
How long will my vertical spinach tower last?
The lifespan of your vertical spinach tower depends on the materials you use and how well you maintain it. If you use durable materials like PVC pipes or sturdy plastic containers, your tower can last for several years. Regularly clean the tower to prevent the buildup of algae or mold. Replace the soil every year or two to replenish nutrients. With proper care, your vertical spinach tower can provide you with years of fresh, homegrown spinach.


Leave a Comment