
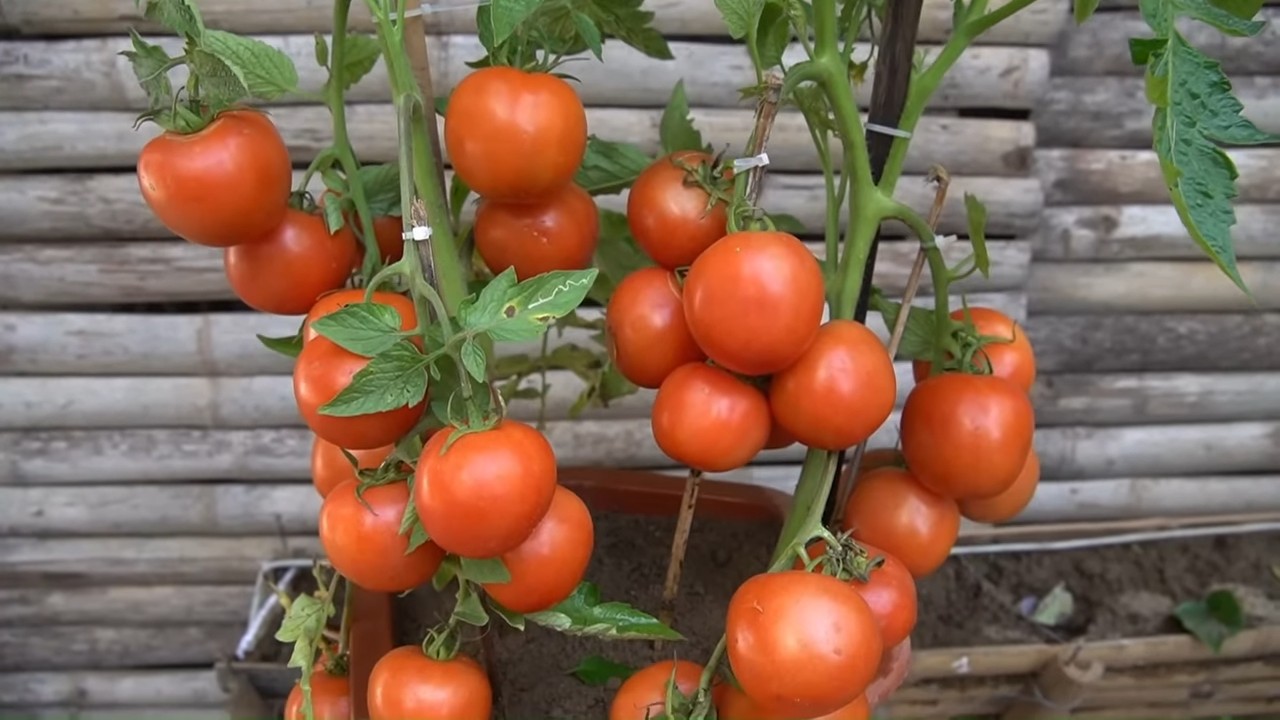
Vertical Tomato Growing Tower: Imagine plucking juicy, sun-ripened tomatoes right from your balcony, patio, or even a small corner of your garden! Sounds like a dream, right? Well, it doesn’t have to be! For centuries, gardeners have sought innovative ways to maximize their yields, especially in limited spaces. From ancient hanging gardens to modern-day urban farms, the desire to cultivate our own food is deeply ingrained in our history.
That’s where the magic of a DIY vertical tomato growing tower comes in. Let’s face it, not everyone has acres of land to dedicate to a sprawling tomato patch. But that shouldn’t stop you from enjoying the unparalleled taste of homegrown tomatoes. This DIY project is perfect for apartment dwellers, balcony gardeners, or anyone looking to add a touch of green to their lives without sacrificing precious space.
I’m going to show you how to build your own vertical tomato growing tower, a simple yet effective solution that not only saves space but also looks fantastic. Plus, it’s a fun and rewarding project that will have you harvesting delicious tomatoes all season long. Get ready to unleash your inner gardener and create a thriving vertical oasis!
DIY Vertical Tomato Growing Tower: A Bountiful Harvest in a Small Space
Hey there, fellow gardening enthusiasts! Are you dreaming of juicy, sun-ripened tomatoes but short on space? Well, I’ve got just the project for you: a DIY vertical tomato growing tower! This ingenious setup allows you to grow a ton of tomatoes in a fraction of the ground space, making it perfect for balconies, patios, or even small backyards. Plus, it’s a fun and rewarding project that you can tackle over a weekend. Let’s get started!
What You’ll Need: Gathering Your Supplies
Before we dive in, let’s make sure you have everything you need. This project requires a few key materials, but don’t worry, most of them are readily available at your local hardware or garden supply store.
* **Hardware Cloth (1/2 inch mesh):** This will form the inner core of our tower, providing support and aeration. You’ll need enough to create a cylinder of your desired height and diameter. I recommend a piece that’s at least 36 inches wide and long enough to create a cylinder about 18 inches in diameter and 3-4 feet tall.
* **Landscape Fabric:** This will line the inside of the hardware cloth, preventing soil from washing out while still allowing for drainage. Get a roll that’s wide enough to completely line the hardware cloth cylinder.
* **Zip Ties:** These are essential for securing the hardware cloth and landscape fabric together. Get a pack of heavy-duty zip ties for a secure hold.
* **Potting Soil:** Choose a high-quality potting mix specifically formulated for vegetables. This will provide the nutrients your tomato plants need to thrive. You’ll need a lot, so estimate based on the size of your tower.
* **Tomato Seedlings:** Select your favorite tomato varieties! I recommend choosing determinate (bush) varieties for this project, as they tend to stay more compact. Cherry tomatoes, Roma tomatoes, and other smaller varieties are also excellent choices.
* **PVC Pipe (4-inch diameter):** This will be the watering tube in the center of the tower. It should be slightly shorter than the height of your tower.
* **Drill with Drill Bits:** You’ll need a drill to create holes in the PVC pipe for watering.
* **Measuring Tape:** For accurate measurements when cutting and assembling the materials.
* **Scissors or Utility Knife:** For cutting the landscape fabric.
* **Gloves:** To protect your hands during the construction process.
* **Safety Glasses:** Always wear safety glasses when working with hardware cloth.
* **Optional: Compost or Worm Castings:** To enrich the soil and provide extra nutrients.
* **Optional: Mulch:** To help retain moisture and suppress weeds.
Building the Core: Assembling the Hardware Cloth Cylinder
This is where we start to give our tower its shape. Working with hardware cloth can be a bit tricky, so take your time and be careful.
1. **Cut the Hardware Cloth:** Using your measuring tape, determine the length of hardware cloth needed to create a cylinder of your desired diameter. Remember to add a few extra inches for overlapping the edges. Carefully cut the hardware cloth using wire cutters or tin snips. Be sure to wear gloves and safety glasses to protect yourself from sharp edges.
2. **Form the Cylinder:** Gently bend the hardware cloth into a cylindrical shape. Overlap the edges by a few inches.
3. **Secure the Seam:** Using zip ties, securely fasten the overlapping edges of the hardware cloth together. Space the zip ties every few inches along the seam to create a strong and stable cylinder. Trim off any excess zip tie tails.
Lining the Tower: Adding the Landscape Fabric
Now, we’ll line the inside of the hardware cloth cylinder with landscape fabric to prevent soil erosion.
1. **Cut the Landscape Fabric:** Measure the height and circumference of your hardware cloth cylinder. Cut a piece of landscape fabric that is slightly larger than these measurements. This will give you some extra material to work with.
2. **Line the Cylinder:** Carefully insert the landscape fabric into the hardware cloth cylinder. Overlap the edges of the fabric along the inside of the cylinder.
3. **Secure the Fabric:** Use zip ties to attach the landscape fabric to the hardware cloth. Space the zip ties every few inches along the top and bottom edges of the cylinder, as well as along the overlapping seam. Trim off any excess fabric.
Creating the Watering System: Preparing the PVC Pipe
A central watering system is key to ensuring your tomatoes get the moisture they need throughout the tower.
1. **Drill Holes in the PVC Pipe:** Using your drill and a small drill bit (around 1/4 inch), create holes in the PVC pipe. Space the holes about 4-6 inches apart, and stagger them around the circumference of the pipe. This will ensure even watering throughout the tower. Be sure to drill holes along the entire length of the pipe, except for the bottom few inches.
2. **Cap the Bottom (Optional):** You can cap the bottom of the PVC pipe to prevent soil from entering. This is optional, but it can help keep the pipe clean and prevent clogging.
Assembling the Tower: Putting It All Together
Now for the fun part: assembling the entire tower!
1. **Position the PVC Pipe:** Place the PVC pipe in the center of the hardware cloth cylinder. Make sure it’s standing upright and centered.
2. **Start Filling with Soil:** Begin filling the tower with potting soil. As you fill, gently pack the soil around the PVC pipe. Be sure to leave a few inches of space at the top of the tower.
3. **Add Compost or Worm Castings (Optional):** As you fill the tower, you can add layers of compost or worm castings to enrich the soil and provide extra nutrients for your tomato plants.
4. **Water the Soil:** Once the tower is about half full, water the soil thoroughly. This will help settle the soil and prevent air pockets.
5. **Continue Filling with Soil:** Continue filling the tower with soil until it’s almost full. Water again to settle the soil.
Planting Your Tomatoes: Bringing Your Tower to Life
Now it’s time to plant your tomato seedlings and watch your tower come to life!
1. **Create Planting Holes:** Using your hands or a small trowel, create planting holes in the landscape fabric. Space the holes about 8-12 inches apart around the tower.
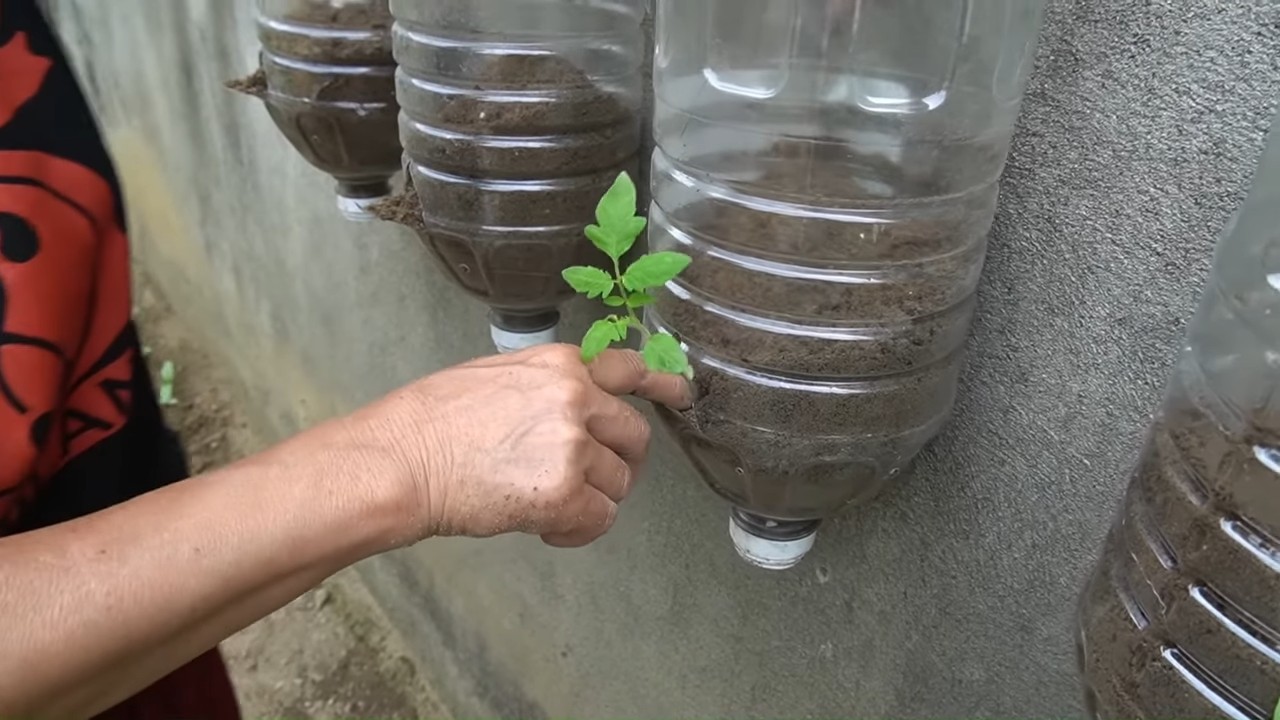
2. **Plant the Seedlings:** Gently remove the tomato seedlings from their containers and plant them in the prepared holes. Be sure to plant them at the same depth they were growing in their containers.
3. **Water Thoroughly:** Water the newly planted seedlings thoroughly.
4. **Add Mulch (Optional):** Add a layer of mulch around the base of the tomato plants to help retain moisture and suppress weeds.
Caring for Your Tomato Tower: Ensuring a Bountiful Harvest
Once your tomato tower is planted, it’s important to provide proper care to ensure a healthy and productive harvest.
* **Watering:** Water your tomato tower regularly, especially during hot and dry weather. The central PVC pipe makes watering easy – simply pour water into the top of the pipe, and it will distribute evenly throughout the tower. Check the soil moisture regularly and water when the top inch or two feels dry.
* **Fertilizing:** Fertilize your tomato plants every few weeks with a balanced fertilizer specifically formulated for vegetables. Follow the instructions on the fertilizer package.
* **Sunlight:** Tomato plants need at least 6-8 hours of sunlight per day. Place your tomato tower in a sunny location where it will receive plenty of direct sunlight.
* **Support:** As your tomato plants grow, they may need additional support. You can use tomato cages or stakes to help support the plants and prevent them from falling over.
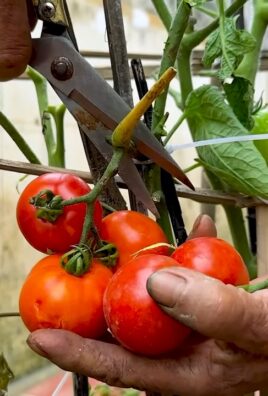
* **Pruning:** Prune your tomato plants regularly to remove suckers (the small shoots that grow between the main stem and the branches). This will help improve air circulation and encourage fruit production.
* **Pest and Disease Control:** Keep an eye out for pests and diseases. If you notice any problems, take action immediately to prevent them from spreading. There are many organic pest and disease control options available.
Troubleshooting: Common Issues and Solutions
Even with the best care, you might encounter a few challenges along the way. Here are some common issues and how to address them:
* **Yellowing Leaves:** This could be a sign of overwatering, underwatering, or nutrient deficiency. Check the soil moisture and adjust your watering schedule accordingly. Fertilize your plants with a balanced fertilizer.
* **Blossom End Rot:** This is a common problem in tomatoes, caused by calcium deficiency. Ensure your soil is rich in calcium and water your plants consistently. You can also add calcium supplements to the soil.
* **Pests:** Common tomato pests include aphids, whiteflies, and tomato hornworms. Use organic pest control methods, such as insecticidal soap or neem oil, to control these pests.
* **Diseases:** Common tomato diseases include early blight, late blight, and septoria leaf spot. Prevent these diseases by providing good air circulation, watering at the base of
Conclusion
So, there you have it! Building your own vertical tomato growing tower isn’t just a fun weekend project; it’s a game-changer for anyone looking to maximize their garden space and enjoy a bountiful harvest of delicious, homegrown tomatoes. We’ve walked you through the process, highlighting the benefits and offering tips to ensure your success.
But why is this DIY trick a must-try? Let’s recap. First and foremost, it’s incredibly space-efficient. Whether you have a sprawling backyard or a tiny balcony, a vertical tomato tower allows you to grow a surprising number of tomato plants in a minimal footprint. This is especially crucial for urban gardeners or those with limited outdoor space.
Secondly, it promotes healthier plants. By elevating your tomatoes, you improve air circulation, which helps to prevent fungal diseases that can plague ground-level plants. The tower design also makes it easier to water and fertilize your plants directly at the roots, leading to stronger, more productive growth.
Thirdly, it’s cost-effective. While you could purchase a pre-made vertical garden, building your own allows you to customize the design to your specific needs and budget. You can repurpose materials, such as plastic containers or wooden pallets, making it an environmentally friendly option as well.
But the benefits don’t stop there. A vertical tomato tower is also aesthetically pleasing, adding a touch of greenery and visual interest to your outdoor space. Imagine the vibrant colors of ripe tomatoes cascading down the sides of your tower – it’s a beautiful and rewarding sight.
Now, let’s talk about variations. Feel free to experiment with different materials and designs. You could use terracotta pots stacked on top of each other, create a tower from chicken wire and burlap, or even build a hydroponic vertical system. The possibilities are endless!
Consider adding companion plants to your tower. Basil, marigolds, and nasturtiums are all excellent choices that can help to deter pests and attract beneficial insects. You can also incorporate herbs like oregano or thyme for a fragrant and functional addition.
Another variation is to adjust the size and shape of your tower to suit your specific needs. If you only have a small balcony, you might opt for a smaller, more compact design. If you have more space, you could build a larger, multi-tiered tower to maximize your tomato yield.
Don’t be afraid to get creative and personalize your vertical tomato growing tower. Add decorative elements, such as painted pots or colorful stones, to make it a unique and eye-catching feature in your garden.
We’re confident that you’ll love the results of this DIY project. Not only will you enjoy a delicious harvest of homegrown tomatoes, but you’ll also gain a sense of accomplishment and pride in your gardening skills.
So, what are you waiting for? Gather your materials, follow our instructions, and get ready to build your own vertical tomato growing tower. We encourage you to share your experiences with us. Post photos of your finished towers on social media using #VerticalTomatoTowerDIY and let us know how it’s working for you. We can’t wait to see your creations! Happy gardening!
Frequently Asked Questions (FAQ)
What type of tomatoes are best suited for a vertical growing tower?
Determinate tomato varieties, also known as bush tomatoes, are generally better suited for vertical growing towers than indeterminate varieties. Determinate tomatoes grow to a specific size and produce all their fruit at once, making them easier to manage in a confined space. Indeterminate tomatoes, on the other hand, continue to grow and produce fruit throughout the season, which can become unwieldy in a vertical tower. Some excellent determinate varieties for vertical growing include Roma, Celebrity, and Patio. However, with proper pruning and support, you can also grow smaller indeterminate varieties like cherry or grape tomatoes in a vertical tower. Just be sure to provide adequate support for the vines as they grow.
How often should I water my vertical tomato growing tower?
The frequency of watering will depend on several factors, including the weather, the type of soil you’re using, and the size of your plants. In general, you should water your vertical tomato tower whenever the top inch of soil feels dry to the touch. During hot, sunny weather, you may need to water daily, or even twice a day. In cooler, cloudier weather, you may only need to water every few days. Be sure to water deeply, so that the water reaches the roots of the plants. Avoid overwatering, as this can lead to root rot. A good way to check if your plants need water is to stick your finger into the soil. If the soil feels dry, it’s time to water.
What kind of soil should I use in my vertical tomato growing tower?
A well-draining potting mix is essential for growing healthy tomatoes in a vertical tower. Avoid using garden soil, as it can become compacted and prevent proper drainage. A good potting mix will contain a blend of peat moss, perlite, and vermiculite. You can also add compost to the mix to provide additional nutrients. Make sure the potting mix is lightweight and airy, allowing for good root development. You can also amend the soil with slow-release fertilizer to provide a steady supply of nutrients throughout the growing season.
How much sunlight do my tomatoes need in a vertical growing tower?
Tomatoes need at least six to eight hours of direct sunlight per day to thrive. Choose a location for your vertical tomato tower that receives plenty of sunlight. If you don’t have a sunny spot, you can supplement with grow lights. Be sure to rotate your tower regularly to ensure that all sides of the plants receive adequate sunlight. If your plants are not getting enough sunlight, they may become leggy and produce fewer tomatoes.
How do I fertilize my tomatoes in a vertical growing tower?
Tomatoes are heavy feeders and require regular fertilization. You can use a liquid fertilizer, a slow-release fertilizer, or a combination of both. Liquid fertilizers should be applied every two to three weeks, while slow-release fertilizers can be applied at planting time and then again every few months. Choose a fertilizer that is specifically formulated for tomatoes, and follow the instructions on the label. Be careful not to over-fertilize, as this can burn the roots of the plants.
How do I prevent pests and diseases in my vertical tomato growing tower?
Prevention is key when it comes to pests and diseases. Start by using healthy, disease-resistant tomato varieties. Keep your tower clean and free of debris. Water your plants at the base to avoid wetting the foliage, which can promote fungal diseases. Monitor your plants regularly for signs of pests or diseases. If you spot any problems, take action immediately. You can use organic pesticides or fungicides to control pests and diseases. Companion planting, such as planting basil or marigolds near your tomatoes, can also help to deter pests.
Can I grow other plants in my vertical tomato growing tower?
Yes, you can definitely grow other plants in your vertical tomato growing tower! Companion planting is a great way to maximize your space and create a more diverse and beneficial ecosystem. Some excellent companion plants for tomatoes include basil, marigolds, nasturtiums, oregano, and thyme. Basil helps to repel pests and improve the flavor of tomatoes. Marigolds deter nematodes and other soil pests. Nasturtiums attract beneficial insects. Oregano and thyme are aromatic herbs that can help to repel pests and attract pollinators. Just be sure to choose plants that have similar growing requirements as tomatoes, such as sunlight and water.
How do I support my tomato plants in a vertical growing tower?
Supporting your tomato plants is crucial, especially as they grow larger and heavier with fruit. The tower itself provides some support, but you may need to add additional support as the plants mature. You can use tomato cages, stakes, or trellises to provide extra support. Be sure to tie the plants loosely to the supports to avoid damaging the stems. As the plants grow, continue to add support as needed. Proper support will prevent the plants from falling over and breaking, ensuring a bountiful harvest.
What do I do with my vertical tomato growing tower at the end of the season?
At the end of the growing season, remove the tomato plants and any remaining fruit from the tower. Clean the tower thoroughly to remove any debris or pests. You can then store the tower for the winter or reuse it for another crop. If you’re storing the tower, be sure to protect it from the elements. You can also amend the soil with compost or other organic matter to prepare it for the next growing season. Consider rotating your crops each year to prevent soilborne diseases.

Leave a Comment