
Vinegar cleaning hacks are about to become your new best friend! Seriously, forget those expensive, chemical-laden cleaners. I’m going to let you in on a little secret: the humble bottle of vinegar sitting in your pantry is a powerhouse of cleaning potential. For generations, vinegar has been a go-to cleaning solution, passed down through families as a safe and effective way to tackle grime. Think about it – our grandmothers knew what they were doing! They didn’t have fancy marketing campaigns or aisles of specialized products, just good old-fashioned vinegar.
But why should you care about vinegar cleaning hacks in today’s world? Well, for starters, it’s incredibly budget-friendly. Who doesn’t love saving money? Plus, it’s an eco-conscious choice, reducing your reliance on harsh chemicals that can harm the environment and your family. I’ve found that many people are looking for natural and effective ways to keep their homes sparkling, and that’s exactly what these DIY tricks offer. From banishing stubborn stains to deodorizing your entire house, these vinegar cleaning hacks will revolutionize your cleaning routine. Get ready to ditch the chemicals and embrace the power of vinegar – your home (and your wallet) will thank you!
Unlocking the Power of Vinegar: DIY Cleaning Hacks That Will Blow Your Mind!
Hey there, fellow DIY enthusiasts! I’m so excited to share some of my absolute favorite cleaning hacks using the humble, yet mighty, vinegar. Forget those expensive, chemical-laden cleaners – vinegar is your new best friend! It’s cheap, effective, and eco-friendly. Let’s dive in and transform your home with the magic of vinegar!
General Vinegar Cleaning Tips
Before we jump into specific hacks, let’s cover some essential ground rules for using vinegar as a cleaner:
* Dilution is Key: Always dilute vinegar with water. A 1:1 ratio (equal parts vinegar and water) is a great starting point for most cleaning tasks. For tougher jobs, you can increase the vinegar concentration.
* White Distilled Vinegar is Your Go-To: While other types of vinegar exist, white distilled vinegar is the best choice for cleaning. It’s clear, inexpensive, and doesn’t contain any coloring agents that could stain surfaces.
* Test in an Inconspicuous Area: Before applying vinegar to any surface, especially delicate ones like natural stone or wood, test it in a hidden area first to ensure it doesn’t cause any damage or discoloration.
* Avoid Mixing with Bleach: This is crucial! Mixing vinegar with bleach creates toxic chlorine gas, which is extremely dangerous. Never, ever mix these two cleaning agents.
* Ventilation is Important: While vinegar is generally safe, it does have a strong odor. Make sure to open windows or turn on a fan when cleaning with vinegar to ensure proper ventilation.
* Embrace the Smell (It Fades!): Let’s be honest, vinegar doesn’t smell amazing. But the good news is that the smell dissipates quickly. You can also add a few drops of your favorite essential oil to the vinegar solution to mask the odor.
Cleaning Your Kitchen with Vinegar
The kitchen is often the dirtiest room in the house, but vinegar can make cleaning it a breeze!
Cleaning Your Microwave
Microwaves can get incredibly gross, incredibly fast. Splattered food, lingering odors – it’s a breeding ground for nastiness. But fear not, vinegar is here to save the day!
1. Prepare the Solution: In a microwave-safe bowl, mix 1 cup of water with 1/4 cup of white distilled vinegar.
2. Microwave It: Place the bowl in the microwave and heat it on high for 5-10 minutes. The steam will loosen the grime and make it easier to wipe away.
3. Let it Sit: After microwaving, let the bowl sit inside the microwave for another 5 minutes. This allows the steam to further penetrate the stuck-on food.
4. Wipe it Clean: Carefully remove the bowl (it will be hot!). Use a clean cloth or sponge to wipe down the interior of the microwave. You’ll be amazed at how easily the grime comes off!
5. Clean the Turntable: Remove the turntable and wash it with warm, soapy water. You can also soak it in a vinegar and water solution for extra cleaning power.
6. Dry and Reassemble: Dry all the components thoroughly and reassemble your sparkling clean microwave.
Degreasing Your Stovetop
Grease splatters are inevitable when cooking, but they can be a pain to clean. Vinegar is a fantastic degreaser!
1. Remove Loose Debris: Use a paper towel or cloth to wipe away any loose food particles or debris from the stovetop.
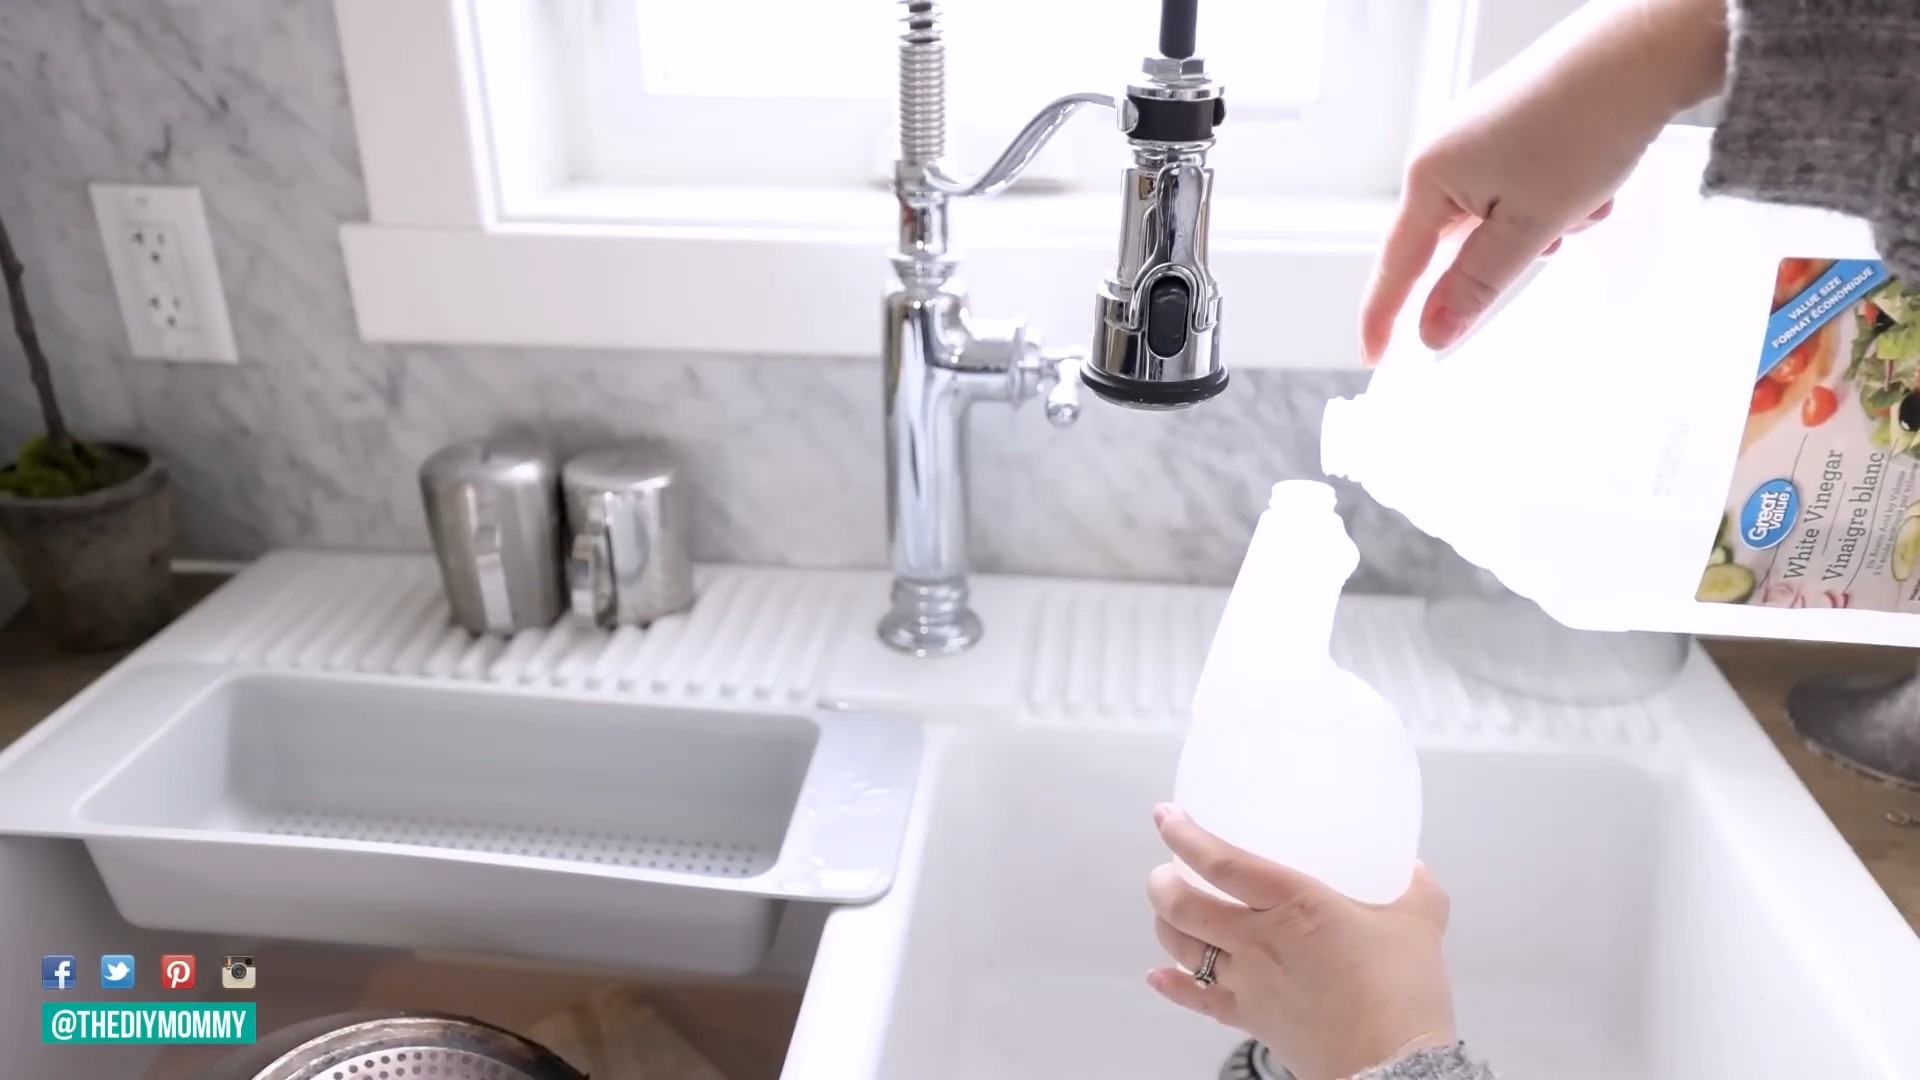
2. Prepare the Vinegar Solution: Mix equal parts white distilled vinegar and water in a spray bottle.
3. Spray and Soak: Spray the vinegar solution liberally onto the stovetop, focusing on areas with heavy grease buildup. Let it sit for 5-10 minutes to allow the vinegar to break down the grease.
4. Scrub Gently: Use a non-abrasive sponge or cloth to scrub the stovetop. For stubborn grease, you can use a paste of baking soda and vinegar.
5. Wipe Clean: Wipe the stovetop clean with a damp cloth.
6. Dry and Polish: Dry the stovetop with a clean cloth to prevent water spots. For extra shine, you can polish it with a microfiber cloth.
Cleaning Your Dishwasher
Did you know your dishwasher needs cleaning too? Over time, it can accumulate food particles, soap scum, and mineral deposits. Vinegar can help keep your dishwasher running smoothly and smelling fresh.
1. Empty the Dishwasher: Make sure your dishwasher is completely empty.
2. Place Vinegar in a Dish-Safe Cup: Fill a dishwasher-safe cup or bowl with 1 cup of white distilled vinegar.
3. Place on Top Rack: Place the cup on the top rack of the dishwasher.
4. Run a Hot Cycle: Run the dishwasher on a hot cycle. The vinegar will help to dissolve grease, soap scum, and mineral deposits.
5. Repeat Monthly: Repeat this process once a month to keep your dishwasher clean and efficient.
Bathroom Brilliance with Vinegar
The bathroom is another area where vinegar shines. It can tackle soap scum, hard water stains, and mildew with ease.
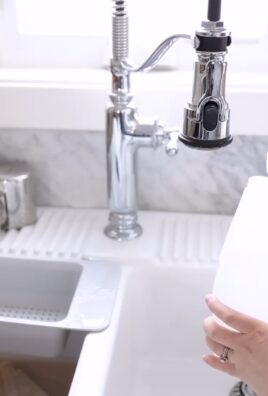
Cleaning Showerheads
Showerheads can get clogged with mineral deposits, reducing water pressure and affecting the spray pattern. Vinegar can dissolve these deposits and restore your showerhead to its former glory.
1. Prepare the Vinegar Solution: Fill a plastic bag with white distilled vinegar. You’ll need enough vinegar to completely submerge the showerhead.
2. Secure the Bag: Attach the bag to the showerhead using a rubber band or twist tie. Make sure the showerhead is fully submerged in the vinegar.
3. Soak Overnight: Let the showerhead soak in the vinegar overnight. This will give the vinegar plenty of time to dissolve the mineral deposits.
4. Remove and Rinse: Remove the bag and rinse the showerhead thoroughly with water.
5. Scrub if Needed: If there are any stubborn deposits remaining, use an old toothbrush to scrub them away.
6. Enjoy Your Improved Shower: Enjoy your shower with improved water pressure and a cleaner spray pattern!
Removing Soap Scum from Shower Doors
Soap scum can be a real eyesore on shower doors. Vinegar can cut through the soap scum and leave your shower doors sparkling.
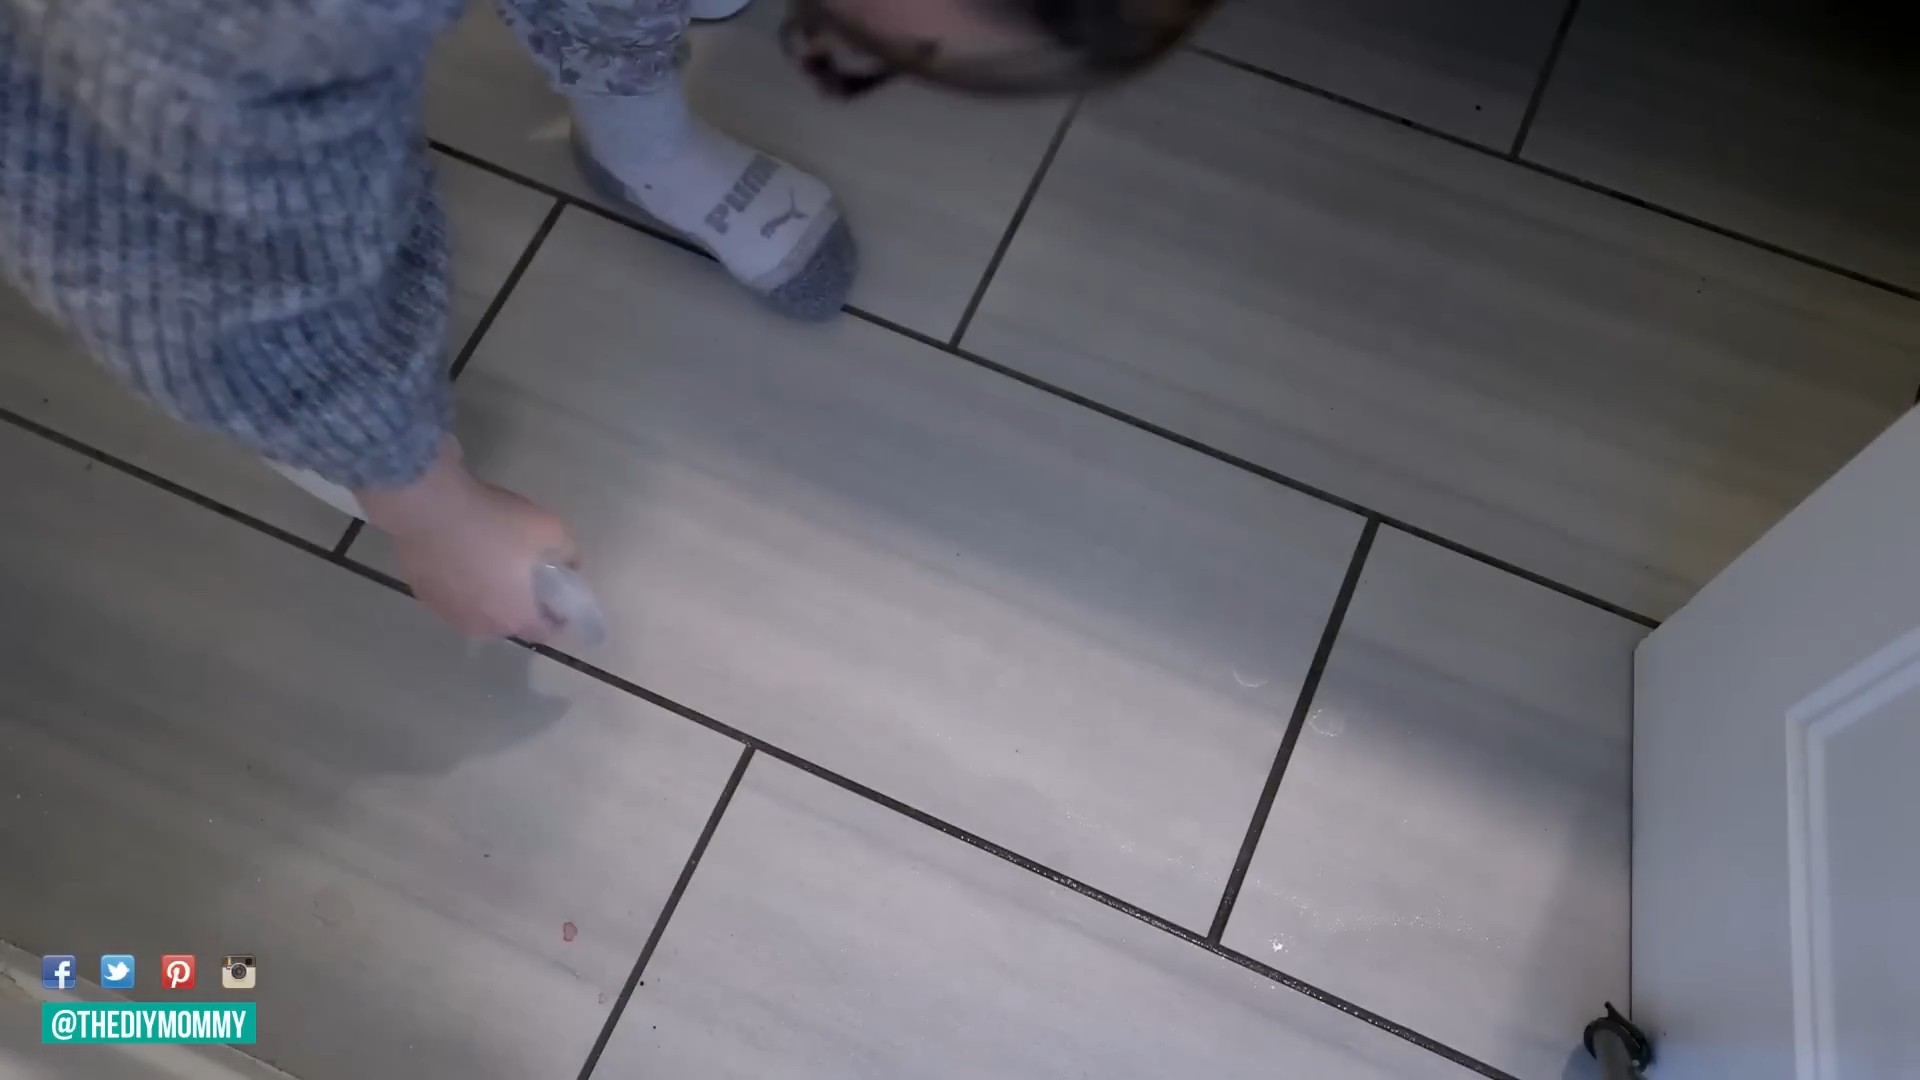
1. Prepare the Vinegar Solution: Mix equal parts white distilled vinegar and water in a spray bottle.
2. Spray and Soak: Spray the vinegar solution liberally onto the shower doors, focusing on areas with heavy soap scum buildup. Let it sit for 10-15 minutes to allow the vinegar to break down the soap scum.
3. Scrub Gently: Use a non-abrasive sponge or cloth to scrub the shower doors. For stubborn soap scum, you can use a paste of baking soda and vinegar.
4. Rinse Thoroughly: Rinse the shower doors thoroughly with water.
5. Dry and Shine: Dry the shower doors with a clean cloth or squeegee to prevent water spots.
Cleaning Toilets
Vinegar can also be used to clean and deodorize your toilet.
1. Pour Vinegar into the Bowl: Pour 1 cup of white distilled vinegar into the toilet bowl.
2. Let it Sit: Let the vinegar sit for at least 30 minutes, or even overnight for a deeper clean.
3. Scrub the Bowl: Use a toilet brush to scrub the bowl, paying attention to any stains or buildup.
4. Flush: Flush the toilet to rinse away the vinegar and debris.
5. Clean the Exterior: Mix equal parts white distilled vinegar and water in a spray bottle. Spray the exterior of the toilet and wipe it clean with a cloth.
Vinegar for Laundry
Vinegar isn’t just for cleaning your home; it can also be used in your laundry routine!
Fabric Softener Alternative
Vinegar can be used as a natural fabric softener. It helps to soften clothes, reduce static cling, and remove detergent residue.
1. Add Vinegar to the Rinse Cycle: Add 1/2 cup of white distilled vinegar to the fabric softener dispenser of your washing machine.
2. Run the Wash Cycle: Run the wash cycle as usual.
3. Enjoy Softer Clothes: Your clothes will come out softer and fresher, without the use of harsh chemicals.
Removing Odors from Clothes
Vinegar can also help to remove stubborn odors from clothes, such as smoke, mildew, or sweat.
1. Soak Clothes in Vinegar Solution: Fill a tub or sink with cold water and add 1 cup of white distilled vinegar.
2. Soak for 30 Minutes: Soak the clothes in the vinegar solution for at least 30 minutes, or even overnight for heavily soiled items.
3. Wash as Usual: Wash the clothes as usual in your washing machine
Conclusion
So, there you have it! This deep dive into vinegar cleaning hacks has, hopefully, illuminated the incredible versatility and power of this humble household staple. We’ve explored how vinegar can tackle grime, banish odors, and leave your home sparkling, all without the harsh chemicals found in many commercial cleaners. But why is this DIY approach a must-try?
Firstly, it’s incredibly cost-effective. A bottle of vinegar is significantly cheaper than a cabinet full of specialized cleaning products. Think of all the money you’ll save! Secondly, it’s environmentally friendly. By reducing your reliance on chemical cleaners, you’re contributing to a healthier planet for yourself and future generations. And thirdly, it’s surprisingly effective. From stubborn stains to lingering smells, vinegar can handle a wide range of cleaning challenges.
But the beauty of these vinegar cleaning hacks lies in their adaptability. Feel free to experiment and find what works best for you and your home. For instance, if you find the scent of vinegar too strong, infuse it with citrus peels (lemon, orange, grapefruit) for a more pleasant aroma. Simply add the peels to a jar of vinegar and let it steep for a few weeks before straining and using. You can also add a few drops of your favorite essential oils, like lavender or tea tree, for added fragrance and antibacterial properties.
Another variation to consider is the type of vinegar you use. While white distilled vinegar is the most common and versatile choice, apple cider vinegar can also be used for certain cleaning tasks, particularly those involving delicate surfaces. Just be sure to test it in an inconspicuous area first to ensure it doesn’t cause any discoloration.
For tougher cleaning jobs, like removing hard water stains or soap scum, consider heating the vinegar slightly before applying it. The heat will help to loosen the grime and make it easier to wipe away. However, be careful not to boil the vinegar, as this can release strong fumes.
And don’t forget about the power of baking soda! When combined with vinegar, baking soda creates a fizzing action that can help to lift dirt and grime from surfaces. This combination is particularly effective for cleaning drains and removing stubborn stains from carpets and upholstery.
Ultimately, the best way to discover the full potential of these vinegar cleaning hacks is to try them for yourself. Start with a simple task, like cleaning your microwave or freshening up your garbage disposal, and gradually work your way up to more challenging projects.
We’re confident that you’ll be amazed by the results. Not only will your home be cleaner and fresher, but you’ll also feel good knowing that you’re using a safe, natural, and sustainable cleaning solution.
So, go ahead, grab a bottle of vinegar and get cleaning! And don’t forget to share your experiences with us. We’d love to hear about your favorite vinegar cleaning hacks and any tips or tricks you’ve discovered along the way. Share your stories in the comments below, and let’s create a community of vinegar-powered cleaning enthusiasts! Let us know how these **vinegar cleaning hacks** worked for you!
Frequently Asked Questions (FAQs)
What type of vinegar is best for cleaning?
White distilled vinegar is generally considered the best type of vinegar for cleaning. It’s inexpensive, readily available, and has a high acidity level, making it effective at dissolving dirt, grime, and mineral deposits. Apple cider vinegar can also be used, but it’s less acidic and may leave a slight residue. Avoid using flavored vinegars, as they may contain sugars or other additives that can leave sticky residue.
Is vinegar safe to use on all surfaces?
No, vinegar is not safe to use on all surfaces. Avoid using vinegar on natural stone surfaces like marble, granite, and limestone, as the acidity can etch and damage them. It’s also best to avoid using vinegar on waxed wood furniture, as it can strip the wax finish. Additionally, vinegar can damage electronic screens, so avoid using it to clean TVs, computers, or smartphones. Always test vinegar in an inconspicuous area before using it on a new surface.
Can I mix vinegar with bleach?
Absolutely not! Mixing vinegar with bleach creates chlorine gas, which is highly toxic and can be fatal. Never mix vinegar with any other cleaning products containing bleach. Always use vinegar separately and rinse surfaces thoroughly after cleaning with vinegar before using any other cleaning products.
How do I get rid of the vinegar smell after cleaning?
The vinegar smell typically dissipates within a few hours. To speed up the process, you can open windows and doors to ventilate the area. You can also place bowls of baking soda around the room to absorb the odor. Alternatively, you can add a few drops of essential oils, like lavender or lemon, to your vinegar cleaning solution to mask the smell.
Can vinegar kill mold?
Yes, vinegar can kill some types of mold. However, it’s not as effective as bleach for killing all types of mold, particularly black mold. To kill mold with vinegar, spray undiluted vinegar onto the affected area and let it sit for an hour. Then, scrub the area with a brush and rinse with water. Be sure to wear gloves and a mask when cleaning mold, and ventilate the area well. For severe mold infestations, it’s best to consult with a professional mold remediation service.
How do I clean my coffee maker with vinegar?
To clean your coffee maker with vinegar, fill the water reservoir with a solution of equal parts vinegar and water. Run the coffee maker through a full brewing cycle. Then, run it through two more cycles with just water to rinse away any remaining vinegar. This will help to remove mineral deposits and improve the taste of your coffee.
Can I use vinegar to clean my dishwasher?
Yes, you can use vinegar to clean your dishwasher. Pour a cup of white vinegar into the bottom of the empty dishwasher and run it on a hot cycle. This will help to remove food particles, grease, and mineral deposits. You can also clean the dishwasher’s filter with vinegar to remove any buildup.
How do I clean my microwave with vinegar?
To clean your microwave with vinegar, combine equal parts vinegar and water in a microwave-safe bowl. Microwave the mixture on high for 5-10 minutes, or until the solution boils and the microwave is filled with steam. Let the microwave sit for a few minutes to allow the steam to loosen any grime. Then, carefully remove the bowl and wipe down the inside of the microwave with a clean cloth.
Can vinegar remove hard water stains?
Yes, vinegar is very effective at removing hard water stains. To remove hard water stains from faucets, showerheads, or other fixtures, soak a cloth in vinegar and wrap it around the affected area. Let it sit for an hour or two, then scrub with a brush and rinse with water. For tougher stains, you may need to repeat the process.
Is vinegar safe for septic systems?
Yes, vinegar is generally safe for septic systems. Unlike harsh chemical cleaners, vinegar is biodegradable and won’t harm the beneficial bacteria in your septic tank. However, it’s important to use vinegar in moderation, as excessive amounts can disrupt the pH balance of the septic system.
Leave a Comment