
Vinegar cleaning hacks – who knew this humble kitchen staple could be your secret weapon to a sparkling home? I’m always on the lookout for budget-friendly and eco-conscious ways to keep my house clean, and let me tell you, vinegar has become my go-to solution for tackling all sorts of messes.
For centuries, vinegar has been used for its cleaning and disinfecting properties. From ancient civilizations using it to preserve food to our grandmothers relying on it for household chores, vinegar has a rich history as a natural cleaner. It’s a testament to its effectiveness that it’s still a popular choice today!
In our modern world, we’re bombarded with harsh chemicals and expensive cleaning products. But what if I told you that you could achieve the same, if not better, results with something you probably already have in your pantry? That’s where these vinegar cleaning hacks come in. Not only are they incredibly effective, but they’re also gentle on the environment and your wallet.
I’m going to share some of my favorite DIY tricks using vinegar that will revolutionize your cleaning routine. From banishing stubborn stains to deodorizing your home, get ready to discover the amazing power of vinegar and transform your cleaning game!
Unlocking the Cleaning Power of Vinegar: My Favorite DIY Hacks
Vinegar! It’s not just for salad dressing anymore. I’ve discovered that this humble kitchen staple is a cleaning powerhouse, and I’m excited to share my favorite DIY vinegar cleaning hacks with you. It’s cheap, it’s natural, and it’s surprisingly effective. Let’s dive in!
Descaling Your Kettle with Vinegar
Hard water can wreak havoc on your kettle, leaving behind a scaly buildup that affects the taste of your tea and coffee. But don’t worry, vinegar is here to save the day!
What you’ll need:
* White vinegar
* Water
* A soft sponge or cloth
Step-by-step instructions:
1. Prepare the solution: Fill your kettle with equal parts white vinegar and water. The amount you need will depend on the size of your kettle, but aim for at least halfway full.
2. Boil the solution: Turn on your kettle and let the vinegar and water mixture come to a boil. Once it boils, let it sit for about an hour. For really stubborn scale, you can let it sit overnight. I’ve found that the longer it sits, the easier the scale is to remove.
3. Empty and rinse: Carefully pour out the vinegar solution. You might see some scale already coming loose. Rinse the kettle thoroughly with clean water, making sure to remove any remaining vinegar residue.
4. Scrub if needed: If there’s still some scale clinging on, use a soft sponge or cloth to gently scrub the inside of the kettle. Avoid using abrasive scrubbers, as they can damage the kettle’s surface.
5. Boil with fresh water: To get rid of any lingering vinegar smell, fill the kettle with fresh water and boil it again. Discard the water and repeat if necessary. Now your kettle should be sparkling clean and ready to brew your favorite hot beverages!
Cleaning Your Microwave with Vinegar
Microwaves can get pretty gross with splatters and spills. Cleaning them can be a pain, but vinegar makes it a breeze.
What you’ll need:
* White vinegar
* Water
* A microwave-safe bowl
* A clean cloth or sponge
Step-by-step instructions:
1. Prepare the vinegar solution: In a microwave-safe bowl, mix equal parts white vinegar and water (about 1 cup of each).
2. Microwave the solution: Place the bowl in the microwave and heat it on high for 5-10 minutes. The mixture should boil and create steam inside the microwave. This steam will loosen the grime and make it easier to wipe away.
3. Let it sit: After microwaving, leave the bowl inside the microwave for another 5-10 minutes. This allows the steam to continue working its magic.
4. Wipe clean: Carefully remove the bowl (it will be hot!) and use a clean cloth or sponge to wipe down the inside of the microwave. You’ll be amazed at how easily the splatters and spills come off.
5. Clean the turntable: Don’t forget to remove the turntable and wash it separately with soap and water.
6. Dry and enjoy: Once everything is clean, dry the inside of the microwave with a clean cloth. Your microwave will be sparkling clean and ready for your next meal!
Vinegar as a Fabric Softener
Did you know you can use vinegar as a natural fabric softener? It’s a great alternative to chemical-laden commercial softeners.
What you’ll need:
* White vinegar
* Your washing machine
Step-by-step instructions:
1. Add vinegar to the rinse cycle: Pour about 1/2 cup of white vinegar into the fabric softener dispenser of your washing machine.
2. Run the wash cycle as usual: Start your washing machine and let it run through its normal cycle. The vinegar will work to soften your clothes and remove any lingering detergent residue.
3. Enjoy soft, fresh laundry: Once the wash cycle is complete, your clothes will be softer and fresher than ever. Don’t worry about the vinegar smell – it will dissipate as the clothes dry.
Cleaning Showerheads with Vinegar
Showerheads can get clogged with mineral deposits, reducing water pressure and making your shower less enjoyable. Vinegar can help dissolve these deposits and restore your showerhead to its former glory.
What you’ll need:
* White vinegar
* A plastic bag (sandwich bag or larger, depending on the size of your showerhead)
* A rubber band or twist tie
* An old toothbrush or small brush
Step-by-step instructions:
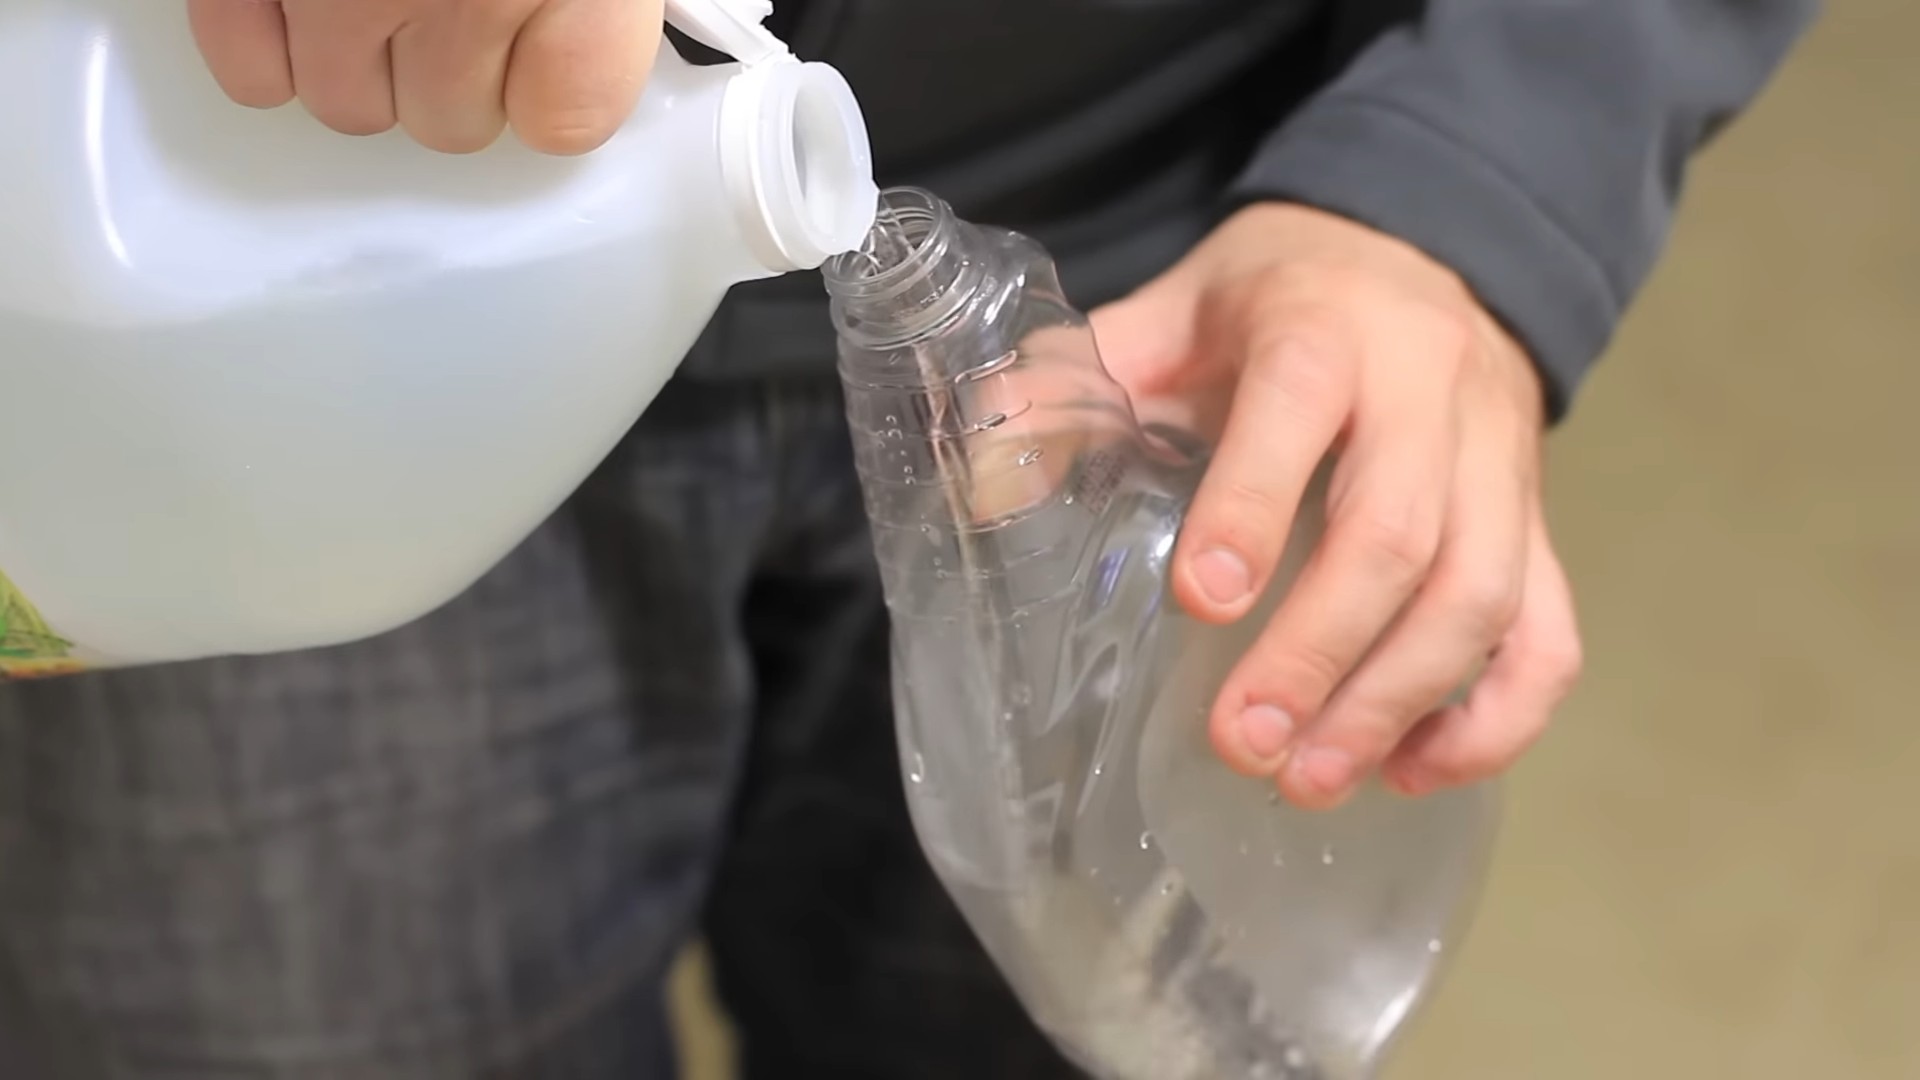
1. Fill the bag with vinegar: Pour enough white vinegar into the plastic bag to completely submerge the showerhead.
2. Attach the bag to the showerhead: Carefully place the bag over the showerhead, making sure the showerhead is fully immersed in the vinegar. Secure the bag with a rubber band or twist tie.
3. Soak overnight: Let the showerhead soak in the vinegar overnight. This will give the vinegar plenty of time to dissolve the mineral deposits.
4. Remove the bag and scrub: The next morning, remove the bag and discard the vinegar. Use an old toothbrush or small brush to scrub away any remaining mineral deposits.
5. Rinse and test: Turn on the shower and let the water run for a few minutes to rinse away any remaining vinegar and debris. Check the water pressure to see if it has improved. If necessary, repeat the process.
Cleaning Grout with Vinegar and Baking Soda
Grout can get stained and discolored over time, making your tiles look dingy. A paste of vinegar and baking soda can help brighten and clean your grout.
What you’ll need:
* White vinegar
* Baking soda
* An old toothbrush or grout brush
* Water
* A spray bottle (optional)
Step-by-step instructions:
1. Make a paste: In a small bowl, mix equal parts white vinegar and baking soda to form a paste. The mixture will fizz, so be sure to use a bowl that’s large enough to contain the reaction.
2. Apply the paste to the grout: Use an old toothbrush or grout brush to apply the paste to the grout lines. Make sure to cover all the stained or discolored areas.
3. Let it sit: Allow the paste to sit on the grout for about 10-15 minutes. This will give the vinegar and baking soda time to work their magic.
4. Scrub the grout: Use the toothbrush or grout brush to scrub the grout lines. Apply some pressure and scrub in a back-and-forth motion.
5. Rinse with water: Rinse the grout with clean water. You can use a spray bottle to spray
Vinegar! It’s not just for salad dressing anymore. I’ve discovered that this humble kitchen staple is a cleaning powerhouse, and I’m excited to share my favorite DIY vinegar cleaning hacks with you. It’s cheap, it’s natural, and it’s surprisingly effective. Let’s dive in!
Descaling Your Kettle with Vinegar
Hard water can wreak havoc on your kettle, leaving behind a scaly buildup that affects the taste of your tea and coffee. But don’t worry, vinegar is here to save the day!
What you’ll need:
* White vinegar
* Water
* A soft sponge or cloth
Step-by-step instructions:
1. Prepare the solution: Fill your kettle with equal parts white vinegar and water. The amount you need will depend on the size of your kettle, but aim for at least halfway full.
2. Boil the solution: Turn on your kettle and let the vinegar and water mixture come to a boil. Once it boils, let it sit for about an hour. For really stubborn scale, you can let it sit overnight. I’ve found that the longer it sits, the easier the scale is to remove.
3. Empty and rinse: Carefully pour out the vinegar solution. You might see some scale already coming loose. Rinse the kettle thoroughly with clean water, making sure to remove any remaining vinegar residue.
4. Scrub if needed: If there’s still some scale clinging on, use a soft sponge or cloth to gently scrub the inside of the kettle. Avoid using abrasive scrubbers, as they can damage the kettle’s surface.
5. Boil with fresh water: To get rid of any lingering vinegar smell, fill the kettle with fresh water and boil it again. Discard the water and repeat if necessary. Now your kettle should be sparkling clean and ready to brew your favorite hot beverages!
Cleaning Your Microwave with Vinegar
Microwaves can get pretty gross with splatters and spills. Cleaning them can be a pain, but vinegar makes it a breeze.
What you’ll need:
* White vinegar
* Water
* A microwave-safe bowl
* A clean cloth or sponge
Step-by-step instructions:
1. Prepare the vinegar solution: In a microwave-safe bowl, mix equal parts white vinegar and water (about 1 cup of each).
2. Microwave the solution: Place the bowl in the microwave and heat it on high for 5-10 minutes. The mixture should boil and create steam inside the microwave. This steam will loosen the grime and make it easier to wipe away.
3. Let it sit: After microwaving, leave the bowl inside the microwave for another 5-10 minutes. This allows the steam to continue working its magic.
4. Wipe clean: Carefully remove the bowl (it will be hot!) and use a clean cloth or sponge to wipe down the inside of the microwave. You’ll be amazed at how easily the splatters and spills come off.
5. Clean the turntable: Don’t forget to remove the turntable and wash it separately with soap and water.
6. Dry and enjoy: Once everything is clean, dry the inside of the microwave with a clean cloth. Your microwave will be sparkling clean and ready for your next meal!
Vinegar as a Fabric Softener
Did you know you can use vinegar as a natural fabric softener? It’s a great alternative to chemical-laden commercial softeners.
What you’ll need:
* White vinegar
* Your washing machine
Step-by-step instructions:
1. Add vinegar to the rinse cycle: Pour about 1/2 cup of white vinegar into the fabric softener dispenser of your washing machine.
2. Run the wash cycle as usual: Start your washing machine and let it run through its normal cycle. The vinegar will work to soften your clothes and remove any lingering detergent residue.
3. Enjoy soft, fresh laundry: Once the wash cycle is complete, your clothes will be softer and fresher than ever. Don’t worry about the vinegar smell – it will dissipate as the clothes dry.
Cleaning Showerheads with Vinegar
Showerheads can get clogged with mineral deposits, reducing water pressure and making your shower less enjoyable. Vinegar can help dissolve these deposits and restore your showerhead to its former glory.
What you’ll need:
* White vinegar
* A plastic bag (sandwich bag or larger, depending on the size of your showerhead)
* A rubber band or twist tie
* An old toothbrush or small brush
Step-by-step instructions:
1. Fill the bag with vinegar: Pour enough white vinegar into the plastic bag to completely submerge the showerhead.
2. Attach the bag to the showerhead: Carefully place the bag over the showerhead, making sure the showerhead is fully immersed in the vinegar. Secure the bag with a rubber band or twist tie.
3. Soak overnight: Let the showerhead soak in the vinegar overnight. This will give the vinegar plenty of time to dissolve the mineral deposits.
4. Remove the bag and scrub: The next morning, remove the bag and discard the vinegar. Use an old toothbrush or small brush to scrub away any remaining mineral deposits.
5. Rinse and test: Turn on the shower and let the water run for a few minutes to rinse away any remaining vinegar and debris. Check the water pressure to see if it has improved. If necessary, repeat the process.
Cleaning Grout with Vinegar and Baking Soda
Grout can get stained and discolored over time, making your tiles look dingy. A paste of vinegar and baking soda can help brighten and clean your grout.
What you’ll need:
* White vinegar
* Baking soda
* An old toothbrush or grout brush
* Water
* A spray bottle (optional)
Step-by-step instructions:
1. Make a paste: In a small bowl, mix equal parts white vinegar and baking soda to form a paste. The mixture will fizz, so be sure to use a bowl that’s large enough to contain the reaction.
2. Apply the paste to the grout: Use an old toothbrush or grout brush to apply the paste to the grout lines. Make sure to cover all the stained or discolored areas.
3. Let it sit: Allow the paste to sit on the grout for about 10-15 minutes. This will give the vinegar and baking soda time to work their magic.
4. Scrub the grout: Use the toothbrush or grout brush to scrub the grout lines. Apply some pressure and scrub in a back-and-forth motion.
5. Rinse with water: Rinse the grout with clean water. You can use a spray bottle to spray the grout with water, or you can use a damp sponge to wipe away the paste.
6. Dry and admire: Dry the grout with a clean cloth. Your grout should now be brighter and cleaner than before!
Cleaning Windows with Vinegar
Forget expensive window cleaners! Vinegar is a fantastic and natural way to get streak-free windows.
What you’ll need:
* White vinegar
* Water
* A spray bottle
* A clean microfiber cloth or paper towels
Step-by-step instructions:
1. Prepare the cleaning solution: In a spray bottle, mix equal parts white vinegar and water.
2. Spray the windows: Spray the vinegar solution onto the windows, making sure to cover the entire surface.
3. Wipe clean: Use a clean microfiber cloth or paper towels to wipe the windows clean. Wipe in a circular motion, then finish with vertical strokes to avoid streaks.
4. Dry and enjoy: Let the windows air dry. You’ll be amazed at how sparkling clean and streak-free they are!
Removing Stickers and Labels with Vinegar
Stubborn stickers and labels can be a real pain to remove. Vinegar can help loosen the adhesive and make them easier to peel off.
What you’ll need:
* White vinegar
* A cloth or paper towel
* A scraper or credit card (optional)
Step-by-step instructions:
1. Soak the sticker with vinegar: Soak a cloth or paper towel with white vinegar and place it over the sticker or label.
2. Let it sit: Let the vinegar-soaked cloth sit on the sticker for about 10-15 minutes. This will allow the vinegar to penetrate the adhesive.
3. Peel or scrape: After soaking, try to peel off the sticker or label. If it’s still stubborn, use a scraper or credit card to gently lift the edges and peel it away.
4. Remove residue: If there’s any sticky residue left behind, soak a clean cloth with
Conclusion
So, there you have it! Ditching harsh chemicals and embracing the power of vinegar cleaning hacks is not just a trend; it’s a game-changer for your home and your well-being. We’ve explored how this humble pantry staple can tackle everything from stubborn grime in your bathroom to lingering odors in your kitchen, all while being gentle on the environment and your wallet.
Why is this a must-try? Because it’s effective, affordable, and eco-friendly. You’re not just cleaning; you’re making a conscious choice to reduce your exposure to potentially harmful chemicals and minimize your environmental impact. Plus, the satisfaction of knowing you’re using a natural solution to achieve sparkling results is incredibly rewarding.
But the beauty of vinegar cleaning hacks lies in their versatility. Feel free to experiment and adapt these techniques to suit your specific needs and preferences. For instance, if you find the scent of vinegar too strong, infuse it with citrus peels or herbs like lavender or rosemary for a more pleasant aroma. You can also adjust the concentration of vinegar depending on the severity of the cleaning task. For light cleaning, a diluted solution may suffice, while tougher stains may require a stronger concentration.
Consider these variations to elevate your vinegar cleaning experience:
* Infused Vinegar: As mentioned, adding citrus peels (lemon, orange, grapefruit) or herbs (lavender, rosemary, thyme) to your vinegar solution not only masks the vinegar scent but also adds extra cleaning power. Citrus peels contain natural oils that help cut through grease and grime, while herbs offer antibacterial and antifungal properties. Simply add the peels or herbs to a jar of vinegar and let it steep for a few weeks before straining and using.
* Vinegar and Baking Soda Paste: For particularly stubborn stains or baked-on messes, create a paste by mixing vinegar and baking soda. Apply the paste to the affected area, let it sit for a few minutes, and then scrub gently. The combination of vinegar and baking soda creates a fizzing action that helps lift dirt and grime.
* Vinegar and Essential Oils: Add a few drops of your favorite essential oils to your vinegar cleaning solution for an extra boost of fragrance and cleaning power. Tea tree oil, eucalyptus oil, and lemon oil are all excellent choices for their antibacterial and antifungal properties.
* Vinegar as a Fabric Softener: Add 1/2 cup of white vinegar to your washing machine’s fabric softener dispenser for softer, brighter clothes. Vinegar helps to remove detergent residue and soften fabrics naturally.
* Vinegar for Cleaning Windows and Mirrors: Mix equal parts vinegar and water in a spray bottle and use it to clean windows and mirrors for a streak-free shine. Vinegar helps to dissolve dirt and grime without leaving behind any residue.
We’re confident that once you experience the cleaning prowess of vinegar, you’ll be hooked. It’s a simple, effective, and sustainable way to keep your home clean and healthy.
So, what are you waiting for? Grab a bottle of vinegar and start experimenting! We encourage you to try these DIY tricks and share your experiences with us. Let us know which hacks worked best for you, any variations you tried, and any tips you have to share. Your feedback will help us create an even more comprehensive guide to vinegar cleaning hacks and inspire others to embrace the power of natural cleaning. Share your before and after photos, your favorite vinegar cleaning recipes, and any creative uses you’ve discovered. Let’s build a community of vinegar cleaning enthusiasts!
Frequently Asked Questions
Is vinegar safe to use on all surfaces?
While vinegar is a versatile cleaner, it’s essential to exercise caution on certain surfaces. Avoid using vinegar on natural stone surfaces like marble, granite, and limestone, as the acidity can etch and damage them. It’s also best to avoid using vinegar on waxed furniture, as it can strip the wax finish. When in doubt, test vinegar on a small, inconspicuous area before applying it to the entire surface. Also, avoid mixing vinegar with bleach, as this can create toxic chlorine gas.
What type of vinegar is best for cleaning?
White distilled vinegar is the most commonly recommended type of vinegar for cleaning. It’s inexpensive, readily available, and has a high acidity level, making it effective at dissolving dirt, grime, and mineral deposits. Avoid using other types of vinegar, such as apple cider vinegar or balsamic vinegar, as they may contain sugars or coloring agents that can leave behind a sticky residue or stain surfaces.
How do I get rid of the vinegar smell after cleaning?
The vinegar smell typically dissipates within a few hours. To speed up the process, you can open windows and doors to ventilate the area. You can also add a few drops of essential oils to your vinegar cleaning solution to mask the vinegar scent. Another option is to place a bowl of baking soda in the room to absorb odors.
Can vinegar kill mold?
Yes, vinegar can kill mold. Vinegar is a mild acid that can effectively kill many types of mold. To kill mold with vinegar, spray undiluted white distilled vinegar onto the affected area and let it sit for an hour. Then, wipe the area clean with a damp cloth. For stubborn mold growth, you may need to repeat the process several times. However, it’s important to note that vinegar may not be effective against all types of mold, and in some cases, professional mold remediation may be necessary.
How do I clean my coffee maker with vinegar?
Cleaning your coffee maker with vinegar is a simple and effective way to remove mineral deposits and improve its performance. To clean your coffee maker, fill the water reservoir with equal parts white distilled vinegar and water. Run the coffee maker through a full brewing cycle. Then, run the coffee maker through two or three cycles with fresh water to rinse away any remaining vinegar.
Can I use vinegar to clean my dishwasher?
Yes, you can use vinegar to clean your dishwasher. To clean your dishwasher with vinegar, place a cup of white distilled vinegar in a dishwasher-safe bowl on the top rack of the dishwasher. Run the dishwasher on a hot cycle. The vinegar will help to dissolve mineral deposits, remove food particles, and freshen the dishwasher.
How do I clean my microwave with vinegar?
Cleaning your microwave with vinegar is a quick and easy way to remove splatters and odors. To clean your microwave, mix equal parts white distilled vinegar and water in a microwave-safe bowl. Microwave the mixture for 5-10 minutes, or until the microwave is steamy. Let the bowl sit in the microwave for a few minutes to allow the steam to loosen any stuck-on food particles. Then, carefully remove the bowl and wipe down the inside of the microwave with a damp cloth.
Is vinegar safe for septic systems?
Yes, vinegar is generally safe for septic systems. Unlike harsh chemical cleaners, vinegar is a natural substance that won’t harm the beneficial bacteria in your septic tank. However, it’s important to use vinegar in moderation, as excessive amounts could potentially disrupt the balance of your septic system.
Can I use vinegar to clean my washing machine?
Yes, you can use vinegar to clean your washing machine. To clean your washing machine with vinegar, add 2 cups of white distilled vinegar to the detergent dispenser. Run the washing machine on a hot cycle. The vinegar will help to remove detergent residue, freshen the washing machine, and kill bacteria.
How often should I clean with vinegar?
The frequency of cleaning with vinegar depends on your individual needs and preferences. For general cleaning tasks, such as wiping down countertops and cleaning windows, you can use vinegar as often as needed. For deeper cleaning tasks, such as cleaning your coffee maker or dishwasher, you can use vinegar once a month or as needed.
Leave a Comment