
Water saving tomato gardening is not just a trend; it’s a necessity, and I’m thrilled to share some fantastic DIY tricks that will help you grow juicy, delicious tomatoes while conserving precious water! For centuries, tomatoes have been a staple in cuisines worldwide, from the sun-drenched fields of Italy to the vibrant gardens of Mexico. But with increasing concerns about water scarcity, especially during those hot summer months, we need to adapt our gardening practices.
Have you ever felt guilty watching water cascade from your hose, knowing much of it evaporates before reaching your thirsty tomato plants? Or perhaps you’ve struggled with inconsistent watering, leading to blossom end rot and disappointing harvests? I know I have! That’s why I’ve compiled these simple, yet effective, DIY hacks that will revolutionize your water saving tomato gardening efforts.
This article is packed with practical tips and tricks that anyone can implement, regardless of their gardening experience. From creating DIY self-watering containers to mastering the art of mulching, you’ll discover how to minimize water waste, maximize your tomato yield, and contribute to a more sustainable future. So, grab your gardening gloves, and let’s dive into the world of water-wise tomato growing!
Wassersparende Tomatenzucht: Dein DIY-Guide für eine üppige Ernte
Hallo liebe Gartenfreunde! Ich zeige euch heute, wie ihr mit einfachen Mitteln und ein bisschen Kreativität eure Tomatenpflanzen so bewässern könnt, dass ihr Wasser spart und trotzdem eine reiche Ernte einfahrt. Wir alle wissen, wie durstig Tomaten sein können, besonders an heißen Sommertagen. Aber keine Sorge, mit diesen DIY-Tricks könnt ihr den Wasserverbrauch deutlich reduzieren und gleichzeitig eure Pflanzen glücklich machen.
Warum Wassersparen bei Tomaten wichtig ist
Bevor wir loslegen, kurz ein paar Worte, warum das Ganze überhaupt wichtig ist. Wassersparen schont nicht nur die Umwelt, sondern auch euren Geldbeutel. Außerdem fördert eine gezielte Bewässerung die Gesundheit der Pflanzen und kann sogar den Geschmack der Tomaten verbessern. Denn wenn die Pflanzen nicht ständig im Wasser stehen, entwickeln sie kräftigere Wurzeln und können Nährstoffe besser aufnehmen.
Die Grundlagen: Was Tomaten wirklich brauchen
Tomaten sind Starkzehrer und brauchen viel Wasser, aber eben nicht ständig. Wichtig ist, dass das Wasser direkt an die Wurzeln gelangt und nicht an die Blätter, um Pilzkrankheiten vorzubeugen. Außerdem sollte der Boden zwischen den Wassergaben leicht antrocknen, um die Wurzelbildung anzuregen.
DIY-Bewässerungsmethoden für Tomaten
Hier sind ein paar meiner Lieblingsmethoden, die ich selbst ausprobiert habe und die wirklich gut funktionieren:
* **Die Tonkrug-Bewässerung (Ollas):** Eine uralte Methode, die super effektiv ist.
* **Die PET-Flaschen-Bewässerung:** Einfach, günstig und schnell umzusetzen.
* **Die Tropfschlauch-Bewässerung:** Ideal für größere Tomatenbeete.
* **Mulchen:** Eine einfache, aber wirkungsvolle Methode, um die Feuchtigkeit im Boden zu halten.
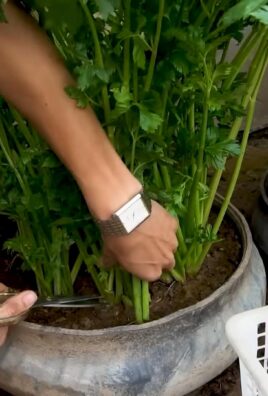
Die Tonkrug-Bewässerung (Ollas) – Schritt für Schritt
Diese Methode ist besonders gut geeignet, wenn ihr eure Tomaten im Gartenbeet oder in großen Töpfen anbaut. Die Tonkrüge geben das Wasser langsam und gezielt an die Wurzeln ab.
Materialien, die du brauchst:
* Unglasierte Tonkrüge (am besten mit einem Fassungsvermögen von 2-5 Litern, je nach Größe der Pflanzen)
* Einen Deckel für die Krüge (z.B. einen flachen Stein oder eine Tonscherbe)
* Bohrmaschine mit Steinbohrer (optional, falls du die Krüge verbinden möchtest)
* Sand oder Kies
* Gartenerde
Schritt-für-Schritt-Anleitung:
1. **Vorbereitung der Tonkrüge:** Zuerst solltet ihr die Tonkrüge gründlich reinigen. Wenn ihr mehrere Krüge miteinander verbinden möchtet (was besonders bei größeren Beeten sinnvoll ist), bohrt ihr mit dem Steinbohrer Löcher in die Seiten der Krüge. Achtet darauf, dass die Löcher nicht zu groß sind, damit das Wasser nicht zu schnell ausläuft.
2. **Einsetzen der Tonkrüge:** Grabt ein Loch in der Nähe eurer Tomatenpflanze (ca. 10-15 cm entfernt), das so tief ist, dass der Tonkrug bis zum Hals im Boden versenkt werden kann.
3. **Befüllen des Lochs:** Füllt das Loch mit etwas Sand oder Kies, um eine gute Drainage zu gewährleisten.
4. **Einsetzen des Tonkrugs:** Setzt den Tonkrug in das Loch und füllt den Zwischenraum mit Gartenerde auf. Drückt die Erde gut an, damit der Krug stabil steht.
5. **Befüllen des Tonkrugs:** Füllt den Tonkrug mit Wasser. Achtet darauf, dass die Erde um den Krug herum feucht ist.
6. **Abdecken des Tonkrugs:** Legt einen Deckel auf den Tonkrug, um Verdunstung zu vermeiden und zu verhindern, dass Insekten hineinfallen.
7. **Regelmäßige Kontrolle:** Kontrolliert regelmäßig den Wasserstand im Tonkrug und füllt ihn bei Bedarf nach. Je nach Wetterlage und Größe der Pflanze müsst ihr den Krug alle paar Tage oder einmal pro Woche auffüllen.
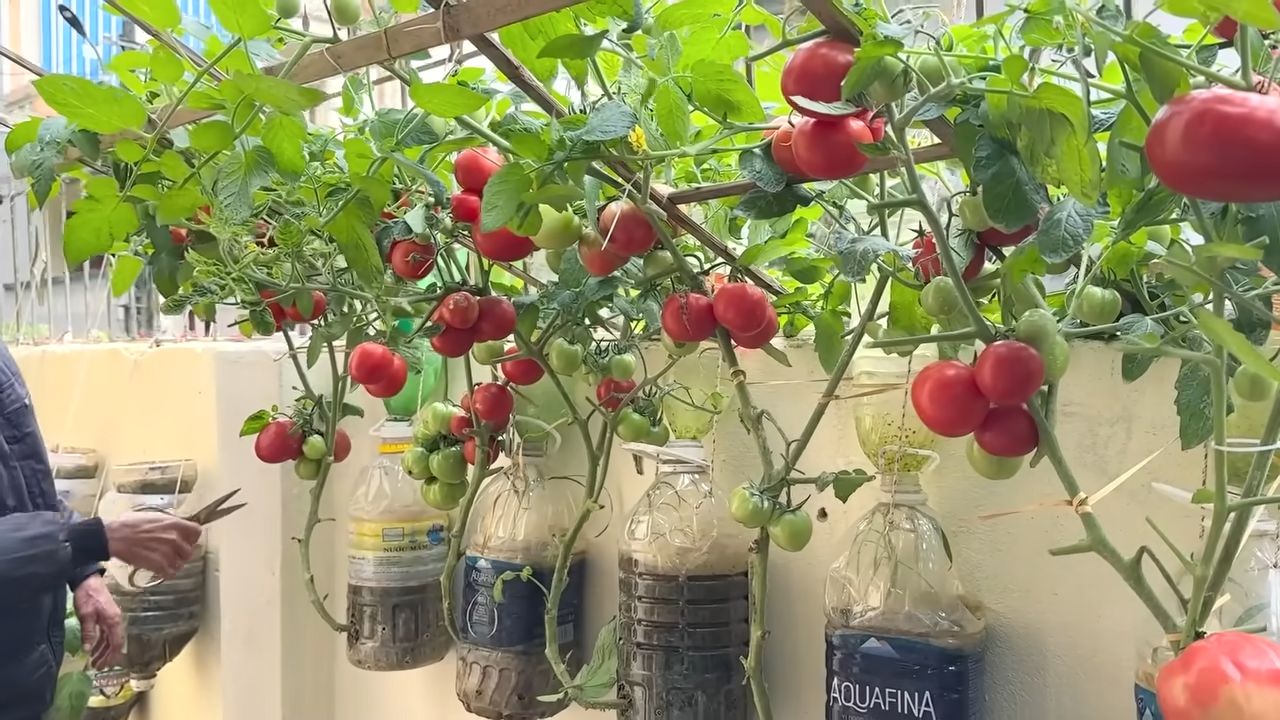
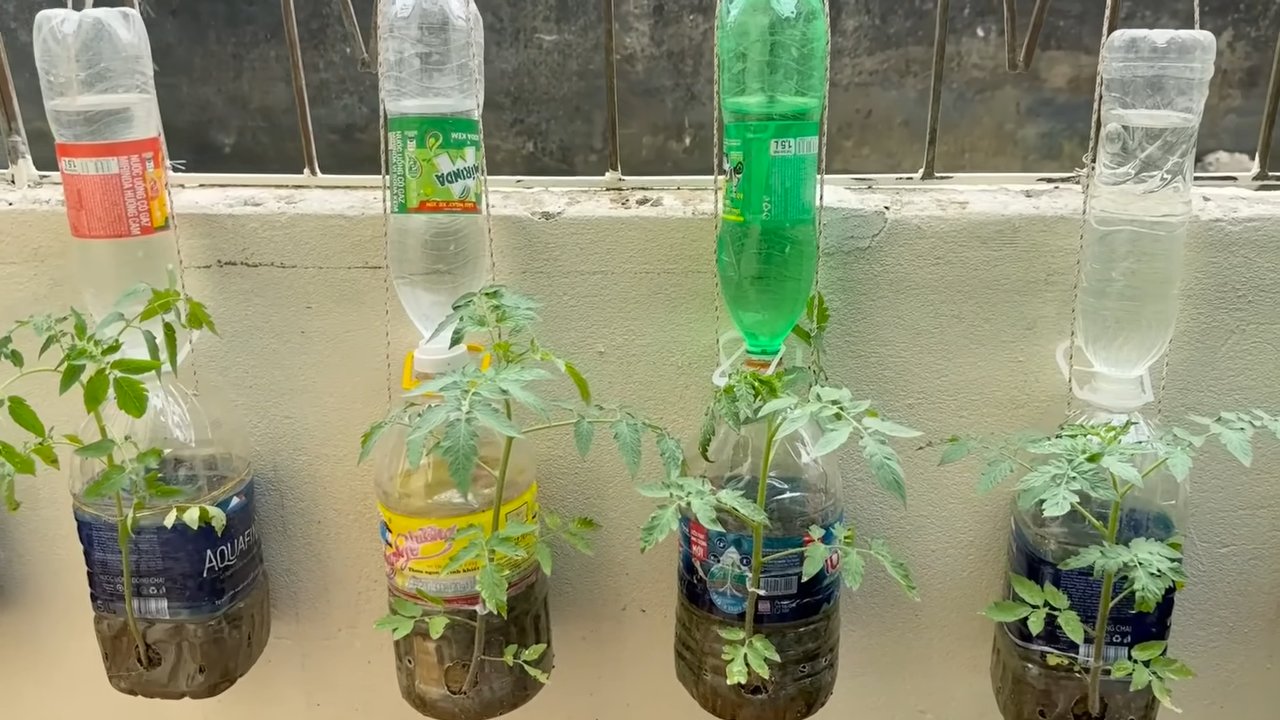
Die PET-Flaschen-Bewässerung – Einfach und genial
Diese Methode ist ideal für alle, die es schnell und unkompliziert mögen. Sie eignet sich sowohl für Tomaten im Gartenbeet als auch für Tomaten in Töpfen.
Materialien, die du brauchst:
* PET-Flaschen (1,5 oder 2 Liter)
* Messer oder Schere
* Nagel oder Schraubenzieher
* Gartenerde
Schritt-für-Schritt-Anleitung:
1. **Vorbereitung der PET-Flasche:** Schneidet den Boden der PET-Flasche ab. Achtet darauf, dass der Schnitt sauber ist, damit ihr euch nicht verletzt.
2. **Löcher bohren:** Stecht mit dem Nagel oder Schraubenzieher mehrere kleine Löcher in den Deckel der PET-Flasche. Die Löcher sollten nicht zu groß sein, damit das Wasser langsam austreten kann.
3. **Einsetzen der PET-Flasche:** Grabt ein Loch in der Nähe eurer Tomatenpflanze (ca. 5-10 cm entfernt), das so tief ist, dass die PET-Flasche bis zum Hals im Boden versenkt werden kann.
4. **Einsetzen der Flasche:** Setzt die PET-Flasche mit dem Deckel nach unten in das Loch.
5. **Befüllen des Lochs:** Füllt den Zwischenraum mit Gartenerde auf. Drückt die Erde gut an, damit die Flasche stabil steht.
6. **Befüllen der PET-Flasche:** Füllt die PET-Flasche mit Wasser.
7. **Regelmäßige Kontrolle:** Kontrolliert regelmäßig den Wasserstand in der PET-Flasche und füllt sie bei Bedarf nach.
**Variante:** Ihr könnt die PET-Flasche auch kopfüber in den Boden stecken, ohne den Boden abzuschneiden. In diesem Fall müsst ihr den Deckel etwas lockern, damit das Wasser austreten kann. Diese Variante ist besonders gut geeignet, wenn ihr die Flasche nicht ständig nachfüllen wollt.
Die Tropfschlauch-Bewässerung – Für größere Tomatenbeete
Wenn ihr ein größeres Tomatenbeet habt, ist die Tropfschlauch-Bewässerung eine sehr effiziente Methode, um Wasser zu sparen. Die Tropfschläuche geben das Wasser direkt an die Wurzeln ab und verhindern so Verdunstungsverluste.
Materialien, die du brauchst:
* Tropfschlauch (in der benötigten Länge)
* Anschlussstücke für den Wasserhahn
* Endstopfen für den Tropfschlauch
* Heringe oder Erdanker (zum Fixieren des Tropfschlauchs)
* Druckminderer (optional, aber empfehlenswert)
Schritt-für-Schritt-Anleitung:
1. **Verlegen des Tropfschlauchs:** Verlegt den Tropfschlauch entlang eurer Tomatenreihen. Achtet darauf, dass der Schlauch in der Nähe der Pflanzen verläuft, damit das Wasser direkt an die Wurzeln gelangt.
2. **Fixieren des Tropfschlauchs:** Fixiert den Tropfschlauch mit Heringen oder Erdankern, damit er nicht verrutscht.
3. **Anschließen des Tropfschlauchs:** Schließt den Tropfschlauch mit den Anschlussstücken an den Wasserhahn an. Wenn ihr einen Druckminderer verwendet, schließt ihr diesen zwischen Wasserhahn und Tropfschlauch an.
4. **Verschließen des Tropfschlauchs:** Verschließt das Ende des Tropfschlauchs mit einem Endstopfen.
5. **Testlauf:** Öffnet den Wasserhahn und überprüft, ob das Wasser gleichmäßig aus den Tropfstellen austritt.
6. **Regulierung der Bewässerung:** Reguliert die Bewässerung je nach Bedarf eurer Pflanzen. Am besten bewässert ihr früh morgens oder spät abends, um Verdunstungsverluste zu minimieren.
Mulchen – Der einfache Feuchtigkeitsbooster
Mulchen ist eine einfache, aber sehr effektive Methode, um die Feuchtigkeit im Boden zu halten und das Wachstum von Unkraut zu unterdrücken.
Materialien, die du brauchst:
* Mulchmaterial (z.B. Stroh, Holzhackschnitzel, Rasenschnitt, Laub)
Schritt-für-Schritt-Anleitung:
1. **Vorbereitung des Bodens:** Entfernt Unkraut
Conclusion
So, there you have it! This simple yet incredibly effective water-saving tomato gardening trick is more than just a gardening hack; it’s a pathway to a more sustainable and bountiful harvest. We’ve explored how burying your tomato plants deeper, coupled with strategic watering techniques, can drastically reduce water consumption while simultaneously boosting your plants’ health and productivity.
Why is this a must-try? Because it addresses two critical aspects of successful tomato growing: efficient water usage and robust root development. By burying the stem, you’re essentially creating a network of roots along the buried portion, allowing the plant to absorb more nutrients and water from a wider area. This translates to stronger, healthier plants that are better equipped to withstand drought conditions and produce a larger yield of delicious tomatoes. Furthermore, by focusing your watering efforts directly at the base of the plant, you minimize water loss through evaporation and prevent the spread of soilborne diseases that can plague tomato plants.
But the beauty of this method lies in its adaptability. Feel free to experiment with different variations to suit your specific climate and soil conditions. For instance, if you live in an area with heavy clay soil, consider amending the soil around the buried stem with compost or other organic matter to improve drainage. You can also try adding a layer of mulch around the base of the plant to further conserve moisture and suppress weeds. Another variation is to use different types of organic matter when planting. Some gardeners swear by adding crushed eggshells for calcium, while others incorporate banana peels for potassium. The possibilities are endless!
Don’t be afraid to get creative and tailor this water-saving tomato gardening technique to your own unique gardening style. The key is to observe your plants closely and make adjustments as needed. Pay attention to the color of the leaves, the growth rate of the plant, and the overall health of the tomatoes. These observations will provide valuable insights into what’s working and what needs to be tweaked.
We are confident that this method will revolutionize your tomato gardening experience. Imagine harvesting buckets of juicy, flavorful tomatoes while knowing that you’re doing your part to conserve water and protect the environment. It’s a win-win situation!
Now, it’s your turn to put this trick to the test. We encourage you to try this water-saving tomato gardening method in your own garden and share your experiences with us. Let us know what works best for you, what challenges you encounter, and any tips or tricks you discover along the way. Together, we can create a community of gardeners who are committed to sustainable and productive tomato growing. Share your photos, stories, and questions in the comments section below. We can’t wait to hear from you! Happy gardening!
Frequently Asked Questions (FAQ)
Q: How deep should I bury my tomato plants?
A: The general recommendation is to bury approximately two-thirds of the tomato plant’s stem. Remove the lower leaves from the stem before planting, leaving only the top few sets of leaves above the soil line. The deeper you bury the stem, the more roots the plant will develop, leading to a stronger and more resilient plant. However, avoid burying the leaves, as this can lead to rot.
Q: What type of soil is best for this method?
A: While this method works well with most soil types, it’s essential to ensure good drainage. If you have heavy clay soil, amend it with compost, peat moss, or other organic matter to improve drainage and aeration. This will prevent the roots from becoming waterlogged and promote healthy growth. Sandy soil may require more frequent watering, even with this method, as it tends to drain quickly.
Q: How often should I water my tomato plants using this method?
A: The frequency of watering will depend on several factors, including your climate, soil type, and the size of your plants. As a general rule, water deeply and infrequently, allowing the soil to dry out slightly between waterings. Check the soil moisture by sticking your finger about an inch or two into the soil. If it feels dry, it’s time to water. When you do water, focus on watering the base of the plant, avoiding wetting the foliage. This helps to prevent fungal diseases.
Q: Can I use this method for all types of tomato plants?
A: Yes, this method is suitable for all types of tomato plants, including determinate (bush) and indeterminate (vining) varieties. However, indeterminate varieties, which tend to grow taller and require staking or caging, may benefit even more from the extra root development provided by this method.
Q: What if my tomato plants are already established? Can I still use this method?
A: While it’s best to implement this method when planting new tomato plants, you can still benefit from it with established plants. Carefully dig around the base of the plant, exposing some of the stem. Gently lay the stem down horizontally and cover it with soil, leaving the top portion of the plant exposed. Water well and monitor the plant closely. It may take a few weeks for the buried stem to develop new roots, but you should eventually see an improvement in the plant’s health and vigor.
Q: What are the benefits of using mulch with this method?
A: Mulch plays a crucial role in conserving moisture, suppressing weeds, and regulating soil temperature. Apply a layer of organic mulch, such as straw, wood chips, or shredded leaves, around the base of your tomato plants. This will help to reduce water evaporation, keep the soil cool during hot weather, and prevent weeds from competing with your tomato plants for nutrients and water.
Q: Can I use fertilizer with this method?
A: Yes, fertilizing your tomato plants is essential for optimal growth and fruit production. Use a balanced fertilizer specifically formulated for tomatoes, following the instructions on the package. You can also incorporate organic fertilizers, such as compost or worm castings, into the soil when planting. Avoid over-fertilizing, as this can lead to excessive foliage growth and reduced fruit production.
Q: What are some common problems I might encounter when using this method, and how can I address them?
A: One common problem is stem rot, which can occur if the buried stem is constantly wet. To prevent this, ensure good drainage and avoid overwatering. Another potential issue is pests, such as cutworms, which can damage the stem of young plants. Protect your plants by using cutworm collars or applying an organic insecticide. Finally, be sure to monitor your plants regularly for signs of disease, such as leaf spots or wilting, and take appropriate action if necessary.
Q: How does this method help with water conservation?
A: This method promotes water conservation in several ways. First, by burying the stem, you encourage the development of a larger root system, which allows the plant to access water from a wider area. Second, by focusing your watering efforts directly at the base of the plant, you minimize water loss through evaporation. Third, by using mulch, you further reduce water evaporation and help to keep the soil moist. Overall, this method can significantly reduce the amount of water needed to grow healthy and productive tomato plants.
Leave a Comment