
Water spinach self-watering: Ever dreamt of effortlessly growing lush, vibrant water spinach without the constant worry of watering? I know I have! Imagine a world where you can harvest fresh, delicious greens right from your backyard, even if you’re a busy bee or tend to forget your daily watering duties. This DIY guide is your passport to that world!
Water spinach, also known as Ong Choy, has a rich history, deeply rooted in Asian cuisine and culture. For generations, it’s been a staple in stir-fries, soups, and salads, prized for its delicate flavor and nutritional benefits. But traditionally, growing it required consistent moisture, a challenge for many home gardeners.
That’s where this ingenious self-watering trick comes in. Let’s face it, life gets hectic! We all have those moments when our plants suffer from neglect, leading to wilted leaves and disappointing harvests. This DIY project eliminates that worry. By creating a simple self-watering system, you’ll ensure your water spinach receives the consistent hydration it needs to thrive, even when you’re away or simply forget. Plus, it’s a fantastic way to conserve water and reduce your environmental footprint. So, are you ready to unlock the secret to effortless water spinach self-watering and enjoy a bountiful harvest? Let’s dive in!
DIY Self-Watering Water Spinach Container: A Beginner’s Guide
Hey there, fellow gardening enthusiasts! I’m thrilled to share my favorite way to grow lush, vibrant water spinach (also known as Ong Choy or Kang Kong) right at home, even if you’re short on time or tend to forget watering. This DIY self-watering container is a game-changer, ensuring your water spinach thrives with minimal effort. Let’s dive in!
What You’ll Need
Before we get started, gather these supplies. Don’t worry, most of them are easily accessible and budget-friendly:
* Two plastic containers: One large (at least 10 gallons) and one smaller that can fit inside the larger one with a few inches of space all around. Think of a large storage tote and a smaller, sturdy bucket.
* Drill with various sized drill bits.
* PVC pipe (about 1-2 inches in diameter and long enough to reach from the bottom of the larger container to a few inches above the top).
* PVC pipe cap (to fit the PVC pipe).
* Landscape fabric or burlap.
* Potting mix (specifically formulated for vegetables).
* Water spinach seeds or cuttings.
* Water.
* Measuring tape or ruler.
* Marker or pen.
* Gravel or small rocks (optional, but recommended for drainage).
* Zip ties (optional, for securing the landscape fabric).
Understanding the Self-Watering System
The beauty of this system lies in its simplicity. The larger container acts as a reservoir, holding water that the water spinach roots can access as needed. The smaller container sits inside, holding the potting mix and plants. The PVC pipe acts as a fill tube, allowing you to easily replenish the water in the reservoir. The landscape fabric prevents the soil from washing into the reservoir.
Building Your Self-Watering Container: Step-by-Step
Alright, let’s get our hands dirty! Follow these steps carefully, and you’ll have your self-watering water spinach container ready in no time.
1. Prepare the Larger Container (Reservoir):
* First, clean the larger container thoroughly with soap and water. This is important to remove any residue that could harm your plants.
* Next, we need to create an overflow hole. This prevents the reservoir from becoming waterlogged during heavy rain. Measure about 2-3 inches from the bottom of the container and mark a spot.
* Using a drill bit slightly larger than your PVC pipe, drill a hole at the marked spot. This will be our overflow drain.
* Now, let’s create a fill tube opening. Choose a spot on the side of the container near the top. Drill a hole large enough to accommodate the PVC pipe snugly.
2. Prepare the Smaller Container (Planting Bed):
* Clean the smaller container as well.
* This container needs drainage holes to allow the water spinach roots to access the reservoir. Using a drill bit (around 1/4 inch), drill several holes (about 10-15) evenly spaced across the bottom of the container.
* Consider drilling a few holes on the lower sides of the container as well, just above where the bottom will sit inside the larger container. This will allow for better water wicking.
3. Assemble the Fill Tube:
* Take your PVC pipe and attach the PVC pipe cap to one end. This cap will prevent soil from entering the pipe and clogging it.
* Insert the uncapped end of the PVC pipe through the hole you drilled near the top of the larger container. The capped end should rest on the bottom of the container.
* Make sure the pipe is secure and doesn’t wobble. You can use waterproof sealant around the hole if you want a more permanent fix, but it’s usually not necessary.
4. Line the Planting Bed:
* Cut a piece of landscape fabric or burlap large enough to line the inside of the smaller container. This fabric will act as a barrier, preventing the potting mix from washing into the reservoir while still allowing water to pass through.
* Place the fabric inside the smaller container, making sure it covers the bottom and sides. You can use zip ties to secure the fabric to the rim of the container if desired.
5. Add Drainage Layer (Optional but Recommended):
* Pour a layer of gravel or small rocks (about 1-2 inches deep) into the bottom of the larger container. This will improve drainage and prevent the smaller container from sitting directly in the water.
6. Position the Planting Bed:
* Carefully place the smaller container (lined with landscape fabric) inside the larger container, on top of the gravel layer (if used).
* Make sure the PVC pipe is accessible and not obstructed by the smaller container.
7. Fill with Potting Mix:
* Now, it’s time to fill the smaller container with potting mix. Use a high-quality potting mix specifically formulated for vegetables.
* Fill the container almost to the top, leaving about an inch or two of space.
* Gently press down on the potting mix to remove any air pockets.
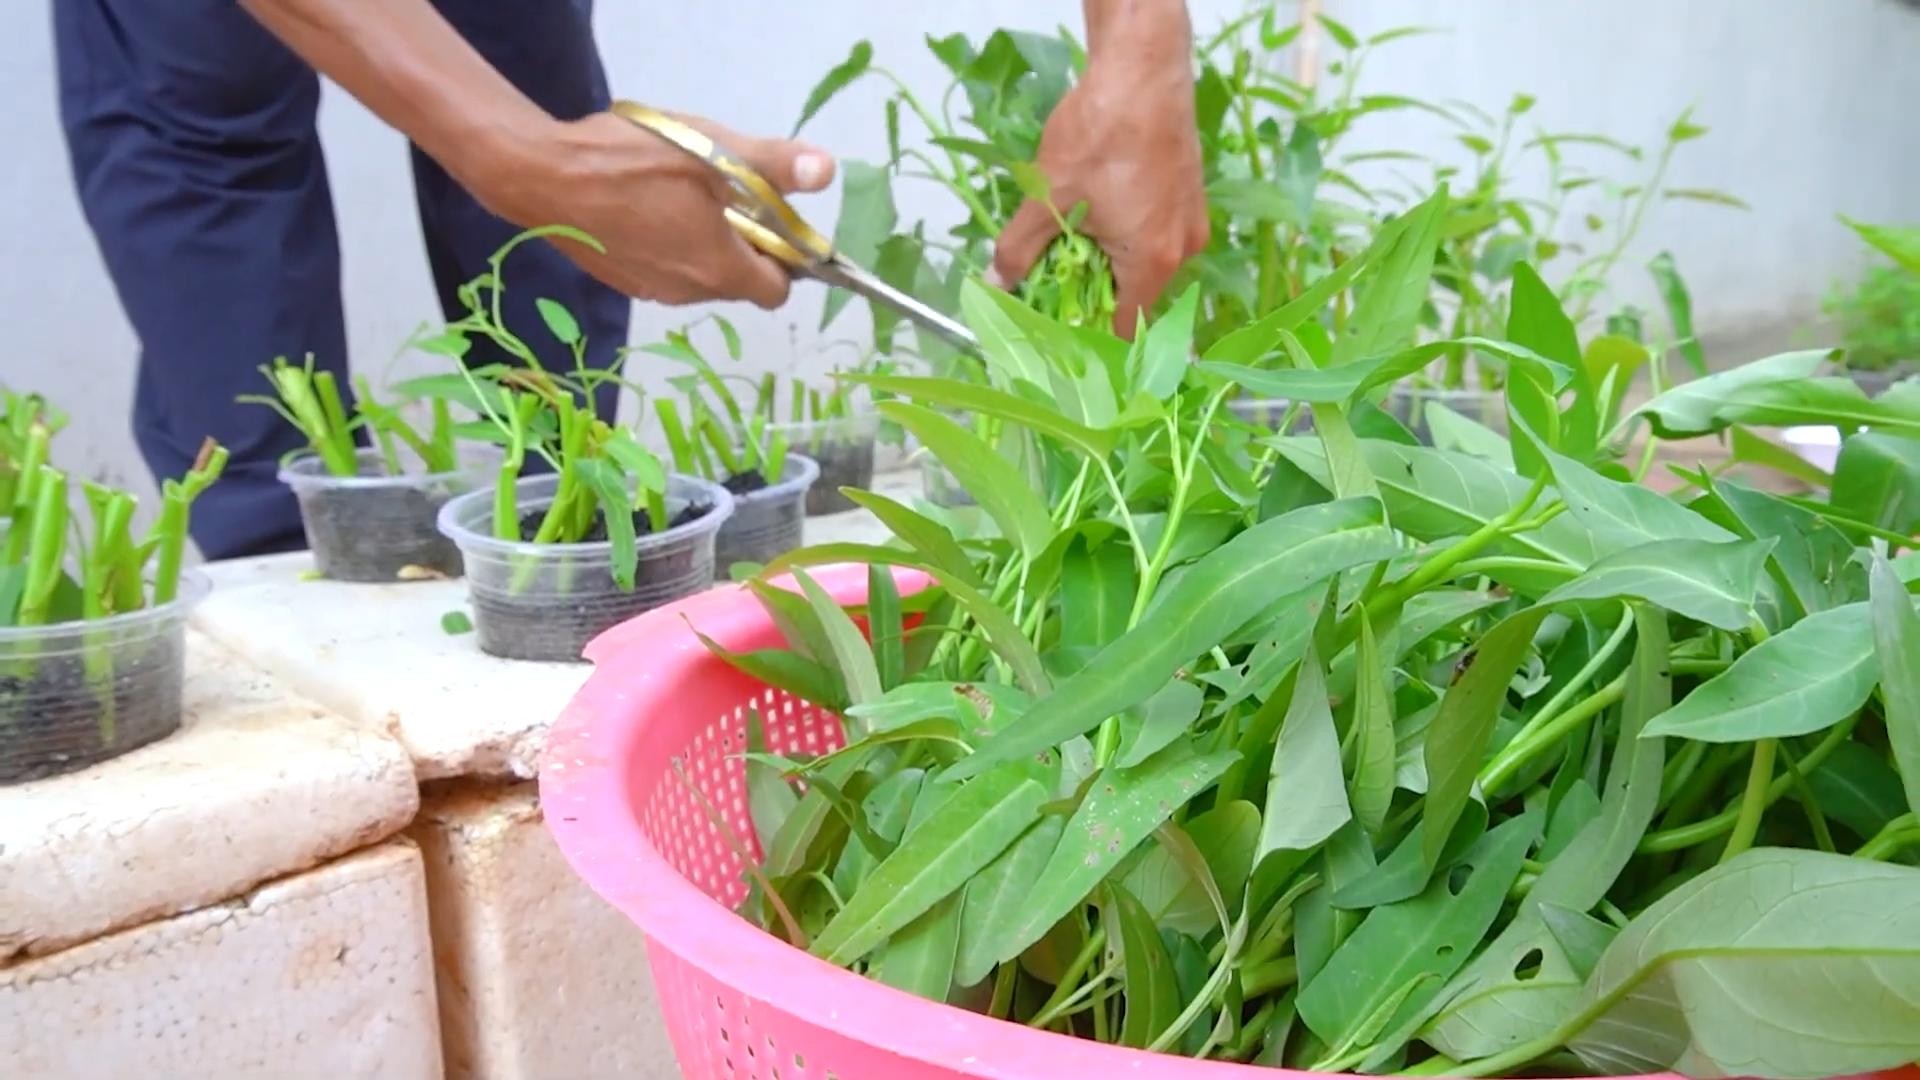
8. Plant Your Water Spinach:
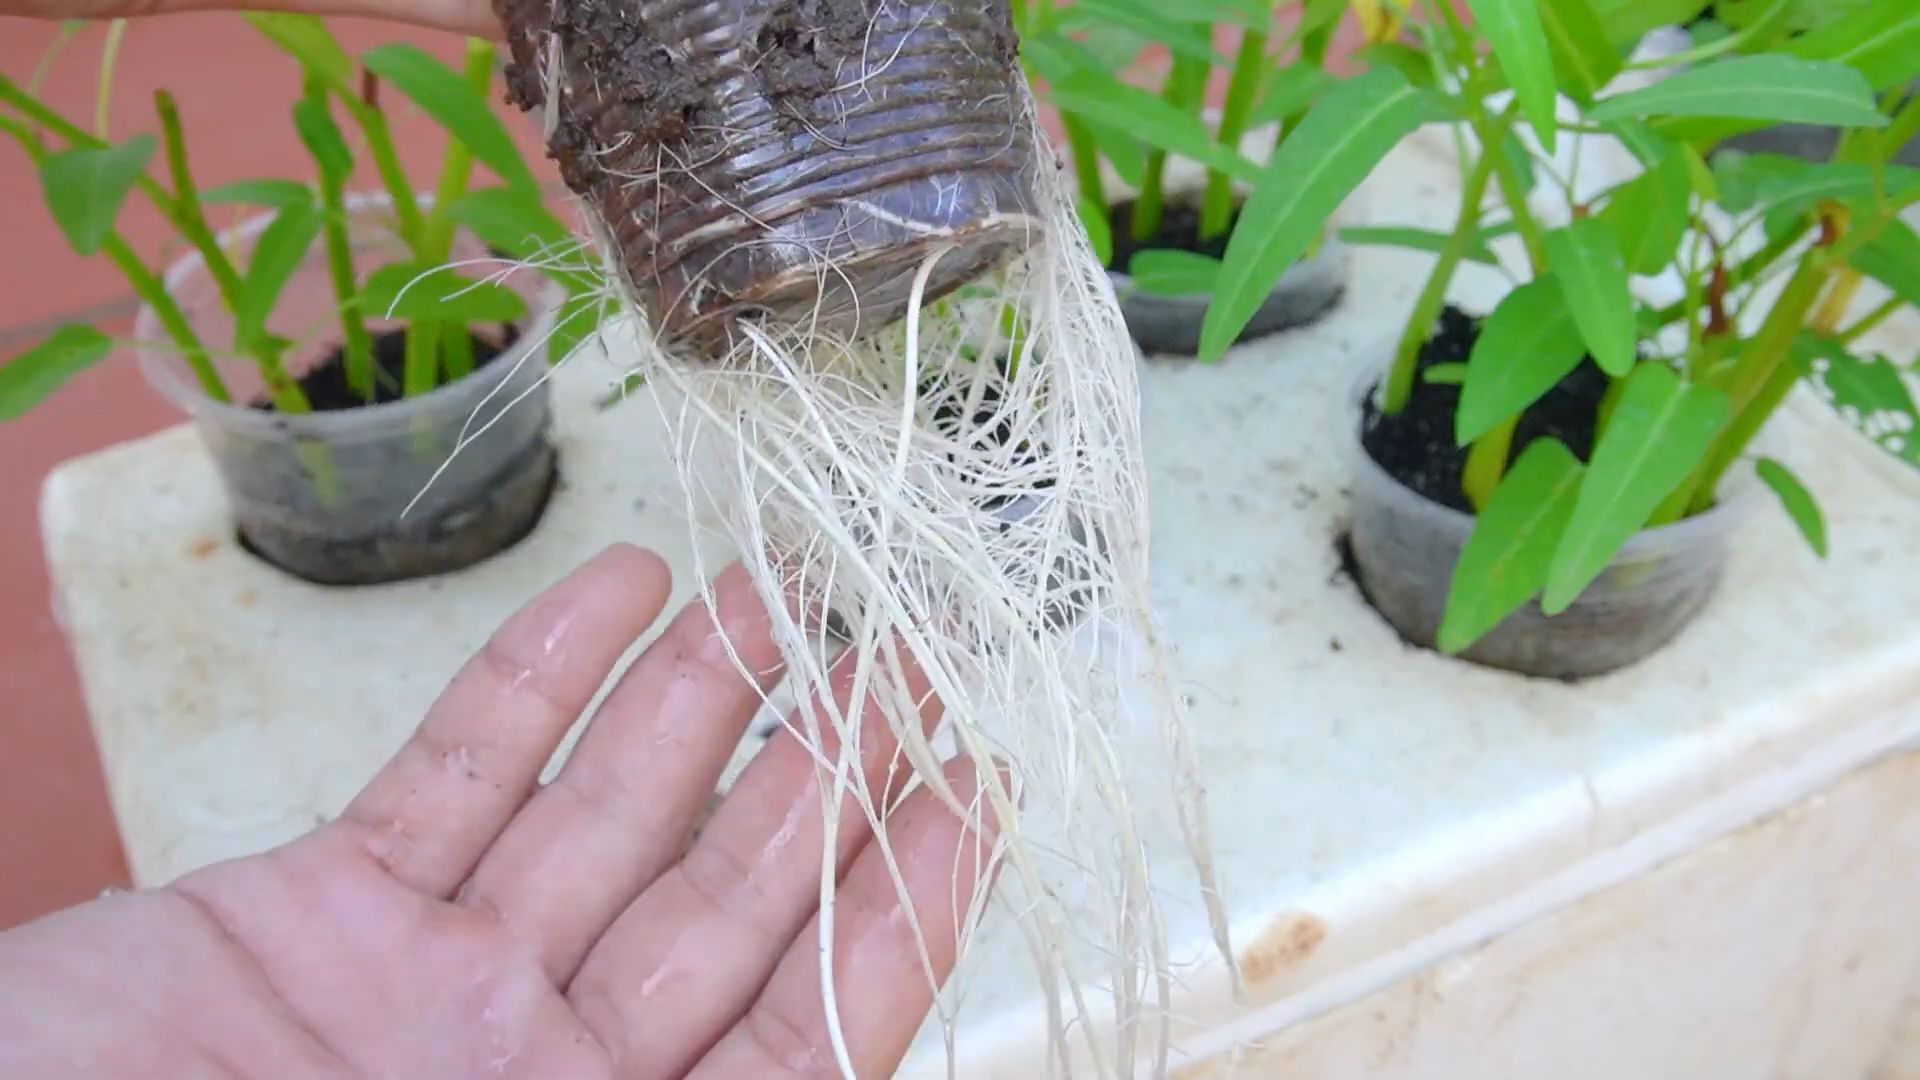
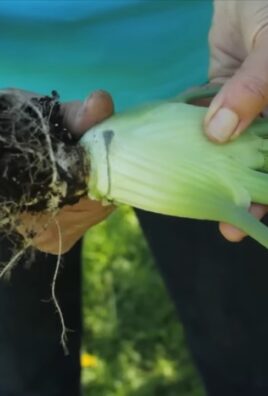
* You can start water spinach from seeds or cuttings. If using seeds, sow them according to the package instructions. If using cuttings, make sure they have nodes (small bumps where roots will grow).
* Space the seeds or cuttings evenly across the surface of the potting mix.
* Cover the seeds or cuttings with a thin layer of potting mix.
* Gently water the potting mix to moisten it.
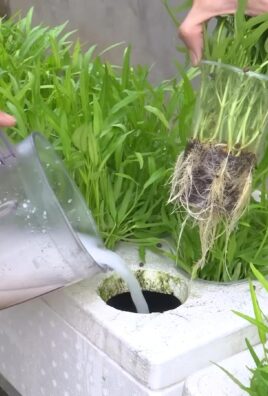
9. Fill the Reservoir:
* Using a watering can or hose, fill the larger container with water through the PVC pipe until water starts to come out of the overflow hole.
* This indicates that the reservoir is full.
10. Placement and Care:
* Place your self-watering water spinach container in a sunny location. Water spinach thrives in full sun (at least 6 hours of direct sunlight per day).
* Check the water level in the reservoir regularly (every few days, depending on the weather). Refill as needed through the PVC pipe.
* Fertilize your water spinach every few weeks with a balanced liquid fertilizer. Follow the instructions on the fertilizer package.
* Harvest your water spinach regularly by cutting the stems a few inches above the soil. This will encourage new growth.
Troubleshooting Tips
* Algae Growth: If you notice algae growing in the reservoir, don’t panic! It’s a common occurrence. You can add a small amount of hydrogen peroxide to the water to kill the algae.
* Slow Growth: If your water spinach isn’t growing as quickly as you’d like, make sure it’s getting enough sunlight and fertilizer. You can also try adding some compost to the potting mix.
* Pest Problems: Water spinach is generally pest-resistant, but occasionally aphids or other pests may appear. Treat them with insecticidal soap or neem oil.
* Waterlogged Soil: If the soil seems constantly waterlogged, even when the reservoir is low, you may need to add more drainage holes to the smaller container or use a lighter potting mix.
Harvesting Your Water Spinach
One of the most rewarding parts of this project is harvesting your own fresh, delicious water spinach! You can start harvesting when the stems are about 6-8 inches long. Simply cut the stems a few inches above the soil. The plant will continue to produce new growth, providing you with a continuous supply of water spinach.
Enjoy Your Homegrown Water Spinach!
And there you have it! A simple, effective, and rewarding way to grow your own water spinach. I hope you found this guide helpful. Happy gardening!
Conclusion
So, there you have it! Transforming a simple plastic bottle into a self-watering system for your water spinach is not just a fun project; it’s a game-changer for anyone who loves fresh greens but struggles with consistent watering. This DIY trick addresses a common gardening challenge – the need for constant moisture, especially crucial for water spinach, which, as its name suggests, thrives in damp conditions. By creating a self-watering environment, you’re essentially providing your water spinach with a mini-ecosystem that caters to its specific needs.
Why is this a must-try? Because it simplifies gardening, reduces water waste, and ultimately leads to a more abundant and healthier harvest of your favorite leafy green. Imagine the satisfaction of snipping off fresh, vibrant water spinach leaves, knowing you nurtured them with a simple, sustainable solution. No more worrying about daily watering or wilting leaves during those scorching summer days. This method is particularly beneficial for those with busy schedules, limited gardening space, or those who simply want to make their gardening routine more efficient.
But the beauty of this DIY project lies in its adaptability. Feel free to experiment with different bottle sizes depending on the size of your container and the number of water spinach plants you have. You can also explore using different types of wicking materials, such as cotton rope or strips of old t-shirts, to see which works best for drawing water up to the soil. For an extra boost, consider adding a diluted liquid fertilizer to the water reservoir to provide your water spinach with essential nutrients. Remember to monitor the water level in the bottle regularly and refill as needed.
Furthermore, consider the placement of your self-watering water spinach. While water spinach loves moisture, it also needs plenty of sunlight. Ensure your container is located in a spot that receives at least six hours of direct sunlight per day. You can also use this self-watering system for other moisture-loving plants, such as basil or mint, with slight adjustments to the watering frequency.
Don’t be afraid to get creative and personalize your self-watering system. You can decorate the bottles with paint or stickers to add a touch of personality to your garden. You can also group several self-watering containers together to create a visually appealing and functional display.
We wholeheartedly encourage you to try this DIY self-watering trick for your water spinach. It’s an easy, affordable, and effective way to ensure your plants thrive. Once you’ve given it a go, we’d love to hear about your experience! Share your photos, tips, and any variations you’ve tried in the comments below. Let’s build a community of gardeners who are passionate about sustainable and efficient gardening practices. Your insights could inspire others to embrace this simple yet powerful technique and enjoy the rewards of a bountiful water spinach harvest. Happy gardening!
Frequently Asked Questions (FAQ)
What type of plastic bottle is best for this DIY self-watering system?
Ideally, you should use a clean, food-grade plastic bottle. Bottles that have previously contained water, juice, or soda are excellent choices. Avoid using bottles that have held harsh chemicals or cleaning products, as these could contaminate the soil and harm your water spinach. The size of the bottle will depend on the size of your container and the number of plants you have. A 1-liter or 2-liter bottle is generally a good starting point. Make sure the bottle is sturdy enough to withstand being buried in the soil and filled with water.
What kind of soil should I use for my water spinach in this self-watering system?
Water spinach thrives in rich, well-draining soil. A good potting mix that contains a blend of peat moss, perlite, and vermiculite is ideal. You can also amend your soil with compost or other organic matter to improve its fertility and water retention. Avoid using heavy clay soil, as it can become waterlogged and suffocate the roots of your water spinach. The goal is to create a soil environment that provides adequate drainage while still retaining enough moisture to support the plant’s growth.
How often do I need to refill the water bottle?
The frequency of refilling the water bottle will depend on several factors, including the size of the bottle, the weather conditions, and the size of your water spinach plants. In general, you should check the water level in the bottle every few days and refill it when it’s about half empty. During hot, sunny weather, the water will evaporate more quickly, so you may need to refill it more frequently. Conversely, during cooler, cloudy weather, the water will last longer. Observe your plants closely and adjust the watering frequency accordingly. If the leaves start to wilt, it’s a sign that the soil is too dry and you need to refill the bottle.
Can I use this self-watering system for other plants besides water spinach?
Yes, this self-watering system can be adapted for other plants that require consistent moisture. Some good candidates include basil, mint, lettuce, and other leafy greens. However, it’s important to consider the specific needs of each plant. Some plants prefer drier conditions, so you may need to adjust the size of the wick or the frequency of refilling the water bottle. Experiment and observe your plants closely to determine what works best for them. Plants that are prone to root rot should not be used with this system.
What type of wicking material is best to use?
Several different materials can be used as a wick in this self-watering system. Cotton rope, strips of old t-shirts, felt, or even nylon stockings can all work effectively. The key is to choose a material that is absorbent and can draw water up from the bottle to the soil. Cotton rope is a popular choice because it’s readily available and relatively inexpensive. Strips of old t-shirts are a great way to recycle old clothing and provide a sustainable wicking solution. Experiment with different materials to see which works best for you.
How do I prevent algae from growing in the water bottle?
Algae growth in the water bottle is a common problem, especially when the bottle is exposed to sunlight. To prevent algae growth, you can wrap the bottle in dark-colored tape or paint it with a non-toxic paint. This will block sunlight from reaching the water and inhibit algae growth. You can also add a small amount of hydrogen peroxide to the water to kill any algae that may be present. However, be careful not to add too much hydrogen peroxide, as it can harm your plants. A few drops per liter of water is usually sufficient.
What if the water isn’t wicking up to the soil properly?
If you notice that the soil is dry even though the water bottle is full, there could be a few reasons why the water isn’t wicking up properly. First, make sure that the wicking material is making good contact with both the water in the bottle and the soil in the container. If the wick is too short or not properly inserted, it won’t be able to draw water up effectively. Second, check to see if the wicking material is clogged with dirt or debris. If it is, you may need to replace it with a new piece of wicking material. Finally, make sure that the soil is not too compacted. Compacted soil can prevent water from wicking up properly. Loosen the soil around the base of the plant to improve water absorption.
Can I use fertilizer with this self-watering system?
Yes, you can add a diluted liquid fertilizer to the water reservoir to provide your water spinach with essential nutrients. However, it’s important to use a fertilizer that is specifically formulated for leafy greens and to dilute it according to the manufacturer’s instructions. Over-fertilizing can harm your plants, so it’s always better to err on the side of caution. You can also use a slow-release fertilizer that is mixed into the soil at the time of planting. This will provide a steady supply of nutrients to your water spinach over time.
How do I know if my water spinach is getting enough water with this system?
The best way to determine if your water spinach is getting enough water is to observe the plants closely. Healthy water spinach plants will have vibrant green leaves and will be actively growing. If the leaves start to wilt or turn yellow, it’s a sign that the plants are not getting enough water. You can also check the moisture level of the soil by sticking your finger into the soil. If the soil feels dry to the touch, it’s time to refill the water bottle. Remember that water spinach prefers consistently moist soil, so it’s important to monitor the moisture level regularly.

Leave a Comment