
Watering strawberries less might sound counterintuitive, right? After all, those juicy, red berries seem like they’d need constant hydration. But trust me, as someone who’s spent countless hours tending my own little strawberry patch, I’ve learned that less is often more when it comes to watering these delightful fruits.
For centuries, strawberries have been cherished not just for their taste, but also for their beauty and perceived health benefits. From ancient Roman gardens to the strawberry fields of modern-day California, these berries have held a special place in our hearts (and stomachs!). But even with all that history, many gardeners still struggle with the common pitfall of overwatering.
Why is this DIY trick so crucial? Well, overwatering can lead to a host of problems, including root rot, fungal diseases, and bland, watery berries. Nobody wants that! By mastering the art of watering strawberries less, you’ll not only conserve water but also cultivate healthier, more flavorful, and more abundant harvests. In this article, I’m going to share my tried-and-true tips and tricks for achieving the perfect balance, ensuring your strawberry plants thrive without drowning. Get ready to unlock the secrets to strawberry success!
DIY Self-Watering Strawberry Planter from a Plastic Bottle
Hey there, fellow gardening enthusiasts! Are you tired of constantly worrying about underwatering your precious strawberry plants? I know I was! Strawberries are delicious, but they can be a bit finicky when it comes to watering. Too much, and you risk root rot; too little, and you end up with shriveled berries. That’s why I decided to create a simple, effective, and budget-friendly self-watering strawberry planter using a plastic bottle. This project is perfect for beginners and experienced gardeners alike, and it’s a fantastic way to recycle those plastic bottles piling up in your home. Let’s dive in!
Materials You’ll Need
Before we get started, gather all the necessary materials. This will make the process smoother and prevent you from running around mid-project. Here’s what you’ll need:
- A large plastic bottle (2-liter soda bottle or similar works great)
- A sharp knife or box cutter
- Scissors
- A lighter or candle (optional, for smoothing edges)
- Potting soil (specifically formulated for strawberries is ideal)
- Strawberry plants (duh!)
- Gravel or small stones
- Wicking material (cotton rope, strips of old t-shirt, or felt)
- Water
- Gloves (optional, but recommended to keep your hands clean)
Preparing the Plastic Bottle
This is where we transform the humble plastic bottle into the foundation of our self-watering system. Take your time and be careful when using the knife or box cutter.
- Clean the Bottle: First, thoroughly clean the plastic bottle with soap and water. Remove any labels and sticky residue. A clean bottle ensures that no unwanted chemicals leach into the soil.
- Cut the Bottle: Now, using your sharp knife or box cutter, carefully cut the bottle into two pieces. You’ll want to cut it horizontally, about one-third of the way down from the top. The top part (with the bottle neck) will be inverted and placed inside the bottom part.
- Create the Wicking Hole: In the bottle cap, create a hole large enough to accommodate your wicking material. You can use the knife or scissors for this. The size of the hole will depend on the thickness of your wick. I usually aim for a hole that’s snug but not too tight.
- Smooth the Edges (Optional): The cut edges of the plastic bottle can be sharp. To prevent any accidental cuts, you can gently smooth them using a lighter or candle. Carefully run the cut edge near the flame (without touching it) to melt and soften the plastic. Be extremely cautious when doing this, and work in a well-ventilated area. Alternatively, you can use strong tape to cover the edges.
Assembling the Self-Watering System
Now comes the fun part – putting all the pieces together to create our self-watering planter!
- Insert the Wick: Thread your wicking material through the hole in the bottle cap. You’ll want a good length of wick hanging down inside the top part of the bottle (at least a few inches) and a similar length extending out of the cap. This will allow the wick to draw water up from the reservoir.
- Invert the Top Part: Invert the top part of the bottle (the part with the bottle neck and wick) and place it inside the bottom part. Make sure the wick is hanging down into the bottom section.
- Add Gravel to the Bottom: Pour a layer of gravel or small stones into the bottom part of the bottle. This will create a drainage layer and prevent the soil from becoming waterlogged. The gravel also helps to elevate the top part of the bottle, ensuring that the wick is submerged in water.
- Fill with Potting Soil: Now, fill the top part of the bottle with your potting soil. Leave about an inch of space at the top to prevent soil from spilling out when you water. Gently pat down the soil to remove any air pockets.
Planting Your Strawberries
It’s time to introduce our star players – the strawberry plants!
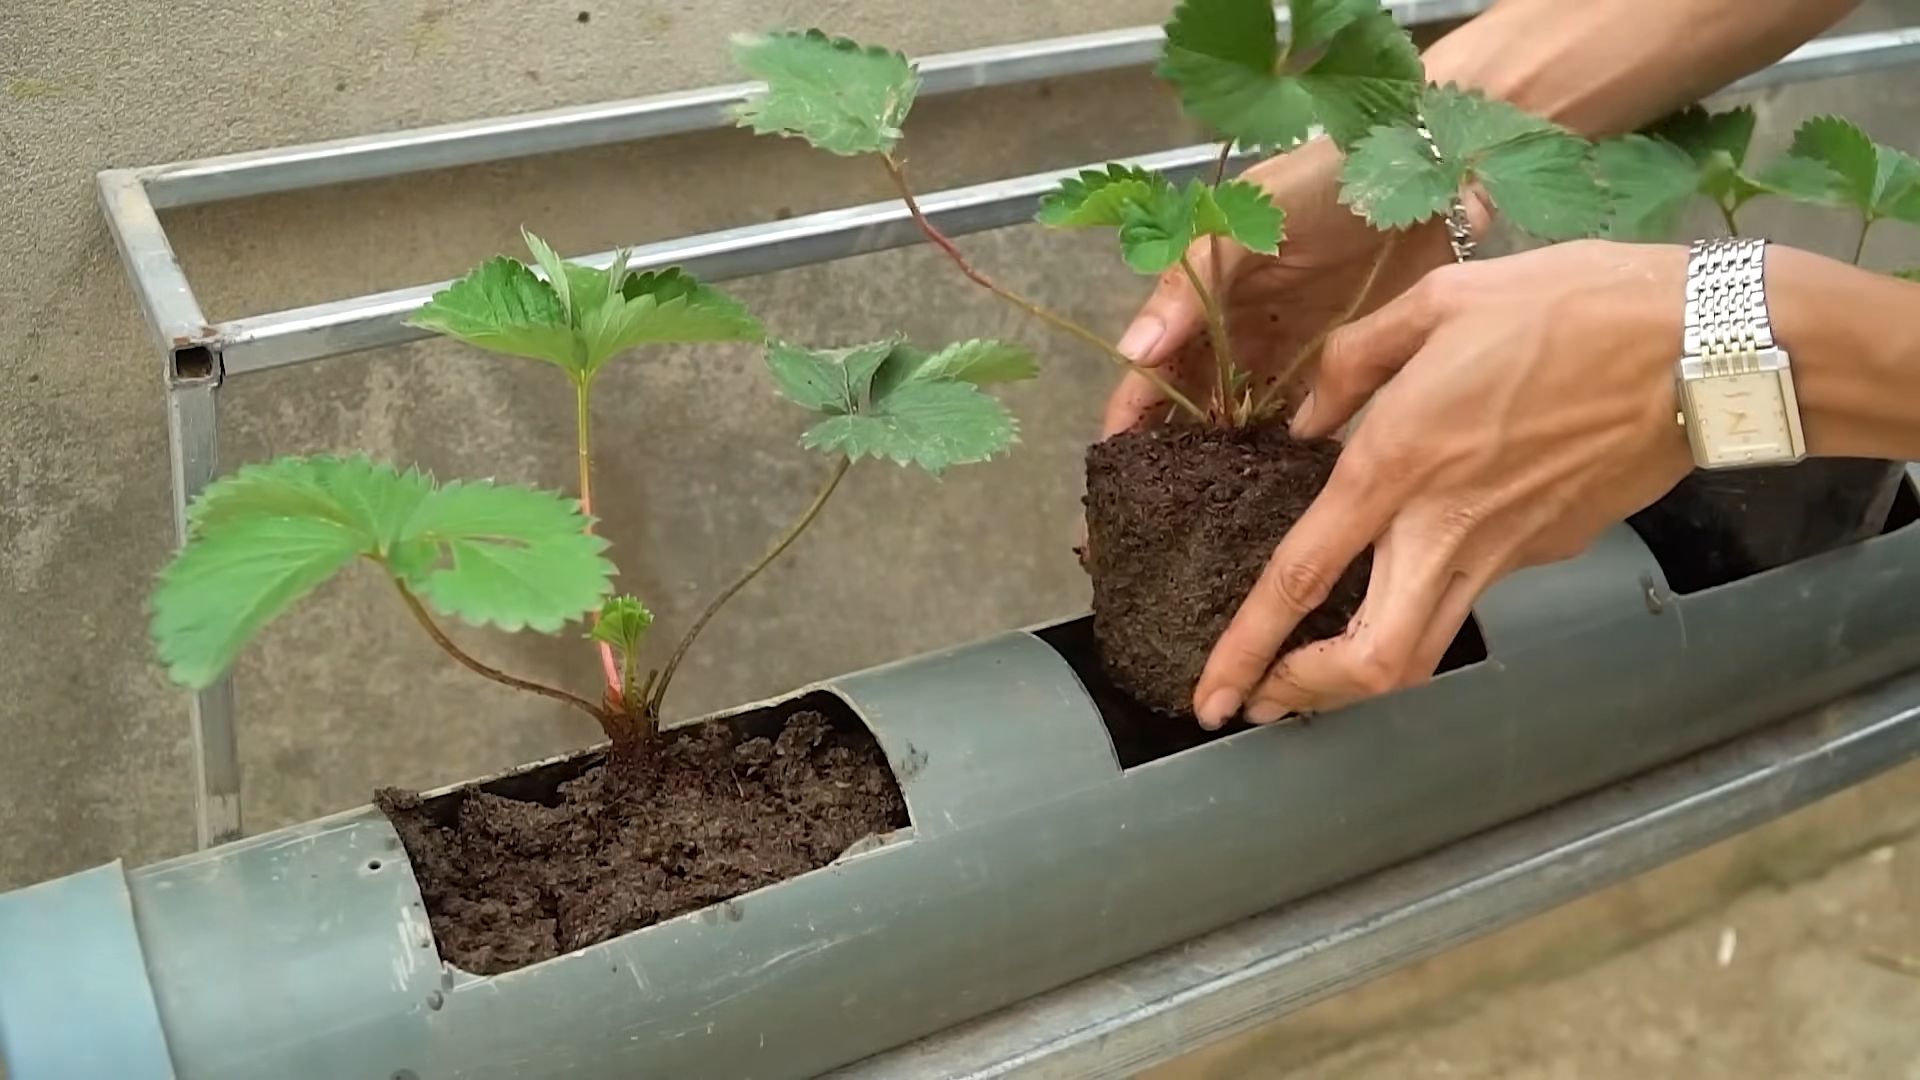
- Prepare the Strawberry Plants: Gently remove the strawberry plants from their containers. Loosen the roots slightly to encourage them to spread out in their new home.
- Plant the Strawberries: Create small holes in the potting soil and carefully plant the strawberry plants. Space them evenly around the top part of the bottle. Make sure the crown of the plant (where the stems meet the roots) is level with the soil surface.
- Water Thoroughly: After planting, water the strawberry plants thoroughly. This will help to settle the soil and ensure that the roots make good contact with the potting mix.
- Fill the Reservoir: Pour water into the bottom part of the bottle, filling the reservoir. The wick will draw water up into the soil, keeping it consistently moist.
Maintaining Your Self-Watering Strawberry Planter
Congratulations! You’ve successfully created a self-watering strawberry planter. Now, let’s talk about how to keep your plants happy and healthy.
- Monitor the Water Level: Regularly check the water level in the reservoir and refill it as needed. The frequency of refilling will depend on the weather conditions and the size of your plants.
- Fertilize Regularly: Strawberries are heavy feeders, so it’s important to fertilize them regularly. Use a fertilizer specifically formulated for strawberries, following the instructions on the package. I like to use a liquid fertilizer diluted in the water reservoir.
- Provide Sunlight: Strawberries need at least 6-8 hours of sunlight per day to thrive. Place your self-watering planter in a sunny location.
- Protect from Pests: Keep an eye out for pests such as aphids, slugs, and snails. If you notice any pests, take action to control them. You can use organic pest control methods such as insecticidal soap or diatomaceous earth.
- Prune Regularly: Prune your strawberry plants regularly to remove any dead or diseased leaves. This will help to improve air circulation and prevent the spread of disease.
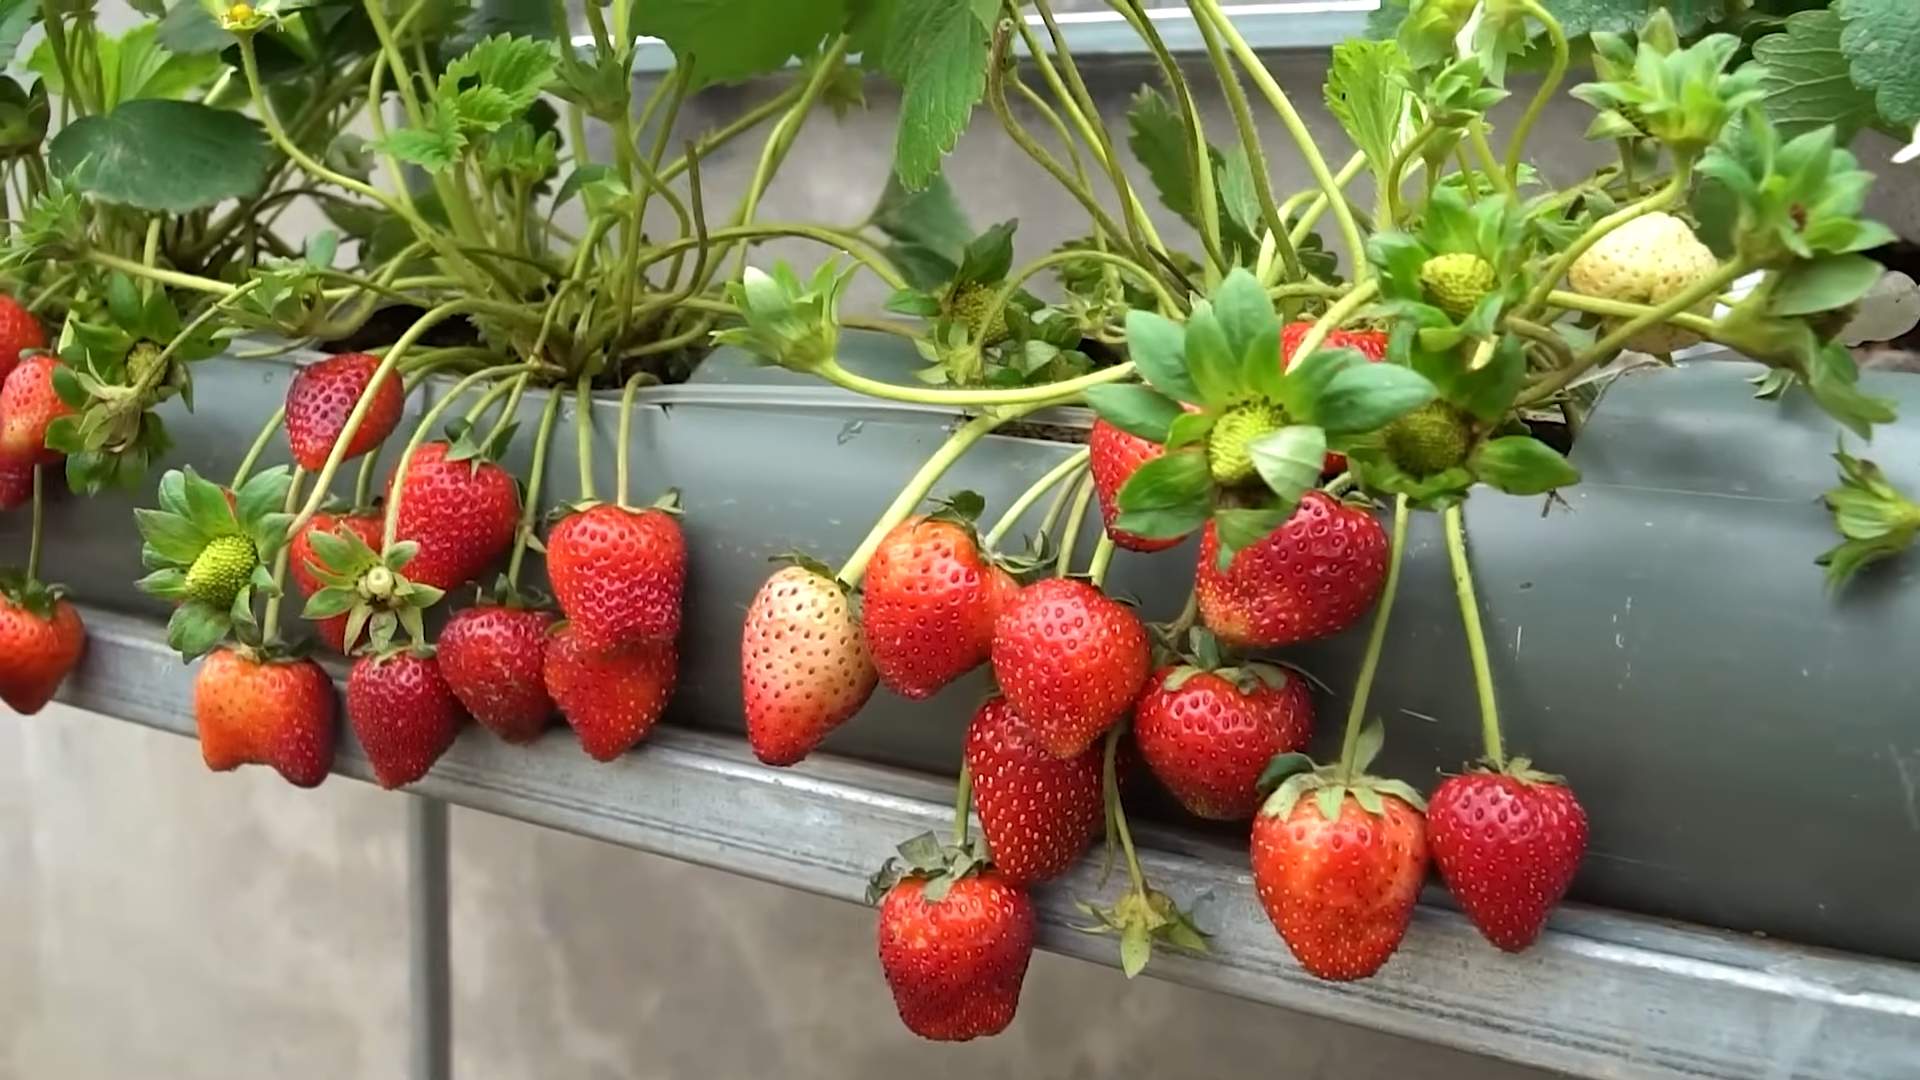
- Harvest Your Strawberries: Once your strawberries are ripe, harvest them regularly. Ripe strawberries will be bright red and easily pull away from the plant.
Troubleshooting Tips
Even with the best intentions, sometimes things don’t go exactly as planned. Here are a few troubleshooting tips to help you overcome common problems:
- Soil is Too Wet: If the soil is consistently too wet, it could be that your wicking material is too thick or that the drainage layer is not adequate. Try using a thinner wick or adding more gravel to the bottom of the bottle.
- Soil is Too Dry: If the soil is consistently too dry, it could be that your wicking material is not making good contact with the water in the reservoir or that the reservoir is not large enough. Make sure the wick is fully submerged in the water and consider using a larger bottle for the reservoir.
- Plants are Not Growing: If your strawberry plants are not growing, it could be due to a lack of sunlight, nutrients, or water. Make sure your plants are getting enough sunlight, fertilize them regularly, and check the water level in the reservoir.
- Root Rot: Root rot is a common problem with strawberries, especially in poorly drained soil. If you suspect root rot, remove the affected plants and replant them in fresh soil. Make sure the drainage layer is adequate and avoid overwatering.
Variations and Enhancements
The beauty of DIY projects is that you can customize them to suit your needs and preferences. Here are a few variations and enhancements you can try:
- Multiple Plants: Use a larger container, like a 5-gallon bucket, to create a self-watering planter for multiple strawberry plants.
- Vertical Garden: Create a vertical strawberry garden by stacking multiple self-watering planters on top of each other.
- Add a Trellis: Add a small trellis to your self-watering planter to support the strawberry plants as they grow.
- Use Different Materials: Experiment with different materials for the wicking material, such as felt or nylon rope.
- Decorative Touches: Decorate your self-watering planter with paint, stickers, or other embellishments to make it more visually appealing.
Why This Works: The Science Behind Self-Watering
The magic behind this self-watering system lies in a simple scientific principle called capillary action. The wicking material acts like a sponge, drawing water up from the reservoir and into the soil. This ensures that the soil remains consistently moist, providing the perfect environment for your strawberry plants to thrive. The gravel layer at the bottom prevents the soil from becoming waterlogged, which can lead to root rot. By providing a consistent supply of water and good drainage
Conclusion
So, there you have it! Mastering the art of watering strawberries less is not just a gardening tip; it’s a pathway to healthier, sweeter, and more abundant harvests. We’ve explored the science behind why overwatering can be detrimental to these delightful berries, and we’ve armed you with practical strategies to achieve the perfect moisture balance.
Think of it this way: you’re not depriving your strawberry plants; you’re empowering them. By encouraging deeper root growth through less frequent but thorough watering, you’re building resilience against drought, disease, and even those pesky pests. You’re essentially training your plants to become self-sufficient, thriving even when you’re not constantly hovering over them with a watering can.
But the benefits extend beyond just plant health. Less watering translates to less water usage, making this a more sustainable and eco-friendly gardening practice. It also frees up your time, allowing you to focus on other aspects of your garden or simply relax and enjoy the fruits (or rather, the berries) of your labor.
Now, let’s talk variations. While the core principle remains the same – water less frequently – you can adapt this technique to suit your specific climate, soil type, and strawberry variety. For example, if you live in a particularly hot and dry region, you might consider using a thick layer of organic mulch around your plants to help retain moisture in the soil. Straw, pine needles, or even shredded leaves work wonders.
Alternatively, if you’re growing strawberries in containers, you’ll need to be extra vigilant about monitoring soil moisture levels, as containers tend to dry out more quickly than garden beds. In this case, you might opt for self-watering containers or consider using a moisture meter to get an accurate reading of the soil’s hydration.
And don’t forget about the power of observation. Pay close attention to your strawberry plants. Are the leaves wilting or turning yellow? Is the fruit small and underdeveloped? These are all signs that your plants might be stressed, either from too much or too little water. Adjust your watering schedule accordingly, and remember that it’s always better to err on the side of underwatering than overwatering.
Ultimately, the key to success lies in experimentation and adaptation. There’s no one-size-fits-all solution when it comes to watering strawberries less. What works for one gardener might not work for another. So, don’t be afraid to try different techniques and find what works best for you and your plants.
We truly believe that this DIY trick is a game-changer for any strawberry enthusiast. It’s simple, effective, and yields remarkable results. So, we encourage you to give it a try and see for yourself the difference it can make.
And most importantly, we want to hear about your experience! Share your tips, tricks, and triumphs in the comments below. Let’s create a community of strawberry-loving gardeners who are passionate about growing the best berries possible. Did you notice a difference in the sweetness of your strawberries? Did you find that your plants were more resistant to disease? We’re eager to learn from your successes and challenges.
So, grab your gardening gloves, head out to your strawberry patch, and start watering strawberries less. You’ll be amazed at the results! Happy gardening!
Frequently Asked Questions (FAQ)
Why is watering strawberries less actually better for them?
Overwatering is a common mistake that many gardeners make, and it can be particularly detrimental to strawberries. When the soil is constantly saturated, the roots are deprived of oxygen, which can lead to root rot and other fungal diseases. Additionally, overwatering can dilute the natural sugars in the berries, resulting in a less flavorful and less sweet harvest. Watering strawberries less encourages deeper root growth, making the plants more resilient to drought and disease. It also allows the berries to develop a more concentrated flavor.
How often should I water my strawberry plants if I’m trying to water them less?
The frequency of watering will depend on several factors, including your climate, soil type, and the age of your plants. As a general rule of thumb, aim to water your strawberry plants deeply but infrequently. This means watering thoroughly when the top inch or two of soil feels dry to the touch, and then allowing the soil to dry out again before watering again. In hot, dry weather, you may need to water every few days, while in cooler, wetter weather, you may only need to water once a week or even less. The best way to determine when to water is to check the soil moisture levels regularly.
What are the signs that I’m underwatering my strawberry plants?
While overwatering is more common, it’s also possible to underwater your strawberry plants. Signs of underwatering include wilting leaves, dry and cracked soil, and small, underdeveloped berries. If you notice these symptoms, increase the frequency of your watering, but be careful not to overcompensate. It’s always better to err on the side of underwatering than overwatering.
What type of soil is best for growing strawberries with less watering?
Well-draining soil is essential for growing healthy strawberries, especially when you’re trying to water them less. Soil that drains poorly can lead to waterlogged roots and root rot. Amend your soil with organic matter, such as compost or well-rotted manure, to improve drainage and aeration. Sandy loam soil is generally considered to be ideal for growing strawberries.
Can I use mulch to help retain moisture in the soil when watering strawberries less?
Yes, mulching is an excellent way to help retain moisture in the soil and reduce the need for frequent watering. A layer of organic mulch, such as straw, pine needles, or shredded leaves, will help to insulate the soil, prevent evaporation, and suppress weed growth. Apply a 2-3 inch layer of mulch around your strawberry plants, being careful not to cover the crowns of the plants.
Does the variety of strawberry affect how much watering is needed?
Yes, different strawberry varieties may have slightly different watering requirements. Some varieties are more drought-tolerant than others. Research the specific needs of the strawberry variety you’re growing to determine the optimal watering schedule. Everbearing varieties, which produce fruit throughout the growing season, may require more frequent watering than June-bearing varieties, which produce fruit only once a year.
How does watering strawberries less affect the taste of the berries?
Watering strawberries less can actually improve the taste of the berries. When the plants are not overwatered, the sugars in the berries become more concentrated, resulting in a sweeter and more flavorful harvest. Overwatering, on the other hand, can dilute the sugars and produce bland, watery berries.
Is it okay to water my strawberry plants during the hottest part of the day?
It’s generally best to avoid watering your strawberry plants during the hottest part of the day, as this can lead to excessive evaporation and increase the risk of fungal diseases. Water your plants in the early morning or late evening, when the temperatures are cooler and the water has more time to soak into the soil.
How do I water strawberries less in containers?
Growing strawberries in containers requires a slightly different approach to watering. Containers tend to dry out more quickly than garden beds, so you’ll need to monitor the soil moisture levels more closely. Use a well-draining potting mix and choose containers with drainage holes. Water thoroughly when the top inch of soil feels dry to the touch, and allow the excess water to drain out of the bottom of the container. Consider using self-watering containers or a moisture meter to help you maintain the optimal moisture balance.
What if it rains a lot? Do I still need to water my strawberries?
If it rains frequently, you may not need to water your strawberry plants at all. Monitor the soil moisture levels and only water when the soil feels dry to the touch. If the soil is already saturated from rain, avoid watering until it has had a chance to dry out. Good drainage is especially important during periods of heavy rainfall.

Leave a Comment