
Waterless mustard greens growing might sound like an oxymoron, right? But what if I told you that you could cultivate these peppery, nutritious greens with minimal watering, even in the driest conditions? Forget lugging heavy watering cans and worrying about parched soil – this DIY guide is about to revolutionize your home gardening game!
Mustard greens have a rich history, dating back thousands of years in Asian and African cuisines. They’ve been prized not only for their distinctive flavor but also for their impressive nutritional benefits, packed with vitamins, minerals, and antioxidants. Traditionally, growing them required consistent moisture, a challenge for many gardeners, especially those in arid climates or with busy schedules.
But here’s the thing: we all crave fresh, homegrown produce, but not everyone has the time or resources for intensive gardening. That’s where this waterless mustard greens growing hack comes in. Imagine enjoying a vibrant salad or stir-fry with greens you grew yourself, knowing you conserved water and minimized effort. This DIY approach is perfect for beginners, experienced gardeners looking for a low-maintenance option, and anyone passionate about sustainable living. I’m excited to share this simple yet effective method that will have you harvesting delicious mustard greens in no time!
Wasserloser Anbau von Senfgrün: Dein DIY-Leitfaden für frisches Grün ohne Gießen
Hey Gärtnerfreunde! Habt ihr Lust auf frische, würzige Senfgrünblätter, aber keine Lust auf tägliches Gießen? Dann seid ihr hier genau richtig! Ich zeige euch, wie ihr Senfgrün ganz einfach und ohne viel Aufwand wasserlos anbauen könnt. Klingt verrückt? Ist es aber nicht! Mit dieser Methode könnt ihr euch über eine kontinuierliche Ernte freuen, ohne ständig zur Gießkanne greifen zu müssen. Lasst uns loslegen!
Was du brauchst:
* Senfgrünsamen: Wählt eure Lieblingssorte. Es gibt milde und schärfere Varianten.
* Ein breites, flaches Gefäß: Eine Plastikschale, ein Tablett oder sogar ein alter Backblech funktionieren super.
* Kokosfaser oder Anzuchterde: Dies dient als Wachstumsmedium. Kokosfaser speichert Feuchtigkeit besonders gut.
* Perlit oder Vermiculit: Diese Materialien verbessern die Drainage und Belüftung.
* Eine Sprühflasche: Für die anfängliche Befeuchtung.
* Eine dunkle Abdeckung: Ein Stück Pappe, ein dunkles Tuch oder eine umgedrehte Schale.
* Ein heller Standort: Indirektes Sonnenlicht ist ideal.
* Geduld: Das Wichtigste!
Warum wasserloser Anbau funktioniert:
Das Geheimnis liegt in der anfänglichen Befeuchtung und der dunklen Abdeckung. Die Samen keimen in der feuchten Umgebung und entwickeln Wurzeln. Die dunkle Abdeckung hält die Feuchtigkeit und fördert das Wurzelwachstum. Senfgrün ist relativ anspruchslos und kann mit den gespeicherten Nährstoffen und der Feuchtigkeit im Wachstumsmedium eine Weile überleben.
Schritt-für-Schritt-Anleitung:
1. Das Gefäß vorbereiten:
* Reinigt euer Gefäß gründlich.
* Mischt Kokosfaser (oder Anzuchterde) mit Perlit oder Vermiculit im Verhältnis 2:1. Das sorgt für eine gute Drainage und Belüftung.
* Füllt das Gefäß mit der Mischung bis zu einer Höhe von etwa 3-5 cm.
* Drückt die Oberfläche leicht an, aber nicht zu fest.
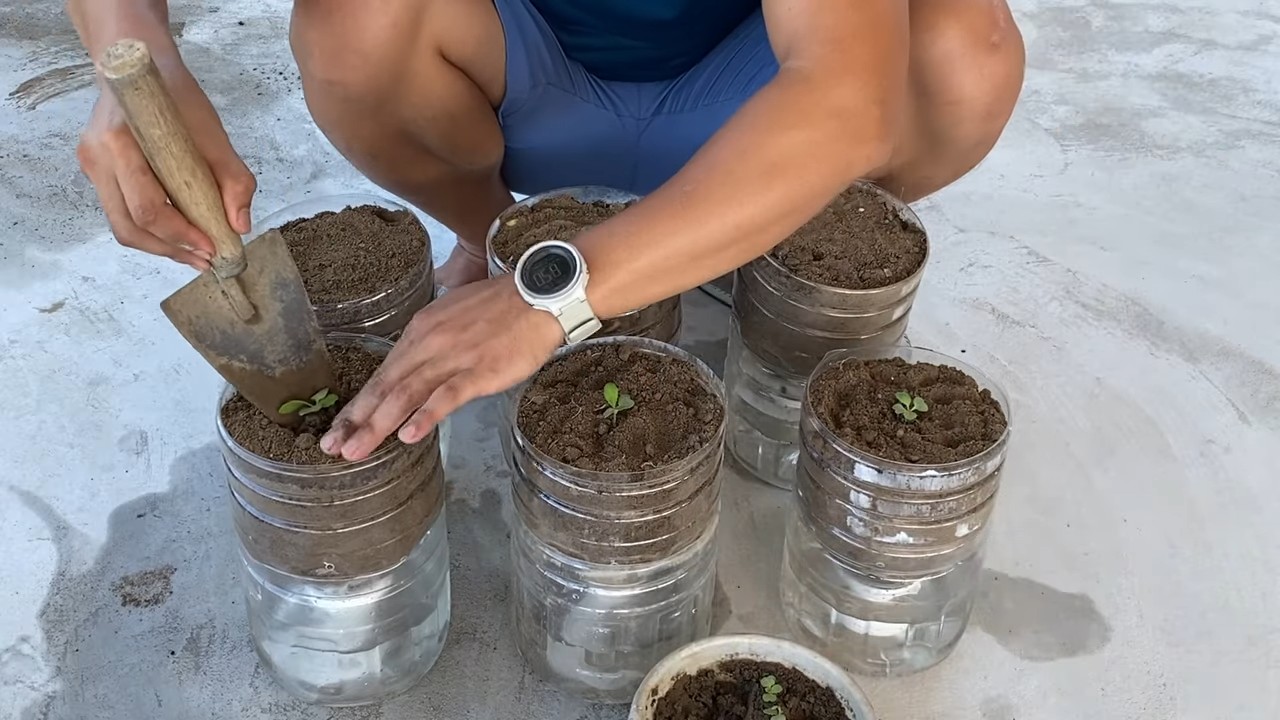
2. Die Samen aussäen:
* Verteilt die Senfgrünsamen gleichmäßig über die Oberfläche des Wachstumsmediums. Achtet darauf, dass sie nicht zu dicht liegen, damit die Keimlinge genügend Platz haben.
* Drückt die Samen leicht an, damit sie Kontakt zum Substrat haben.
* Bedeckt die Samen mit einer dünnen Schicht Kokosfaser oder Vermiculit.
3. Befeuchten und abdecken:
* Besprüht die Oberfläche gründlich mit Wasser, bis sie gut befeuchtet ist. Achtet darauf, dass das Wasser nicht abläuft.
* Deckt das Gefäß mit der dunklen Abdeckung ab. Dies ist entscheidend, um die Feuchtigkeit zu halten und die Keimung zu fördern.
4. Warten und beobachten:
* Stellt das Gefäß an einen hellen Ort, aber nicht in direktes Sonnenlicht.
* Überprüft täglich die Feuchtigkeit unter der Abdeckung. Wenn die Oberfläche trocken aussieht, besprüht sie leicht mit Wasser.
* Nach etwa 2-4 Tagen sollten die Samen keimen.
5. Abdeckung entfernen und wachsen lassen:
* Sobald die Keimlinge erscheinen, entfernt die dunkle Abdeckung.
* Lasst die Senfgrünpflanzen weiter wachsen. Sie benötigen weiterhin helles, indirektes Licht.
* Beobachtet die Pflanzen genau. Wenn die Blätter welk aussehen, ist das ein Zeichen, dass sie Feuchtigkeit benötigen. Besprüht sie dann leicht mit Wasser. Aber Achtung: Nicht zu viel gießen! Das Ziel ist ja der wasserlose Anbau.
6. Ernten:
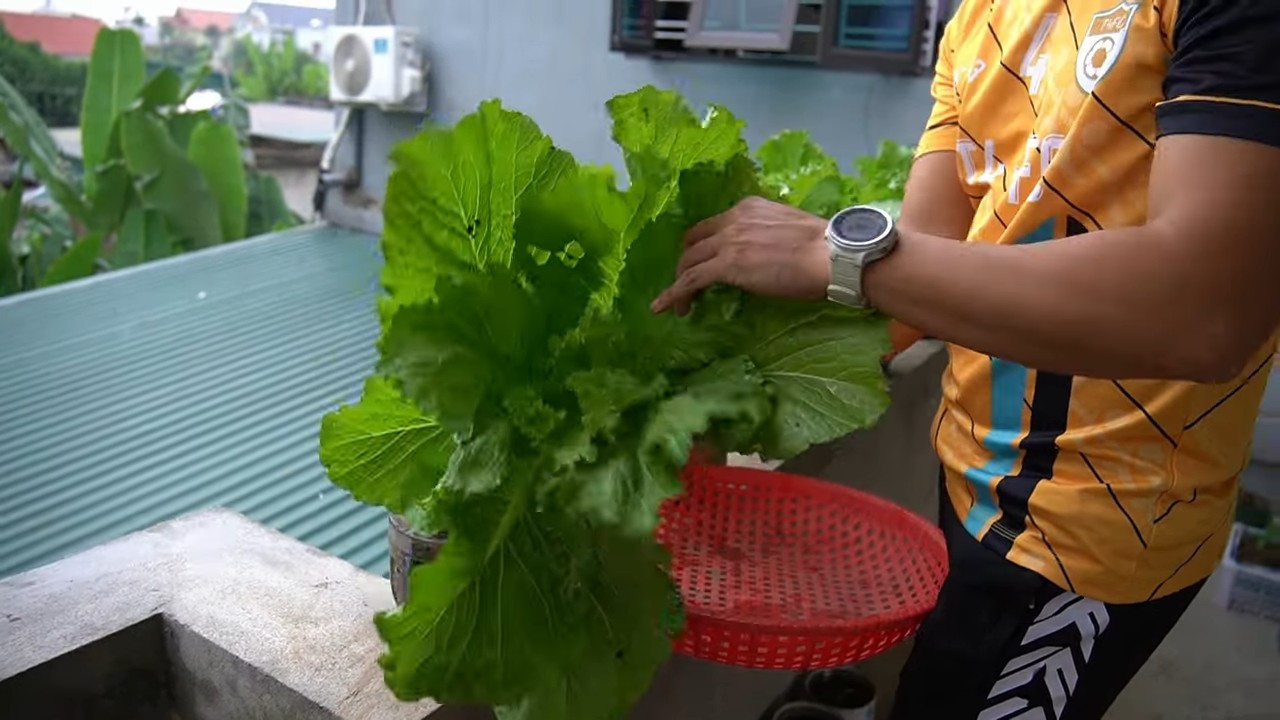
* Sobald die Senfgrünblätter eine Größe von etwa 5-7 cm erreicht haben, könnt ihr sie ernten.
* Schneidet die Blätter mit einer Schere oder einem Messer ab. Lasst die Wurzeln intakt, damit die Pflanzen weiterwachsen können.
* Ihr könnt die Senfgrünblätter mehrmals ernten, bevor sie anfangen, an Geschmack zu verlieren.
Tipps und Tricks für den erfolgreichen wasserlosen Anbau
* Die richtige Sorte wählen: Einige Senfgrünsorten sind besser für den wasserlosen Anbau geeignet als andere. Probiert verschiedene Sorten aus, um herauszufinden, welche am besten funktionieren.
* Die richtige Menge an Feuchtigkeit: Es ist wichtig, die richtige Balance zwischen Feuchtigkeit und Trockenheit zu finden. Zu viel Feuchtigkeit kann zu Schimmelbildung führen, während zu wenig Feuchtigkeit das Wachstum behindert.
* Die richtige Beleuchtung: Senfgrün benötigt helles, indirektes Licht. Wenn ihr keinen hellen Standort habt, könnt ihr auch eine Pflanzenlampe verwenden.
* Die richtige Temperatur: Senfgrün wächst am besten bei Temperaturen zwischen 15 und 25 Grad Celsius.
* Regelmäßige Kontrolle: Überprüft eure Pflanzen regelmäßig auf Schädlinge und Krankheiten.
* Nachhaltigkeit: Verwendet recycelte Gefäße und biologische Anzuchterde, um euren Anbau so nachhaltig wie möglich zu gestalten.
* Erntezeitpunkt: Erntet die Blätter, wenn sie jung und zart sind. Ältere Blätter können bitter werden.
* Rotation: Um die Nährstoffe im Substrat optimal zu nutzen, könnt ihr nach einigen Ernten das Substrat austauschen oder mit Kompost anreichern.
Problemlösung: Häufige Fehler und wie man sie vermeidet
* Schimmelbildung: Wenn ihr Schimmel auf der Oberfläche des Wachstumsmediums entdeckt, ist es wahrscheinlich zu feucht. Entfernt den Schimmel vorsichtig und lüftet das Gefäß besser. Reduziert die Wassermenge beim nächsten Besprühen.
* Welke Blätter: Welke Blätter sind ein Zeichen für Wassermangel. Besprüht die Blätter leicht mit Wasser.
* Gelbe Blätter: Gelbe Blätter können ein Zeichen für Nährstoffmangel sein. Fügt dem Wachstumsmedium etwas Kompost oder organischen Dünger hinzu.
* Langsames Wachstum: Langsames Wachstum kann durch zu wenig Licht oder zu niedrige Temperaturen verursacht werden. Stellt das Gefäß an einen helleren Ort oder erhöht die Temperatur.
* Schädlinge: Überprüft eure Pflanzen regelmäßig auf Schädlinge wie Blattläuse oder Spinnmilben. Bekämpft sie mit natürlichen Mitteln wie Neemöl oder Schmierseife.
Die Vorteile des wasserlosen Anbaus von Senfgrün
* Weniger Aufwand: Kein tägliches Gießen erforderlich.
* Platzsparend: Ideal für kleine Wohnungen oder Balkone.
* Nachhaltig: Weniger Wasserverbrauch.
* Frische Ernte: Immer frische Senfgrünblätter zur Hand.
* Gesund: Senfgrün ist reich an Vitaminen und Mineralstoffen.
* Befriedigend: Es macht Spaß, seine eigenen Lebensmittel anzubauen.
Verwendung von Senfgrün in der Küche
Senfgrün ist vielseitig einsetzbar. Hier sind ein paar Ideen:
* Salate: Fügt Senfgrün zu Salaten hinzu, um ihnen eine würzige Note zu verleihen.
* Suppen: Verwendet Senfgrün in Suppen und Eintöpfen.
* Smoothies: Mischt Senfgrün in Smoothies für einen gesunden Kick.
* Pfannengerichte: Gebt Senfgrün zu Pfannengerichten hinzu.
* Pesto: Macht Pesto aus Senfgrün.
* Gekocht: Dünstet oder kocht Senfgrün als Beilage.
Ich hoffe, dieser Leitfaden hat euch inspiriert, euren eigenen wasserlosen Senfgrün-Garten zu starten. Es ist einfacher als ihr denkt und die Belohnung ist eine köstliche und gesunde Ernte. Viel Spaß beim Gärtnern!
Conclusion
So, there you have it! Growing waterless mustard greens isn’t just a quirky gardening experiment; it’s a game-changer for anyone looking to maximize flavor, minimize waste, and embrace a more sustainable approach to fresh produce. We’ve walked you through the simple steps, highlighting how easy it is to cultivate these peppery greens without the constant need for watering. The result? Mustard greens that are intensely flavored, packed with nutrients, and ready to elevate your culinary creations.
Think about the possibilities! Imagine adding these robust greens to your salads for an extra kick, stir-frying them with garlic and ginger for a quick and healthy side dish, or even blending them into your morning smoothie for a nutritional boost. The concentrated flavor of waterless mustard greens makes them incredibly versatile in the kitchen.
But the benefits extend beyond just taste. By reducing your water consumption, you’re contributing to a more environmentally friendly lifestyle. Plus, the reduced risk of soilborne diseases and pests associated with overwatering means less need for chemical interventions, resulting in healthier, more natural greens.
Don’t be afraid to experiment with different varieties of mustard greens! While we’ve focused on the general principles of waterless cultivation, you can adapt the technique to suit your preferred type of mustard green. Try ‘Florida Broadleaf’ for a milder flavor, or ‘Red Giant’ for a visually stunning and slightly spicier option. You can also adjust the growing medium to see what works best in your specific climate and conditions. Some gardeners have found success using a mix of coco coir and perlite, while others prefer a well-draining potting mix amended with compost.
Consider adding a layer of mulch, such as straw or wood chips, to the surface of the growing medium. This will help to retain moisture and suppress weed growth, further reducing the need for watering. Just be sure to choose a mulch that is free of weed seeds and other contaminants.
We also encourage you to explore different container options. While we’ve suggested using pots or raised beds, you could also try growing your waterless mustard greens in vertical planters or even repurposed containers like old buckets or tires. Just make sure that the container has adequate drainage to prevent water from accumulating at the bottom.
This DIY trick is a must-try for anyone who wants to enjoy fresh, flavorful mustard greens without the hassle of constant watering. It’s a simple, sustainable, and rewarding way to grow your own food.
So, what are you waiting for? Grab some mustard green seeds, prepare your growing medium, and get ready to experience the joy of waterless cultivation. We’re confident that you’ll be amazed by the results.
We’re eager to hear about your experiences! Share your tips, tricks, and photos with us in the comments below. Let’s build a community of waterless mustard green enthusiasts and learn from each other. Happy growing!
Frequently Asked Questions (FAQ)
What exactly does “waterless” mean in this context? Does it mean I never water the mustard greens at all?
No, “waterless” doesn’t mean completely devoid of water. It refers to a significantly reduced watering schedule compared to traditional methods. The goal is to provide just enough moisture to sustain growth without saturating the soil, which can lead to root rot and other problems. You’ll still need to water your mustard greens, but much less frequently. The frequency will depend on factors like your climate, the type of growing medium you’re using, and the size of your container. The key is to monitor the moisture level of the soil and water only when it feels dry to the touch.
How do I know when to water my waterless mustard greens?
The best way to determine when to water is to check the moisture level of the soil. Stick your finger about an inch or two into the soil. If it feels dry, it’s time to water. If it feels moist, wait a day or two and check again. You can also use a moisture meter to get a more accurate reading. Another sign that your mustard greens need water is wilting leaves. However, it’s important to note that wilting can also be a sign of other problems, such as heat stress or nutrient deficiency, so it’s important to rule those out first. When you do water, water deeply, allowing the water to drain out of the bottom of the container. This will encourage deep root growth and help your mustard greens become more drought-tolerant.
What type of soil is best for growing waterless mustard greens?
A well-draining soil is crucial for waterless cultivation. Avoid heavy clay soils that retain too much moisture. A good option is a potting mix specifically formulated for vegetables, or you can create your own mix by combining equal parts of compost, perlite, and coco coir. The compost provides nutrients, the perlite improves drainage, and the coco coir helps retain moisture without becoming waterlogged. You can also add a small amount of sand to further improve drainage. Before planting, make sure to amend the soil with a slow-release fertilizer to provide your mustard greens with the nutrients they need to thrive.
Can I grow waterless mustard greens indoors?
Yes, you can absolutely grow waterless mustard greens indoors! In fact, it’s a great way to enjoy fresh greens year-round, especially if you live in a climate with harsh winters. When growing indoors, it’s important to provide your mustard greens with adequate light. A sunny windowsill that receives at least six hours of direct sunlight per day is ideal. If you don’t have enough natural light, you can supplement with grow lights. LED grow lights are a good option because they are energy-efficient and don’t produce much heat. You’ll also need to ensure that your indoor growing environment is well-ventilated to prevent fungal diseases.
What are some common problems I might encounter when growing waterless mustard greens, and how can I fix them?
One common problem is nutrient deficiency, which can manifest as yellowing leaves or stunted growth. To fix this, amend the soil with a balanced fertilizer or compost tea. Another problem is pest infestations, such as aphids or flea beetles. These pests can be controlled with insecticidal soap or neem oil. Be sure to follow the instructions on the product label carefully. Overwatering can also be a problem, even with waterless cultivation. If you notice that your mustard greens are wilting or have yellowing leaves, and the soil feels soggy, you may be overwatering. Allow the soil to dry out completely before watering again. Finally, be aware of potential fungal diseases, such as powdery mildew. These diseases can be prevented by ensuring good air circulation and avoiding overhead watering. If you do notice signs of fungal disease, treat with a fungicide.
How long does it take to grow waterless mustard greens?
Mustard greens are relatively fast-growing, and you can typically harvest them within 30-45 days of planting. The exact time will depend on the variety of mustard green you’re growing, as well as the growing conditions. You can start harvesting the outer leaves when they are about 4-6 inches long, or you can wait until the entire plant is mature. Regular harvesting will encourage the plant to produce more leaves.
Can I save seeds from my waterless mustard greens to plant next year?
Yes, you can save seeds from your mustard greens, but keep in mind that if you’re growing a hybrid variety, the seeds may not produce plants that are true to type. To save seeds, allow a few plants to bolt (flower) and produce seed pods. Once the seed pods are dry and brown, harvest them and allow them to dry completely. Then, break open the pods and collect the seeds. Store the seeds in a cool, dry place until you’re ready to plant them.
Does growing waterless mustard greens affect the flavor?
Yes, growing mustard greens with a reduced watering schedule can actually enhance their flavor. By limiting the amount of water available to the plants, you’re concentrating the natural sugars and compounds that give mustard greens their characteristic peppery taste. This results in greens that are more flavorful and intense.
Are there any specific climates that are better suited for growing waterless mustard greens?
Mustard greens are a cool-season crop, so they thrive in temperatures between 60°F and 70°F (15°C and 21°C). They can tolerate light frost, but they don’t do well in hot weather. Therefore, the best climates for growing waterless mustard greens are those with mild summers and cool winters. However, with proper care and attention, you can grow mustard greens in a variety of climates. In warmer climates, you may need to provide shade during the hottest part of the day to prevent the plants from bolting.
Leave a Comment